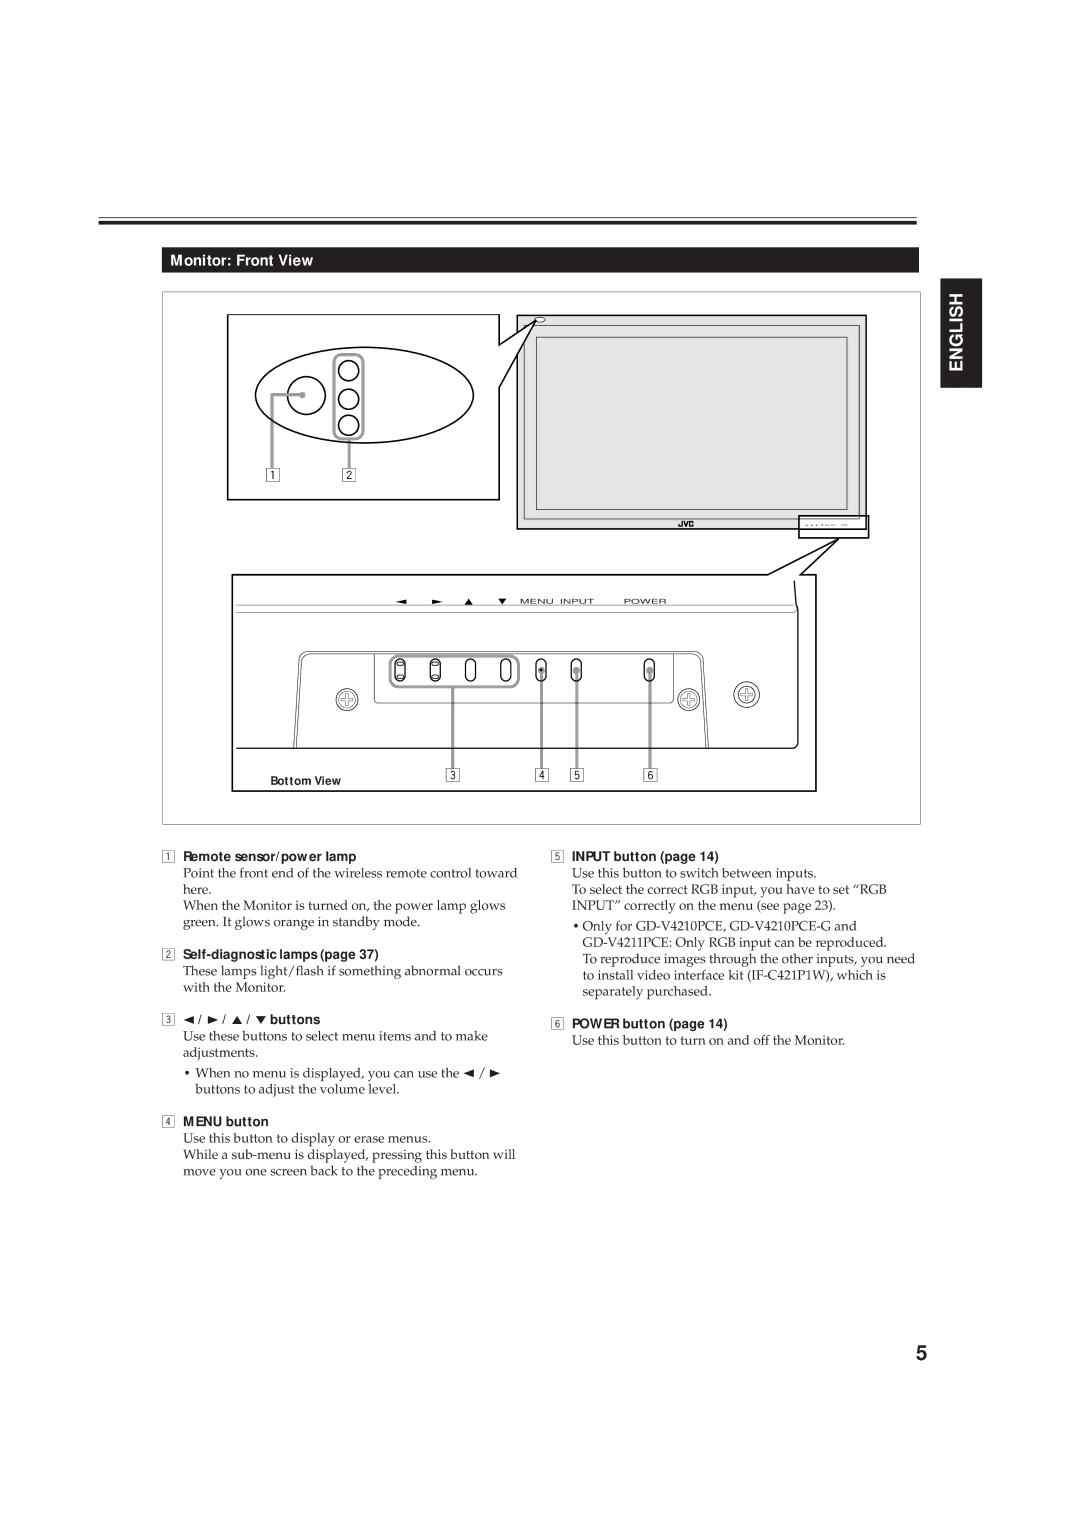
Monitor: Front View
|
|
|
| ENGLISH |
1 | 2 |
|
|
|
|
|
|
| MENU INPUT POWER |
|
| MENU INPUT | POWER | |
Bottom View | 3 | 4 | 5 | 6 |
|
|
|
| |
1Remote sensor/power lamp
Point the front end of the wireless remote control toward here.
When the Monitor is turned on, the power lamp glows green. It glows orange in standby mode.
2Self-diagnostic lamps (page 37)
These lamps light/flash if something abnormal occurs with the Monitor.
32 / 3 / 5 / ∞ buttons
Use these buttons to select menu items and to make adjustments.
•When no menu is displayed, you can use the 2/ 3 buttons to adjust the volume level.
4MENU button
Use this button to display or erase menus.
While a
5INPUT button (page 14)
Use this button to switch between inputs.
To select the correct RGB input, you have to set “RGB INPUT” correctly on the menu (see page 23).
•Only for
To reproduce images through the other inputs, you need to install video interface kit
6POWER button (page 14)
Use this button to turn on and off the Monitor.
5
