![]()
![]()
![]()
![]()
![]()
![]()
![]()
![]()
![]()
![]()
![]()
![]()
![]()
![]()
![]()
![]()
![]()
![]()
![]()
![]()
![]()
![]()
![]()
![]()
![]()
![]()
![]() EN
EN![]() 61
61![]()
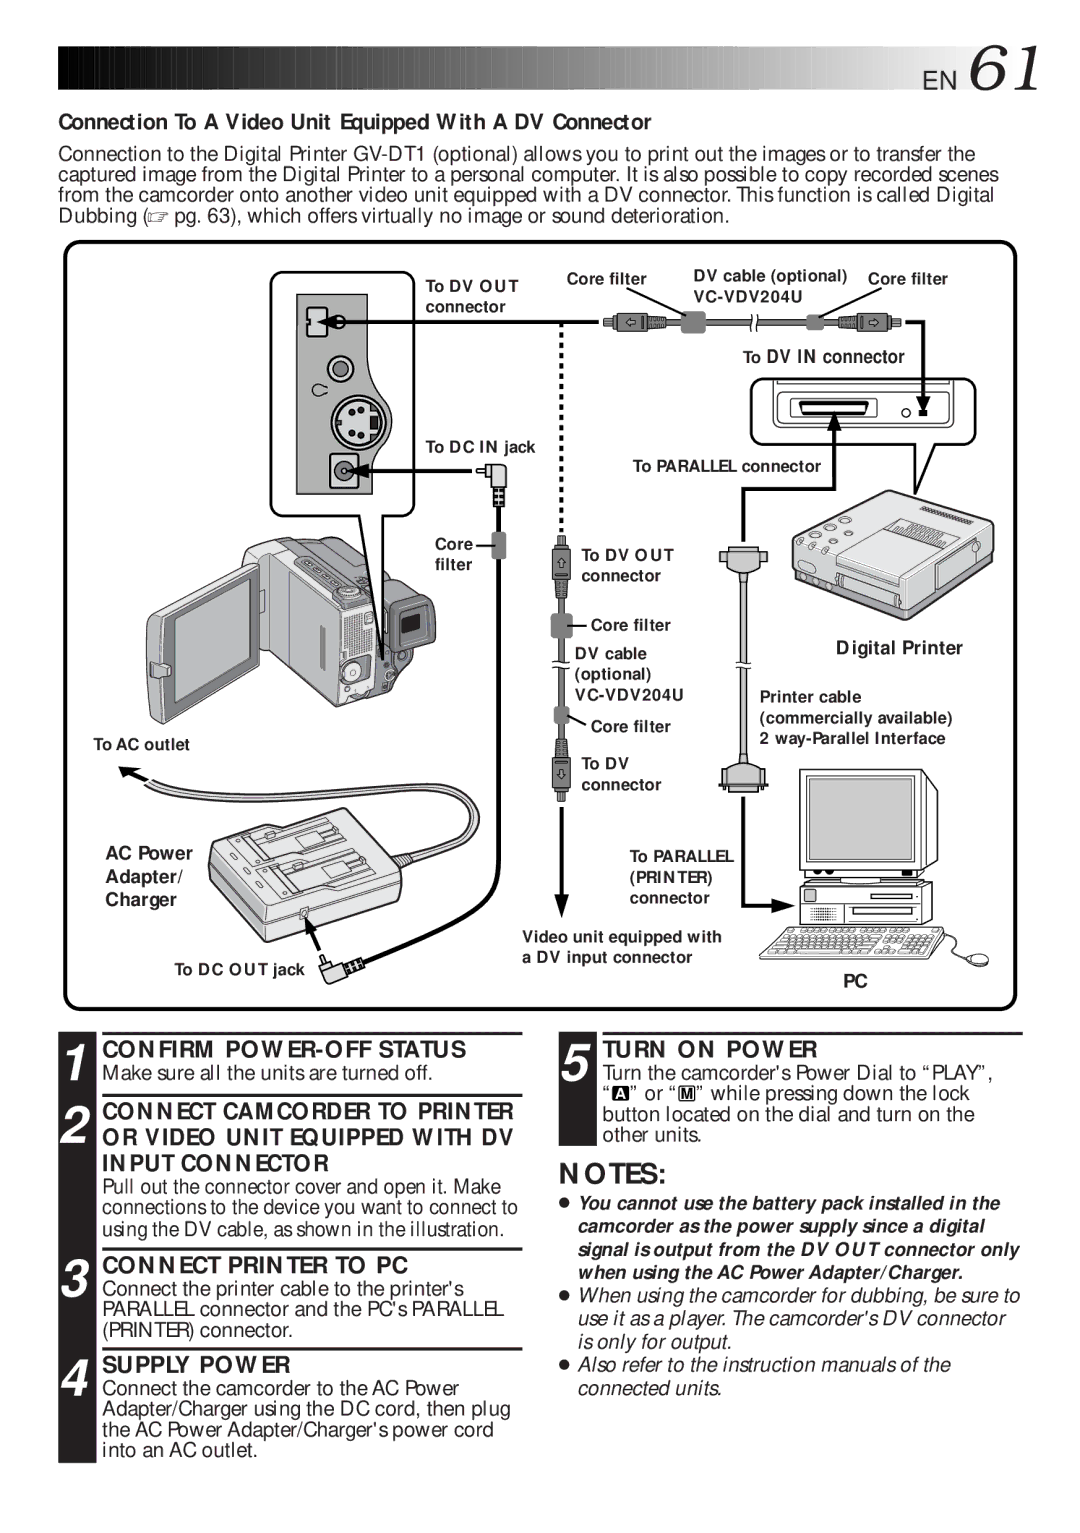
Connection To A Video Unit Equipped With A DV Connector
Connection to the Digital Printer
To AC outlet
AC Power
Adapter/
Charger
To DC OUT jack
To DV OUT | Core filter | DV cable (optional) Core filter | ||||||
|
|
|
| |||||
connector |
|
|
|
| ||||
|
|
|
|
|
|
|
| |
To DV IN connector
To DC IN jack
To PARALLEL connector
Core | To DV OUT | |
filter | ||
connector | ||
|
Core filter | Digital Printer | |
DV cable | ||
(optional) |
| |
Printer cable | ||
Core filter | (commercially available) | |
2 | ||
| ||
To DV |
| |
connector |
|
To PARALLEL (PRINTER) connector
Video unit equipped with a DV input connector
PC
1 CONFIRM
2 CONNECT CAMCORDER TO PRINTER OR VIDEO UNIT EQUIPPED WITH DV INPUT CONNECTOR
Pull out the connector cover and open it. Make connections to the device you want to connect to using the DV cable, as shown in the illustration.
3 CONNECT PRINTER TO PC Connect the printer cable to the printer's PARALLEL connector and the PC's PARALLEL (PRINTER) connector.
4 SUPPLY POWER
Connect the camcorder to the AC Power Adapter/Charger using the DC cord, then plug the AC Power Adapter/Charger's power cord into an AC outlet.
5 TURN ON POWER
Turn the camcorder's Power Dial to “PLAY”, “ A ” or “ M ” while pressing down the lock button located on the dial and turn on the other units.
NOTES:
●You cannot use the battery pack installed in the camcorder as the power supply since a digital signal is output from the DV OUT connector only when using the AC Power Adapter/Charger.
●When using the camcorder for dubbing, be sure to use it as a player. The camcorder's DV connector is only for output.
●Also refer to the instruction manuals of the
connected units.
