![]()
![]()
![]()
![]()
![]()
![]()
![]()
![]()
![]()
![]()
![]()
![]()
![]()
![]()
![]()
![]()
![]()
![]()
![]()
![]()
![]()
![]()
![]()
![]()
![]()
![]()
![]()
![]()
![]()
![]()
![]()
![]()
![]()
![]()
![]()
![]()
![]()
![]()
![]()
![]()
![]()
![]()
![]()
![]()
![]()
![]()
![]()
![]()
![]()
![]()
![]()
![]()
![]()
![]()
![]()
![]()
![]()
![]()
![]()
![]()
![]()
![]()
![]()
![]()
![]()
![]()
![]()
![]()
![]()
![]()
![]()
![]()
![]()
![]() EN
EN![]() 29
29![]()
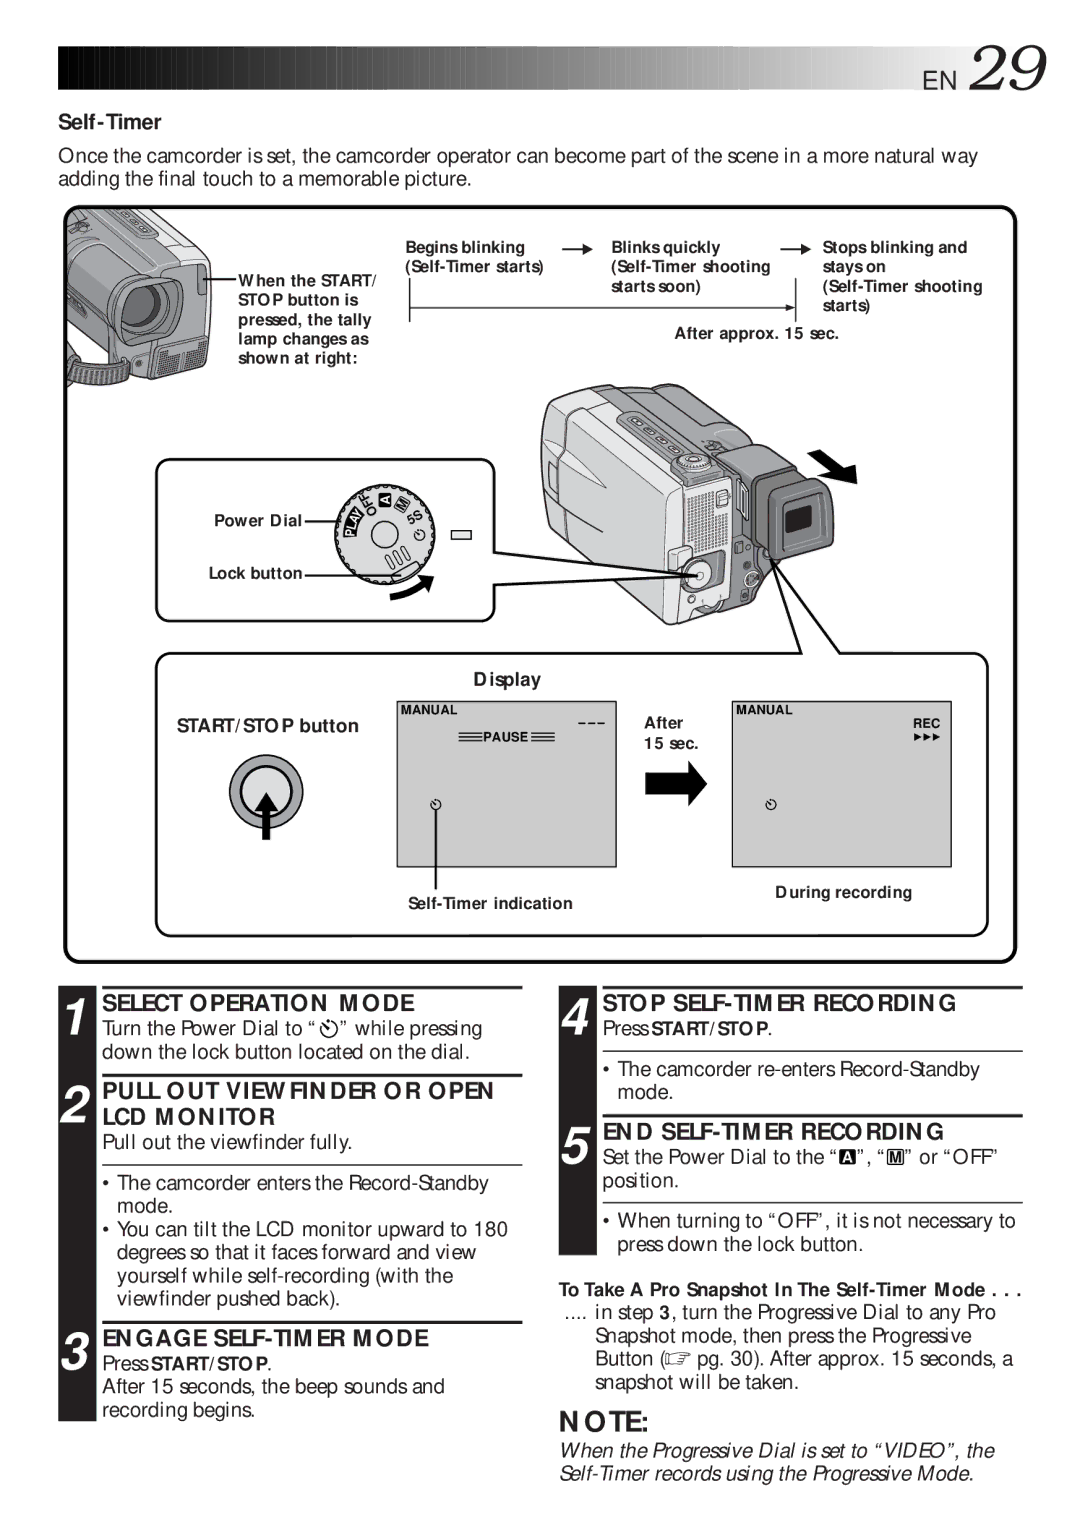
Self-Timer
Once the camcorder is set, the camcorder operator can become part of the scene in a more natural way adding the final touch to a memorable picture.
When the START/ STOP button is pressed, the tally lamp changes as shown at right:
Begins blinking | ´ Blinks quickly | ´ Stops blinking and | ||
| stays on | |||
|
| starts soon) |
| |
|
|
| 4 | starts) |
|
| After approx. 15 sec. | ||
Power Dial
A
OFF
A | Y |
| |
L |
|
P |
|
M
5S
Lock button
Display
START/STOP button
MANUAL
– – –
![]() PAUSE
PAUSE ![]()
After 15 sec.
MANUAL
REC
444
During recording
1 SELECT OPERATION MODE
Turn the Power Dial to “ ![]() ” while pressing down the lock button located on the dial.
” while pressing down the lock button located on the dial.
2 PULL OUT VIEWFINDER OR OPEN LCD MONITOR
Pull out the viewfinder fully.
•The camcorder enters the
•You can tilt the LCD monitor upward to 180 degrees so that it faces forward and view yourself while
3 ENGAGE SELF-TIMER MODE
Press START/STOP.
After 15 seconds, the beep sounds and recording begins.
4 STOP SELF-TIMER RECORDING
Press START/STOP.
•The camcorder
5 END SELF-TIMER RECORDING
Set the Power Dial to the “ A ”, “ M ” or “OFF” position.
•When turning to “OFF”, it is not necessary to press down the lock button.
To Take A Pro Snapshot In The
.... in step 3, turn the Progressive Dial to any Pro
Snapshot mode, then press the Progressive Button (☞ pg. 30). After approx. 15 seconds, a snapshot will be taken.
NOTE:
When the Progressive Dial is set to “VIDEO”, the