80
 EN
EN
CONTROLS,

 INDICATIONS
 AND
AND
 CONNECTORS

 (Cont.)

W
u |
|
| |
y | i o | Bottom of the | |
camcorder | |||
| |||
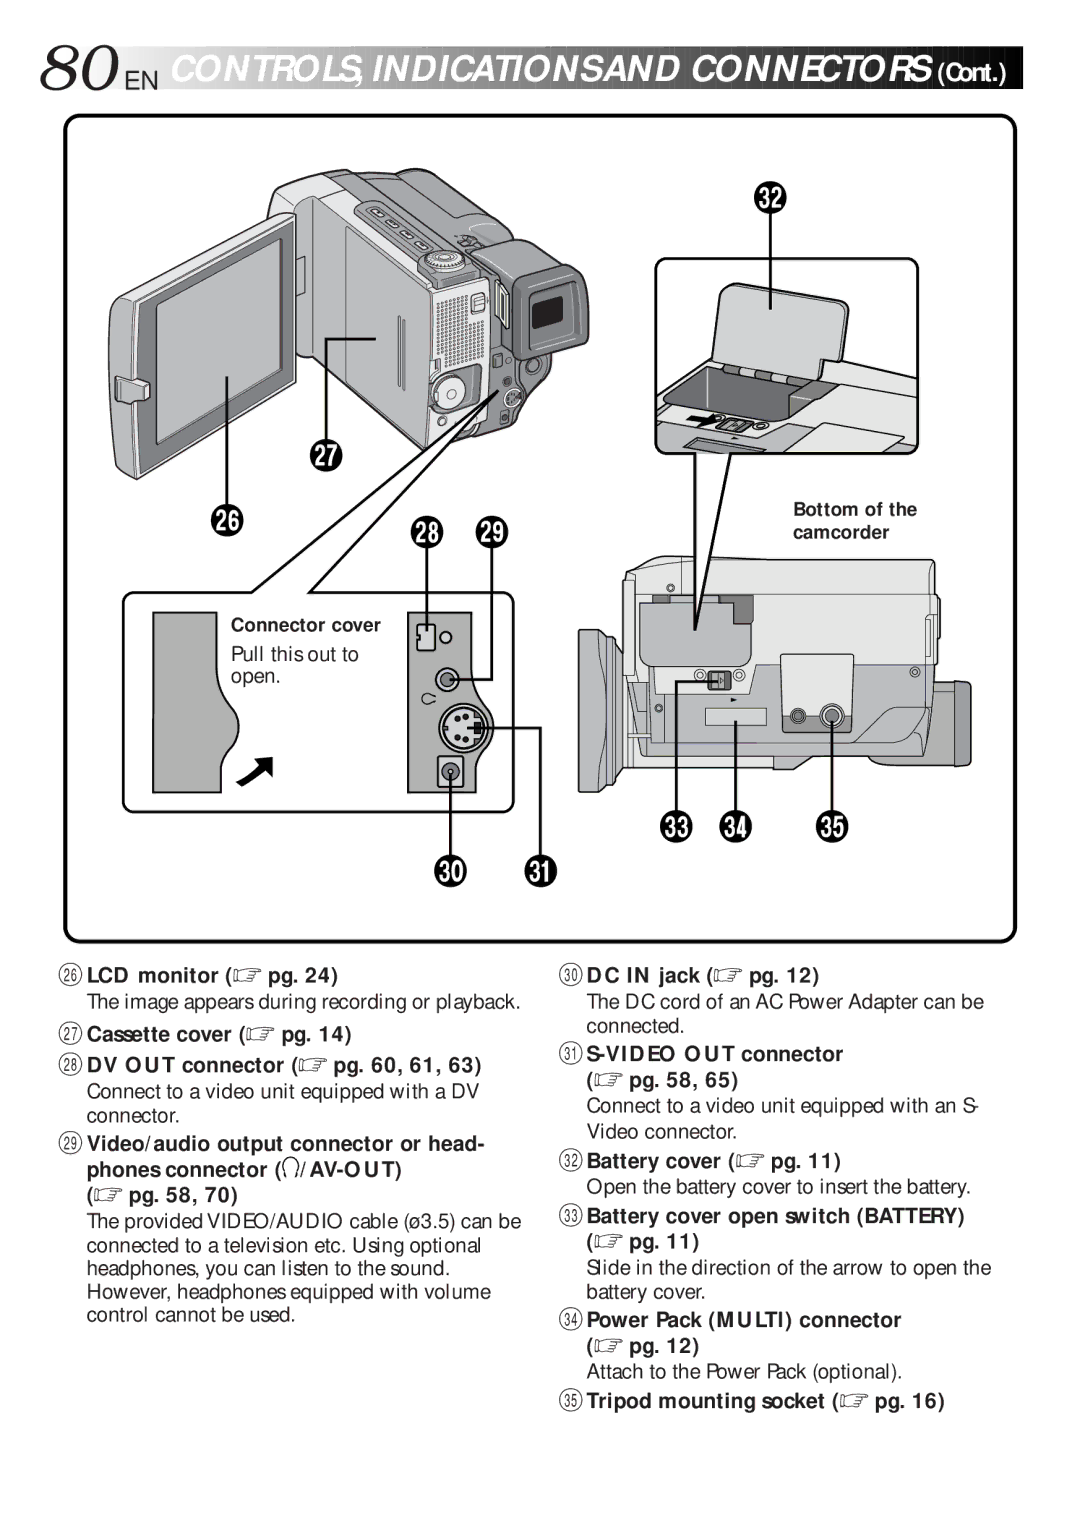
Connector cover |
|
| |
Pull this out to |
|
| |
open. |
|
|
E R T
pQ
yLCD monitor (☞ pg. 24)
The image appears during recording or playback.
uCassette cover (☞ pg. 14)
iDV OUT connector (☞ pg. 60, 61, 63)
Connect to a video unit equipped with a DV connector.
oVideo/audio output connector or head-
phones connector ![]() /AV-OUT)
/AV-OUT)
The provided VIDEO/AUDIO cable (ø3.5) can be connected to a television etc. Using optional headphones, you can listen to the sound. However, headphones equipped with volume control cannot be used.
pDC IN jack (☞ pg. 12)
The DC cord of an AC Power Adapter can be connected.
Q
Connect to a video unit equipped with an S- Video connector.
WBattery cover (☞ pg. 11)
Open the battery cover to insert the battery.
EBattery cover open switch (BATTERY) (☞ pg. 11)
Slide in the direction of the arrow to open the battery cover.
RPower Pack (MULTI) connector (☞ pg. 12)
Attach to the Power Pack (optional).
TTripod mounting socket (☞ pg. 16)