TIMER
TIMER RECORDING


![]()
![]()
![]()
![]()
![]()
![]()
![]()
![]()
![]()
![]()
![]()
![]()
![]()
![]()
![]()
![]()
![]()
![]()
![]()
![]()
![]()
![]()
![]()
![]()
![]()
![]()
![]()
![]()
![]()
![]()
![]()
![]()
![]()
![]()
![]()
![]()
![]()
![]()
![]()
![]()
![]()
![]()
![]() 33
33![]()
VCR Plus+
Timer
Programming
OK
2 | 2 |
q 5/8 6
MENU
| 1 | 2 | 3 |
| |
NUMBER | 4 | 5 | 6 |
| |
|
|
|
| NUMBER "9" | |
| 7 | 8 | 9 | ||
|
| ||||
CANCEL |
|
| 0 |
| TIMER |
|
|
|
| ||
| "8" |
|
|
| |
| NUMBER |
|
|
| |
|
|
|
|
| |
|
|
|
| TV/VIDEO |
|
OK
MENU
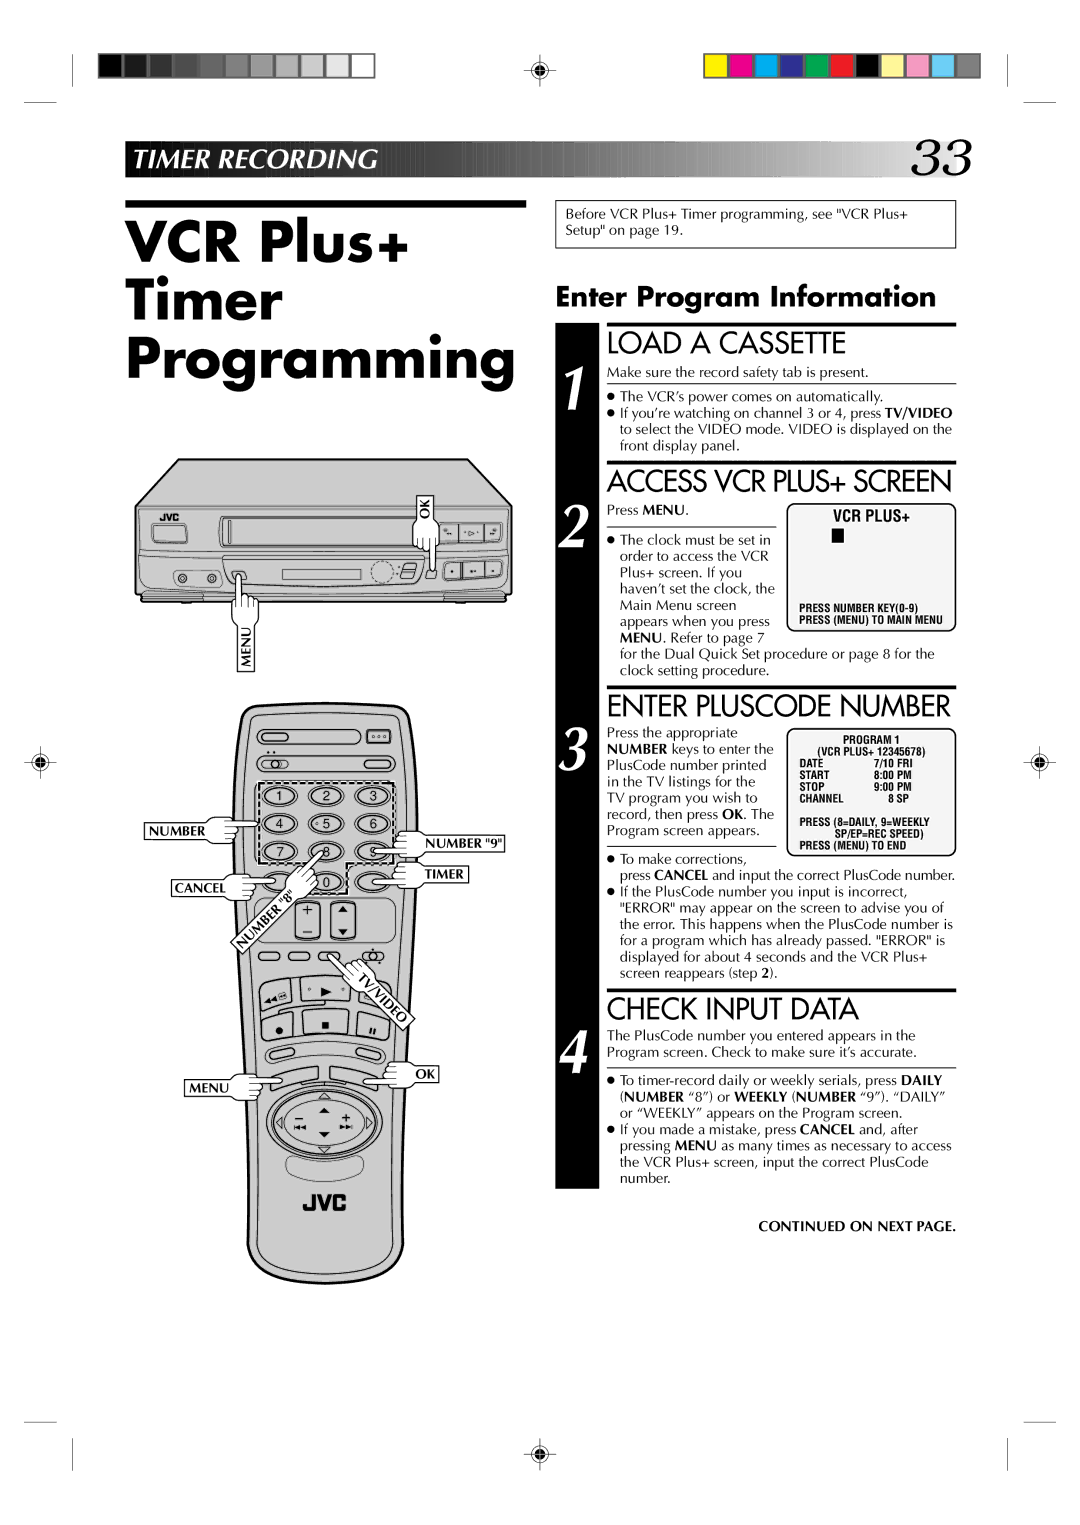
Before VCR Plus+ Timer programming, see "VCR Plus+ Setup" on page 19.
Enter Program Information
1 | LOAD A CASSETTE |
Make sure the record safety tab is present. | |
| |
● The VCR’s power comes on automatically. | |
● If you’re watching on channel 3 or 4, press TV/VIDEO | |
| to select the VIDEO mode. VIDEO is displayed on the |
| front display panel. |
2 | ACCESS VCR PLUS+ SCREEN | |||
Press MENU. |
| VCR PLUS+ | ||
● The clock must be set in |
|
|
| |
|
|
| ||
order to access the VCR |
|
|
| |
| Plus+ screen. If you |
|
|
|
| haven’t set the clock, the |
|
|
|
| Main Menu screen | PRESS NUMBER | ||
| appears when you press | PRESS (MENU) TO MAIN MENU | ||
| MENU. Refer to page 7 |
|
|
|
| for the Dual Quick Set procedure or page 8 for the | |||
| clock setting procedure. |
|
|
|
| ENTER PLUSCODE NUMBER | ||
| Press the appropriate | PROGRAM 1 | |
| NUMBER keys to enter the | ||
| (VCR PLUS+ 12345678) | ||
3 PlusCode number printed | DATE | 7/10 FRI | |
START | 8:00 PM | ||
| in the TV listings for the | STOP | 9:00 PM |
| TV program you wish to | CHANNEL | 8 SP |
| record, then press OK. The | PRESS (8=DAILY, 9=WEEKLY | |
| Program screen appears. | ||
| SP/EP=REC SPEED) | ||
|
| PRESS (MENU) TO END | |
|
| ||
●To make corrections,
press CANCEL and input the correct PlusCode number.
●If the PlusCode number you input is incorrect, "ERROR" may appear on the screen to advise you of the error. This happens when the PlusCode number is for a program which has already passed. "ERROR" is displayed for about 4 seconds and the VCR Plus+ screen reappears (step 2).
4 | CHECK INPUT DATA | |
The PlusCode number you entered appears in the | ||
Program screen. Check to make sure it’s accurate. | ||
● To | ||
| ||
| (NUMBER “8”) or WEEKLY (NUMBER “9”). “DAILY” | |
| or “WEEKLY” appears on the Program screen. | |
| ● If you made a mistake, press CANCEL and, after | |
| pressing MENU as many times as necessary to access | |
| the VCR Plus+ screen, input the correct PlusCode | |
| number. |
CONTINUED ON NEXT PAGE.