36![]()
![]()
![]()
![]()
![]()
![]()
![]()
![]()
![]()
![]()
![]()
![]()
![]()
![]()
![]()
![]()
![]()
![]()
![]()
![]()
![]()
![]()
![]()
![]()
![]()
![]()
![]()
![]()
![]()
![]()
![]()
![]()
![]()
![]()
![]()
![]()


 TIMER
TIMER
 RECORDING
 (cont.)


OK
2 | 2 |
q 5/8 6
MENU | CH |
|
| 1 | 2 | 3 |
| |
NUMBER | 4 | 5 | 6 |
| |
|
|
|
| NUMBER "9" | |
| 7 | 8 | 9 | ||
|
| ||||
|
|
| 0 |
| TIMER |
|
|
|
|
| |
| NUMBER | "8" |
|
| CH |
|
|
|
| ||
|
|
|
|
| |
OK
MENU
![]() SHUTTLE PLUS
SHUTTLE PLUS
3
4
5
SELECT PROGRAM
NUMBER
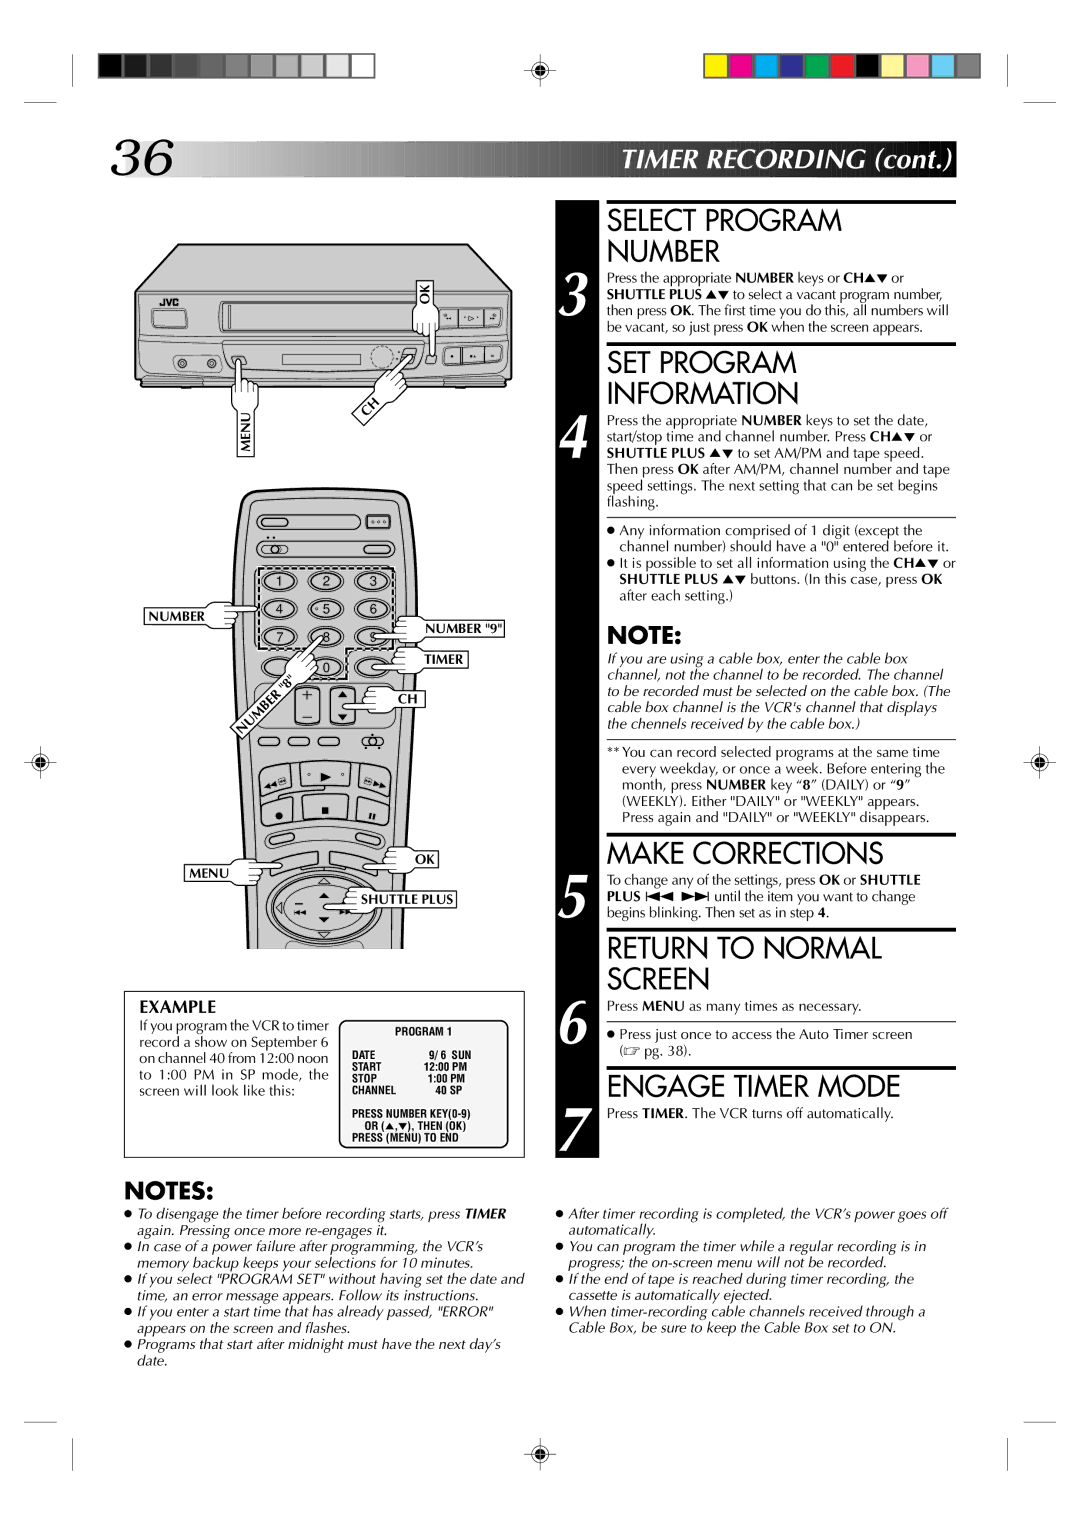
Press the appropriate NUMBER keys or CH5°or SHUTTLE PLUS 5°to select a vacant program number, then press OK. The first time you do this, all numbers will be vacant, so just press OK when the screen appears.
SET PROGRAM
INFORMATION
Press the appropriate NUMBER keys to set the date, start/stop time and channel number. Press CH5° or SHUTTLE PLUS 5° to set AM/PM and tape speed.
Then press OK after AM/PM, channel number and tape speed settings. The next setting that can be set begins flashing.
●Any information comprised of 1 digit (except the channel number) should have a "0" entered before it.
●It is possible to set all information using the CH5° or SHUTTLE PLUS 5° buttons. (In this case, press OK after each setting.)
NOTE:
If you are using a cable box, enter the cable box channel, not the channel to be recorded. The channel to be recorded must be selected on the cable box. (The cable box channel is the VCR's channel that displays the chennels received by the cable box.)
**You can record selected programs at the same time every weekday, or once a week. Before entering the month, press NUMBER key “8” (DAILY) or “9” (WEEKLY). Either "DAILY" or "WEEKLY" appears. Press again and "DAILY" or "WEEKLY" disappears.
MAKE CORRECTIONS
To change any of the settings, press OK or SHUTTLE PLUS ª £ until the item you want to change begins blinking. Then set as in step 4.
RETURN TO NORMAL SCREEN
EXAMPLE
If you program the VCR to timer record a show on September 6 on channel 40 from 12:00 noon to 1:00 PM in SP mode, the screen will look like this:
PROGRAM 1
DATE | 9/ 6 SUN |
START | 12:00 PM |
STOP | 1:00 PM |
CHANNEL | 40 SP |
PRESS NUMBER
PRESS (MENU) TO END
6
7
Press MENU as many times as necessary.
●Press just once to access the Auto Timer screen (☞ pg. 38).
ENGAGE TIMER MODE
Press TIMER. The VCR turns off automatically.
NOTES:
●To disengage the timer before recording starts, press TIMER again. Pressing once more
●In case of a power failure after programming, the VCR’s memory backup keeps your selections for 10 minutes.
●If you select "PROGRAM SET" without having set the date and time, an error message appears. Follow its instructions.
●If you enter a start time that has already passed, "ERROR" appears on the screen and flashes.
●Programs that start after midnight must have the next day’s date.
●After timer recording is completed, the VCR’s power goes off automatically.
●You can program the timer while a regular recording is in progress; the
●If the end of tape is reached during timer recording, the cassette is automatically ejected.
●When