ENGLISH
LOCATION OF THE BUTTONS
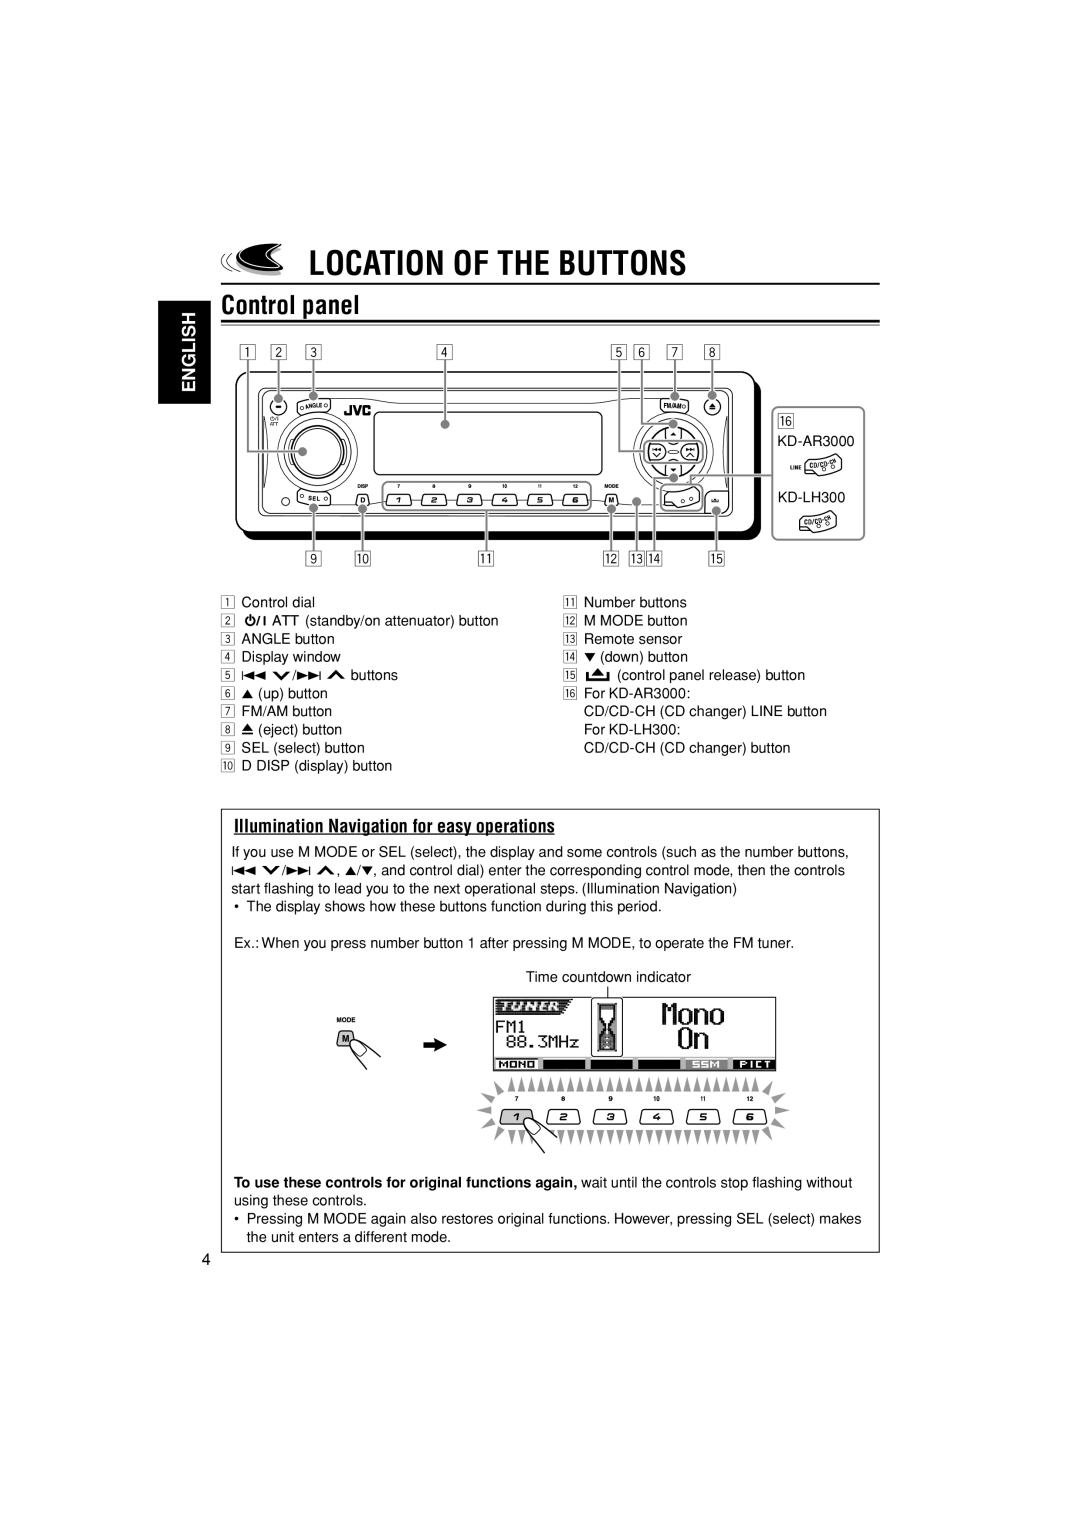
Control panel
| 1 2 | 3 |
| 4 | 5 6 | 7 | 8 |
|
|
|
|
|
|
| y |
|
|
|
|
|
|
|
|
|
|
|
|
|
|
|
|
|
| 9 | p | q | w er |
| t |
1 | Control dial |
|
| q Number buttons |
| ||
2 |
| (standby/on attenuator) button | w M MODE button |
| |||
3 | ANGLE button |
|
| e Remote sensor |
| ||
4 | Display window |
|
| r ∞ (down) button |
| ||
5 | 4 /¢ | buttons |
| t (control panel release) button | |||
6 | 5 (up) button |
|
| y For |
| ||
7 | FM/AM button |
|
| ||||
8 | 0 (eject) button |
|
| For |
| ||
9 | SEL (select) button |
| |||||
pD DISP (display) button
Illumination Navigation for easy operations
If you use M MODE or SEL (select), the display and some controls (such as the number buttons,
4![]() /¢
/¢ ![]() , 5/∞, and control dial) enter the corresponding control mode, then the controls start flashing to lead you to the next operational steps. (Illumination Navigation)
, 5/∞, and control dial) enter the corresponding control mode, then the controls start flashing to lead you to the next operational steps. (Illumination Navigation)
• The display shows how these buttons function during this period.
Ex.: When you press number button 1 after pressing M MODE, to operate the FM tuner.
Time countdown indicator
To use these controls for original functions again, wait until the controls stop flashing without using these controls.
•Pressing M MODE again also restores original functions. However, pressing SEL (select) makes the unit enters a different mode.
4
