![]()
![]()
![]()
![]()
![]()
![]()
![]()
![]()
![]()
![]() EN
EN![]() 77
77![]()
![]()
Remote Control Unit (optional)
The
12
#
T W
@0 !![]()
![]()
![]()
![]() 35 4
35 4
9
8![]()
![]()
![]()
![]() 6
6
![]() 7
7
2
3
1
Knob
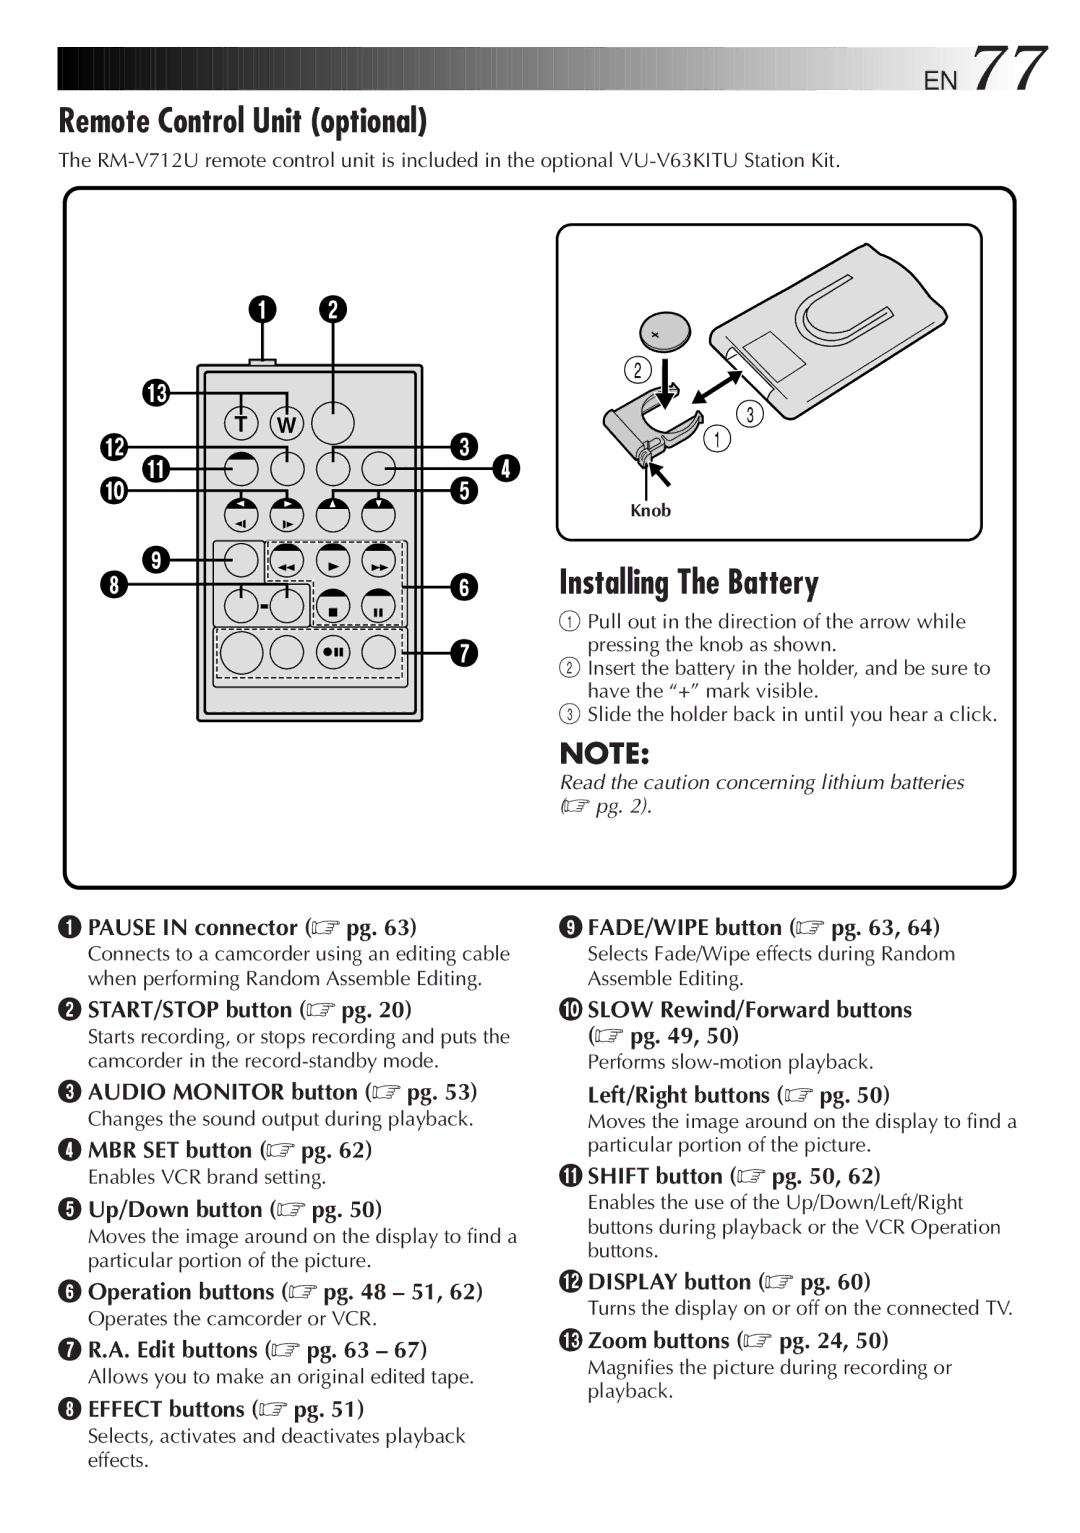
Installing The Battery
1Pull out in the direction of the arrow while pressing the knob as shown.
2Insert the battery in the holder, and be sure to have the “+” mark visible.
3Slide the holder back in until you hear a click.
1PAUSE IN connector (☞ pg. 63)
Connects to a camcorder using an editing cable when performing Random Assemble Editing.
2START/STOP button (☞ pg. 20)
Starts recording, or stops recording and puts the camcorder in the
3AUDIO MONITOR button (☞ pg. 53)
Changes the sound output during playback.
4MBR SET button (☞ pg. 62)
Enables VCR brand setting.
5Up/Down button (☞ pg. 50)
Moves the image around on the display to find a particular portion of the picture.
6Operation buttons (☞ pg. 48 – 51, 62)
Operates the camcorder or VCR.
7R.A. Edit buttons (☞ pg. 63 – 67)
Allows you to make an original edited tape.
8EFFECT buttons (☞ pg. 51)
NOTE:
Read the caution concerning lithium batteries (☞ pg. 2).
9FADE/WIPE button (☞ pg. 63, 64)
Selects Fade/Wipe effects during Random Assemble Editing.
0SLOW Rewind/Forward buttons (☞ pg. 49, 50)
Performs
Left/Right buttons (☞ pg. 50)
Moves the image around on the display to find a particular portion of the picture.
!SHIFT button (☞ pg. 50, 62)
Enables the use of the Up/Down/Left/Right buttons during playback or the VCR Operation buttons.
@DISPLAY button (☞ pg. 60)
Turns the display on or off on the connected TV.
#Zoom buttons (☞ pg. 24, 50)
Magnifies the picture during recording or playback.
Selects, activates and deactivates playback effects.