Control by
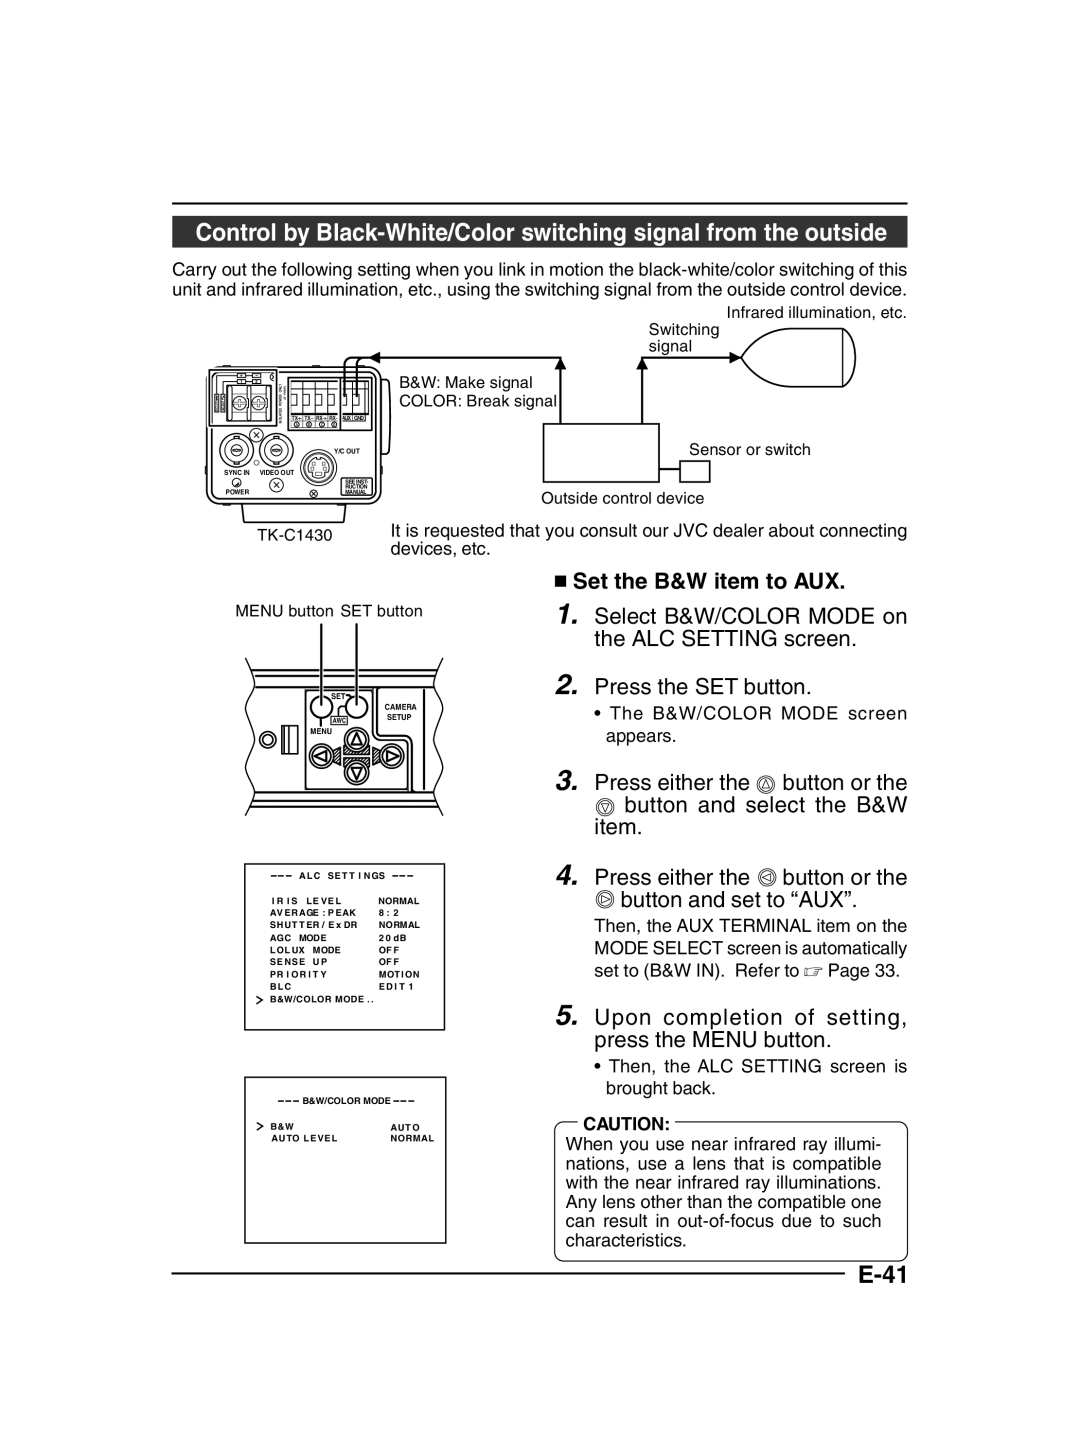
Carry out the following setting when you link in motion the
Infrared illumination, etc.
Switching signal
| + | - |
|
|
|
|
|
| 1 | 2 | ISOLATEDPOWER ONLY |
|
|
|
|
DC12V | AC24V | CLASS2 ONLY(U TYPE) | TX+ TX- RX+ RX- AUX GND | ||||
TYPE)(E | B | C | D | ||||
|
|
|
| A | |||
|
|
|
|
|
|
| Y/C OUT |
| SYNC IN | VIDEO OUT |
|
|
| ||
|
|
|
|
|
|
| SEE INST- |
| POWER |
|
|
|
|
| RUCTION |
|
|
|
|
|
| MANUAL | |
B&W: Make signal
COLOR: Break signal
Sensor or switch
Outside control device
It is requested that you consult our JVC dealer about connecting devices, etc.
MENU button SET button
SET |
|
| CAMERA |
AWC | SETUP |
| |
MENU |
|
A L C SE T T I NGS
I R I S L E VE L | NORMAL |
AV ERAGE : P EAK | 8 : 2 |
SHUT T ER / E x DR | NORMAL |
AGC MODE | 2 0 d B |
L OL UX MODE | OF F |
SE NS E U P | OF F |
PR I O R I T Y | MOTI ON |
B L C | E D I T 1 |
B&W/COLOR MODE . . |
|
B&W/COLOR MODE
B&W | AUT O |
AUTO LEVEL | NORMAL |
■Set the B&W item to AUX.
1.Select B&W/COLOR MODE on the ALC SETTING screen.
2.Press the SET button.
•The B&W/COLOR MODE screen appears.
3.Press either the ![]() button or the
button or the ![]() button and select the B&W item.
button and select the B&W item.
4.Press either the ![]() button or the
button or the ![]() button and set to “AUX”.
button and set to “AUX”.
Then, the AUX TERMINAL item on the MODE SELECT screen is automatically set to (B&W IN). Refer to ☞ Page 33.
5.Upon completion of setting, press the MENU button.
•Then, the ALC SETTING screen is brought back.
CAUTION:
When you use near infrared ray illumi- nations, use a lens that is compatible with the near infrared ray illuminations. Any lens other than the compatible one can result in