"'REGULAR-
WORKED"
BUTTONHOLING
An art by our
. grandmothers..,
now easy to do
by machine
Settings for round-end, keyhole, eyelet ..,
Stitch Selector - il
Stitch Width
Stitch Length Control
Stitch Modifier - Neutral
Buttonhole Foot
Zigzag Needieplate
Darntng Plate
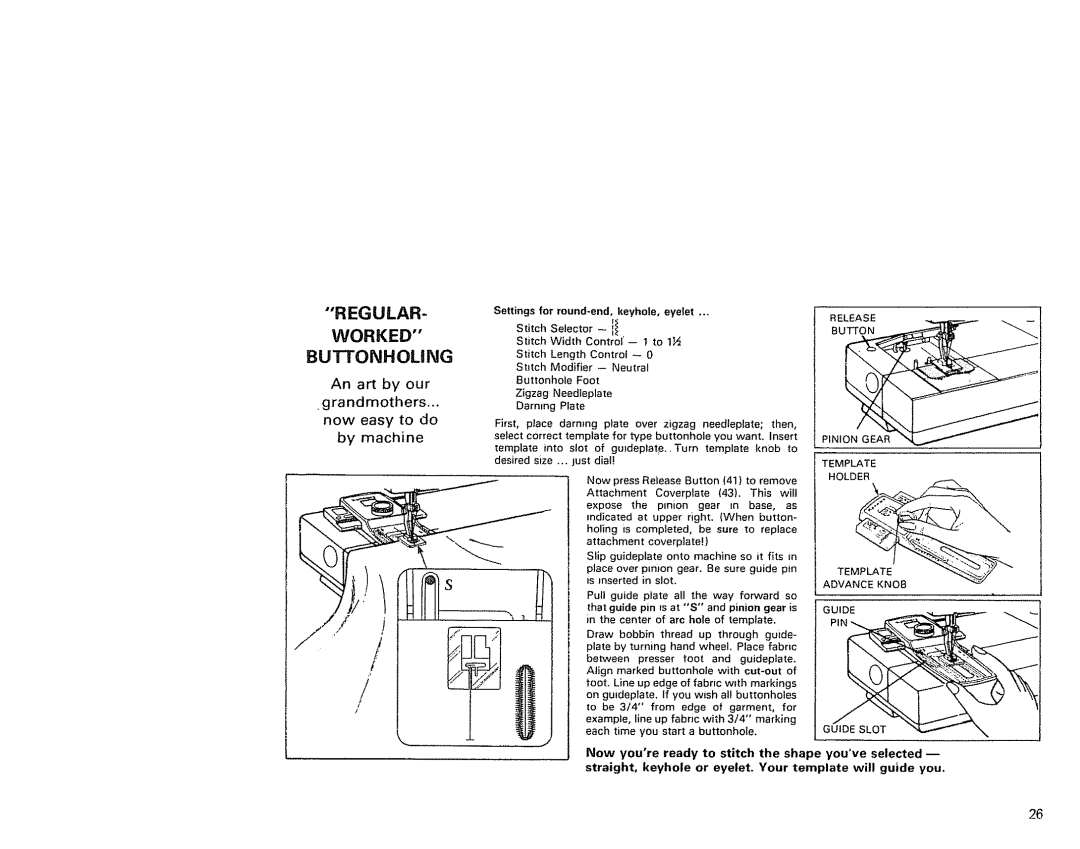
First, place darning plate over zigzag needleplate; then, select correct template for type buttonhole you want. Insert
template into slot of guldepIate.. Turn template knob to desired size ... ust dial!
Now press Retease Button (4t} to remove
Attachment Coverplate (43). This will expose the pinion gear tn base, as indicated at upper right. (When button- holing is completed, be sure to replace attachment coverplate!)
Slip guideplate onto machine so it fits in place over pm_on gear. Be sure guide pin ts inserted in slot.
Pul! guide piate all the way forward so that guide pin rs at "'S" and pimon gear is in the center of arc hole of template.
Draw bobbin thread up through guide- plate by turning hand wheel, Place fabric between presser toot and guideplate.
Align marked buttonhole with
toot. Line up edge of fabric w_th markings on guideplate. If you wish all buttonholes to be 3/4" from edge of garment, for example, llne up fabric with 3/4" marking each time you start a buttonhole.
RELEASE
BUTTON
PINION GEAR
TEMPLATE
HOLDER
TEMPLATE
ADVANCE KNOB
GUIDE
GUIDE SLOT
Now you're ready to stitch the shape you've selected straight, keyhole or eyelet. Your template will guide you,
26