EASY TO SET FOR
ALL STRAIGHT
STITCH I NG
Stitch length is your
Chances are, you'll use straight stitching most fre- quently. This is the basic permanent stitch that holds
the garment together. You'll use the Straight Stitch
Presser Foot and Straight Stitch Needteplate, of course. Machine settings are detailed below.
key decision
For permantent seaming, the straight stitch length is determined by thickness of fabric. The numbers
on the Stitch Length Contro! (31) indicate approximate stitches per inch. As a general rule, the heawer the fabric, the longer the stitch; lighter fabric, shorter stitches, Best stitch for medium- weight fabrics is the
(See next page for tips on reinforcing and secur- ing permanent seams.)
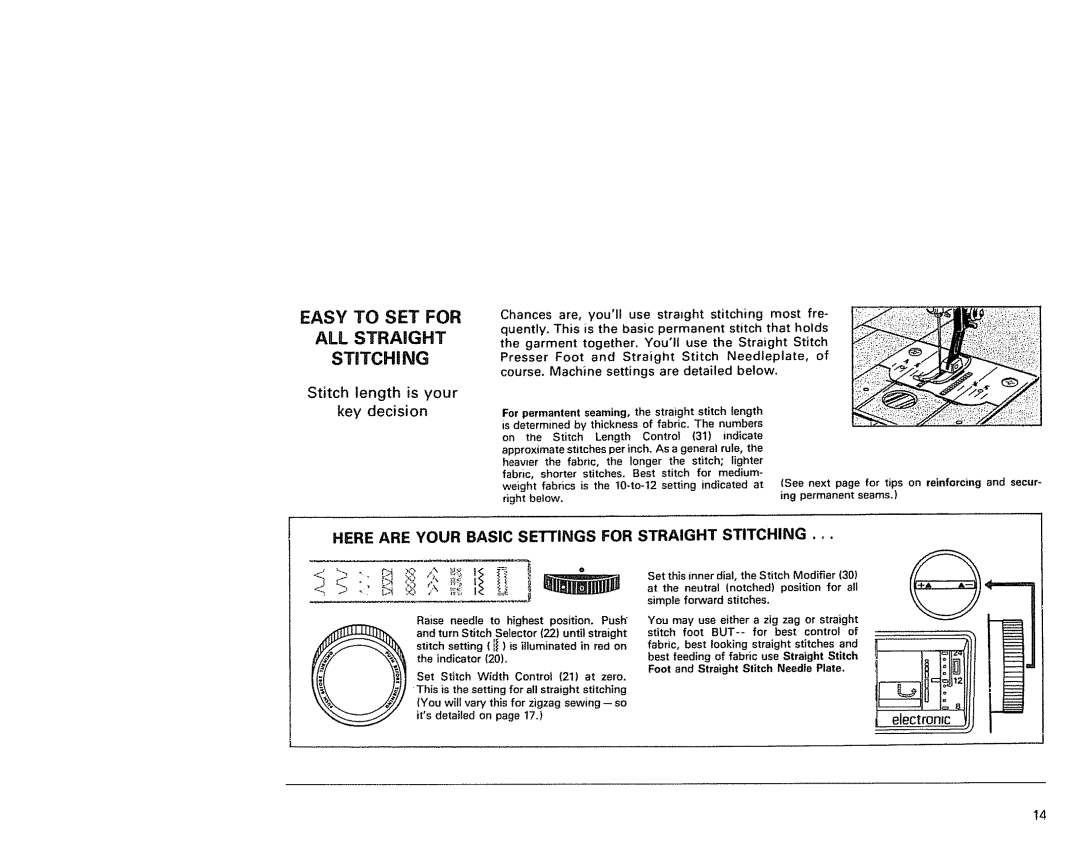
HERE ARE YOUR BASIC SE_INGS FOR STRAIGHT STITCHING .°.
@
Raise needle to highest position. Push" and turn Stitch Selector (22) until straight stitch setting (iI) is illuminated in red on the indicator (20),
Set Stitch Width Control (21) at zero, This is the setting for all straight stitching
. (You will vary this for zigzag sewing
Set this inner dial, the Stitch Modifier (30)
at the neutral (notched) position for all
simple forward stitches.
You may use either a zig zag or straight stitch foot
fabric, best looking straight stitches and best feeding of fabric use Straight Stitch
Foot and Straight Stitch Needle Plate.
electronic
14