_f
RANGE END PANEL REMOVAL OR INSTALLATION
WARNING - Disconnect electrical power to range before beginning installation
The end panel kit consists of:
Two End Panels (RH & L H,)
Two End Panel Brackets
Eight Screws
Instatlation instruction sheet
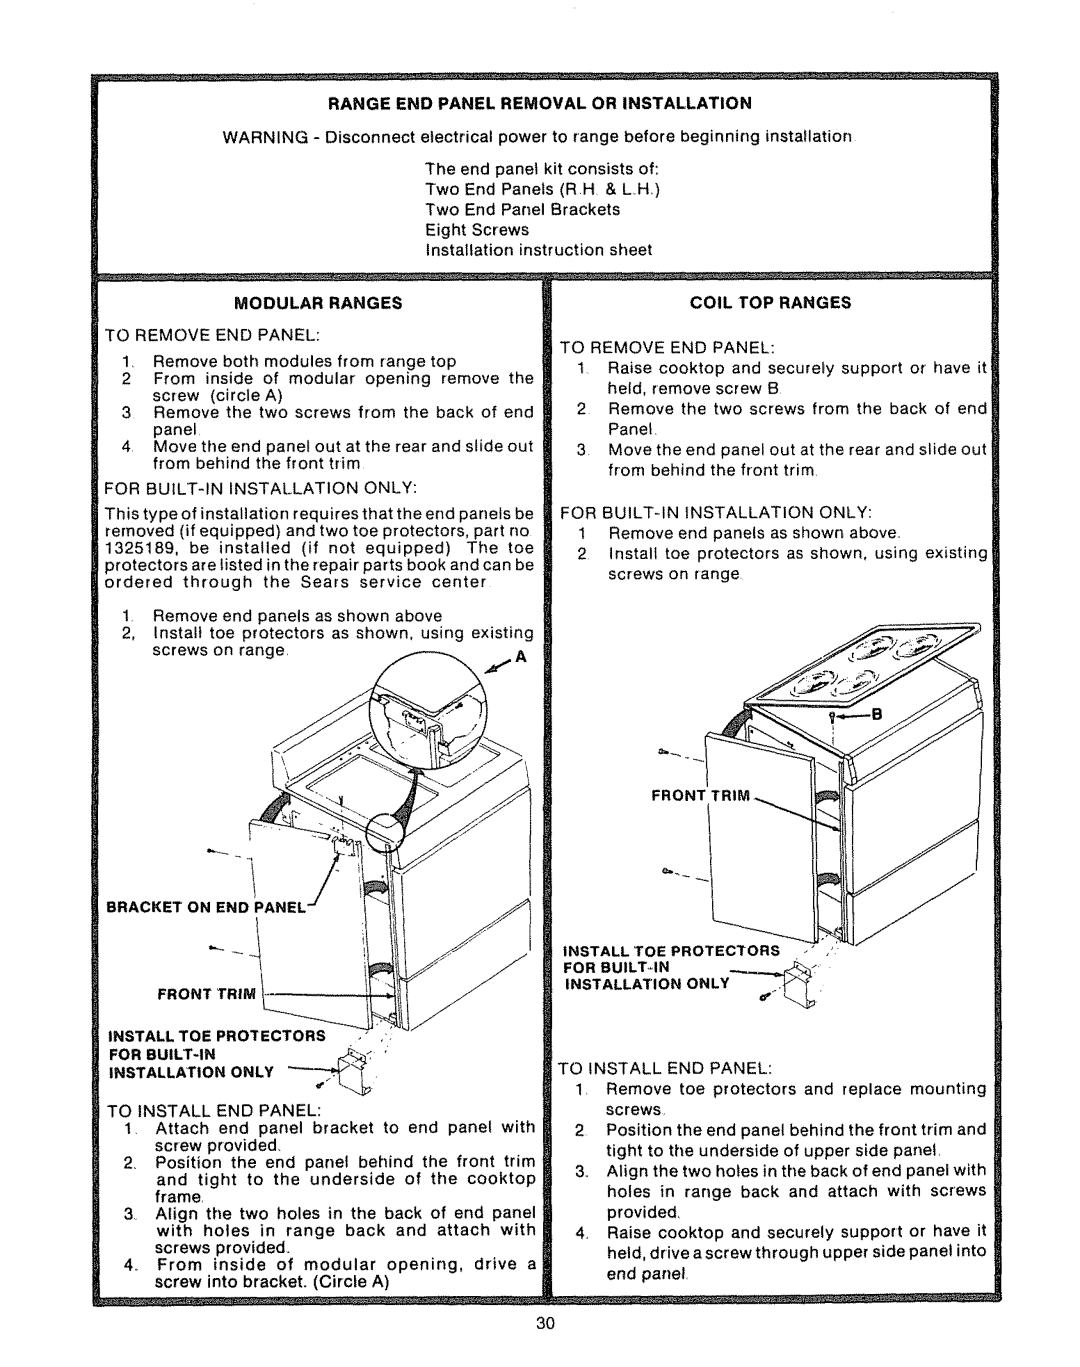
MODULAR RANGES
TO REMOVE END PANEL:
1_ Remove both modules from range top
2From inside of modular opening remove the screw (circle A)
3Remove the two screws from the back of end panel,
4Move the end panel out at the rear and slide out from behind the front trim
FOR
COIL TOP RANGES
TO REMOVE END PANEL:
tRaise cooktop and securely support or have it held, remove screw B
2Remove the two screws from the back of end Panel_
3Move the end panel out at the rear and slide out from behind the front trim
This type of installation requires that the end panels be removed (if equipped) and two toe protectors, part no
1325189, be installed (if not equipped) The toe protectors are listed in the repair parts book and can be ordered through the Sears service center
1 Remove end panels as shown above
2, install toe protectors as shown, using existing screws on range,
FOR
1Remove end panels as shown above
2install toe protectors as shown, using existing screws on range
FRONT
BRACKET ON END PA
INSTALL TOE PROTECTORS/.
FOR BUILT_IN__
FRONT TRIM
INSTALLATION ONLY ._'_
INSTALL TOE PROTECTORS | . ." ,' | |
FOR | ' | |
INSTALLATION ONLY |
|
|
TO INSTALL END PANEL:
1_ Attach end panel bracket to end panel with screw provided
2 Position the end panel behind the front trim
and tight to the underside of the cooktop frame,
3, Align the two holes in the back of end panel with holes in range back and attach with
screws provided°
4_ From inside of modular opening, drive a screw into bracket. (Circle A)
TO INSTALL END PANEL:
1, Remove toe protectors and replace mounting
screws,
2Position the end panel behind the front trim and tight to the underside of upper side panet,
3o Align the two holes in the back of end panel with holes in range back and attach with screws provided
4, Raise cooktop and securely support or have it held, drive a screw through upper side panel into end panel,
30