Additional cleaning tips are listed below:

PART

COMMENTS


Outside

Waxing external painted metal


surfaces helps provide rust


protection. Do not wax plastic


parts. Wax painted metal surfaces


at least twice a year using


appliance wax (or auto paste wax).


Apply wax with a clean, soft cloth.


Inside walls

To help remove odors, you can

(allow freezer

wash with a mixture of warm water

and baking soda (2 tbs to 1 qt [26 g

to warm up so

to .95 L] of water).

cloth won’t


stick)


Door liners

Do not use cleaning waxes,

and gaskets

concentrated detergents, bleaches,


or cleaners containing petroleum


on plastic parts.


Plastic parts

Do not use paper towels, window

(covers and

sprays, scouring cleansers or

flammable fluids. These can

panels)

scratch or damage material.


Condenser

Remove base grille. (See the

coils

“Base Grille” section.)


Use a vacuum with an extended


attachment to clean condenser


coils.


Vacuum coils when dusty or dirty.


Coils may need to be cleaned as


often as every other month.


Replace base grille.


Changing the Light Bulbs

NOTE: Not all appliance bulbs will fit your refrigerator. Be sure to replace the bulb with one of the same size and shape.

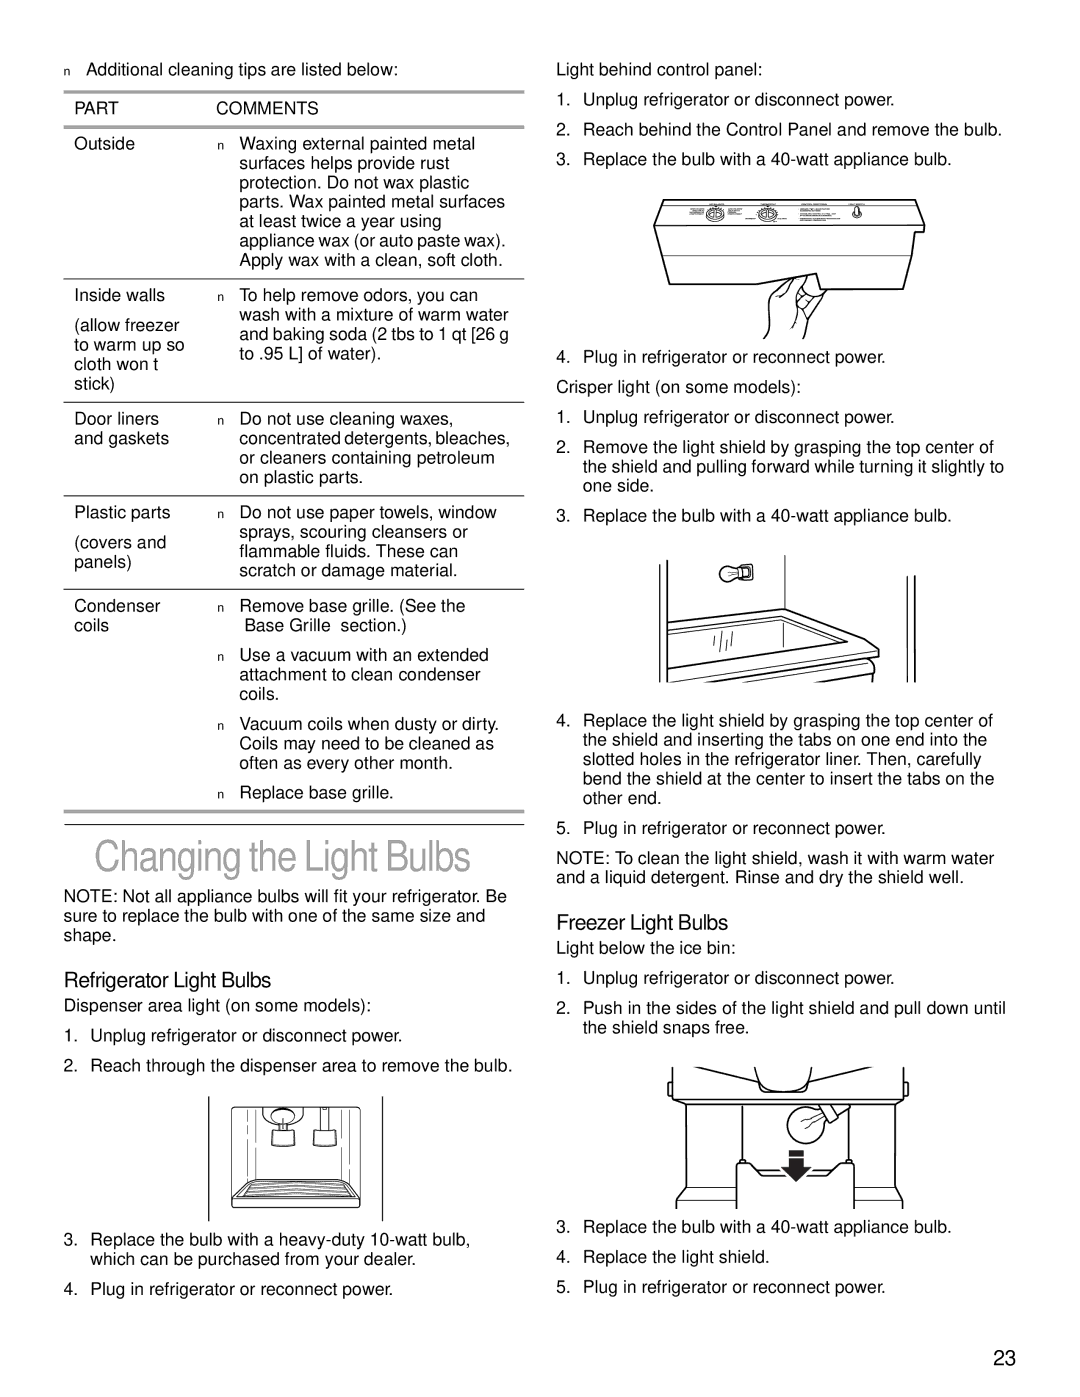
Refrigerator Light Bulbs

Dispenser area light (on some models):

1.Unplug refrigerator or disconnect power.

2.Reach through the dispenser area to remove the bulb.

3.Replace the bulb with a heavy-duty 10-watt bulb, which can be purchased from your dealer.

4.Plug in refrigerator or reconnect power.

Light behind control panel:

1.Unplug refrigerator or disconnect power.

2.Reach behind the Control Panel and remove the bulb.

3.Replace the bulb with a 40-watt appliance bulb.

4.Plug in refrigerator or reconnect power.

Crisper light (on some models):

1.Unplug refrigerator or disconnect power.

2.Remove the light shield by grasping the top center of the shield and pulling forward while turning it slightly to one side.

3.Replace the bulb with a 40-watt appliance bulb.

4.Replace the light shield by grasping the top center of the shield and inserting the tabs on one end into the slotted holes in the refrigerator liner. Then, carefully bend the shield at the center to insert the tabs on the other end.

5.Plug in refrigerator or reconnect power.

NOTE: To clean the light shield, wash it with warm water and a liquid detergent. Rinse and dry the shield well.

Freezer Light Bulbs

Light below the ice bin:

1.Unplug refrigerator or disconnect power.

2.Push in the sides of the light shield and pull down until the shield snaps free.

3.Replace the bulb with a 40-watt appliance bulb.

4.Replace the light shield.

5.Plug in refrigerator or reconnect power.

23

Page 23
Image 23
KitchenAid 2200139A manual Refrigerator Light Bulbs, Freezer Light Bulbs

2200139A specifications

The KitchenAid 2200139A is an indispensable appliance for home cooks and culinary enthusiasts who seek reliability and performance in their kitchen. This stand mixer is designed to streamline food preparation tasks, making it a go-to solution for those who frequently whip up doughs, batters, and a variety of other ingredients.

One of the main features of the KitchenAid 2200139A is its powerful 300-watt motor, designed to handle tough ingredients with ease. The tilt-head design allows for easy access to the bowl and attachments, ensuring convenience during food preparation. The mixer comes equipped with a 4.5-quart stainless steel bowl, providing ample capacity for mixing larger batches without compromising on stability or performance. The bowl is also dishwasher-safe, making cleanup a breeze.

The KitchenAid 2200139A offers ten different speed settings. This versatility allows users to mix at a slow stir to a fast whip, accommodating a wide range of tasks from kneading bread dough to whipping cream. This precision ensures that ingredients are combined perfectly, resulting in superior textures and flavors in every dish.

In addition to its powerful motor and variable speeds, this stand mixer comes with several essential attachments, including a flat beater, dough hook, and wire whip. These attachments help expand culinary possibilities, enabling users to tackle virtually any recipe. The power hub on the stand mixer allows for the connection of various optional attachments, such as pasta makers and food grinders, transforming the unit into a multifunctional culinary tool.

Another standout characteristic of the KitchenAid 2200139A is its robust construction. Built with high-quality materials, this appliance promises durability, making it suitable for everyday use. Its classic design also fits seamlessly into any kitchen decor, available in a variety of colors to match personal style preferences.

The KitchenAid 2200139A is not just about performance; it also emphasizes ease of use. The ergonomic handle and control dial are designed for comfortable operation, while the unit’s stability and low center of gravity minimize movement during mixing, providing a safe and worry-free cooking experience.

In summary, the KitchenAid 2200139A stand mixer stands out for its powerful motor, versatile speed settings, generous bowl capacity, and accessory compatibility. Its thoughtful design and durable construction make it a reliable addition to any kitchen, helping home cooks explore their culinary creativity with ease.