| |
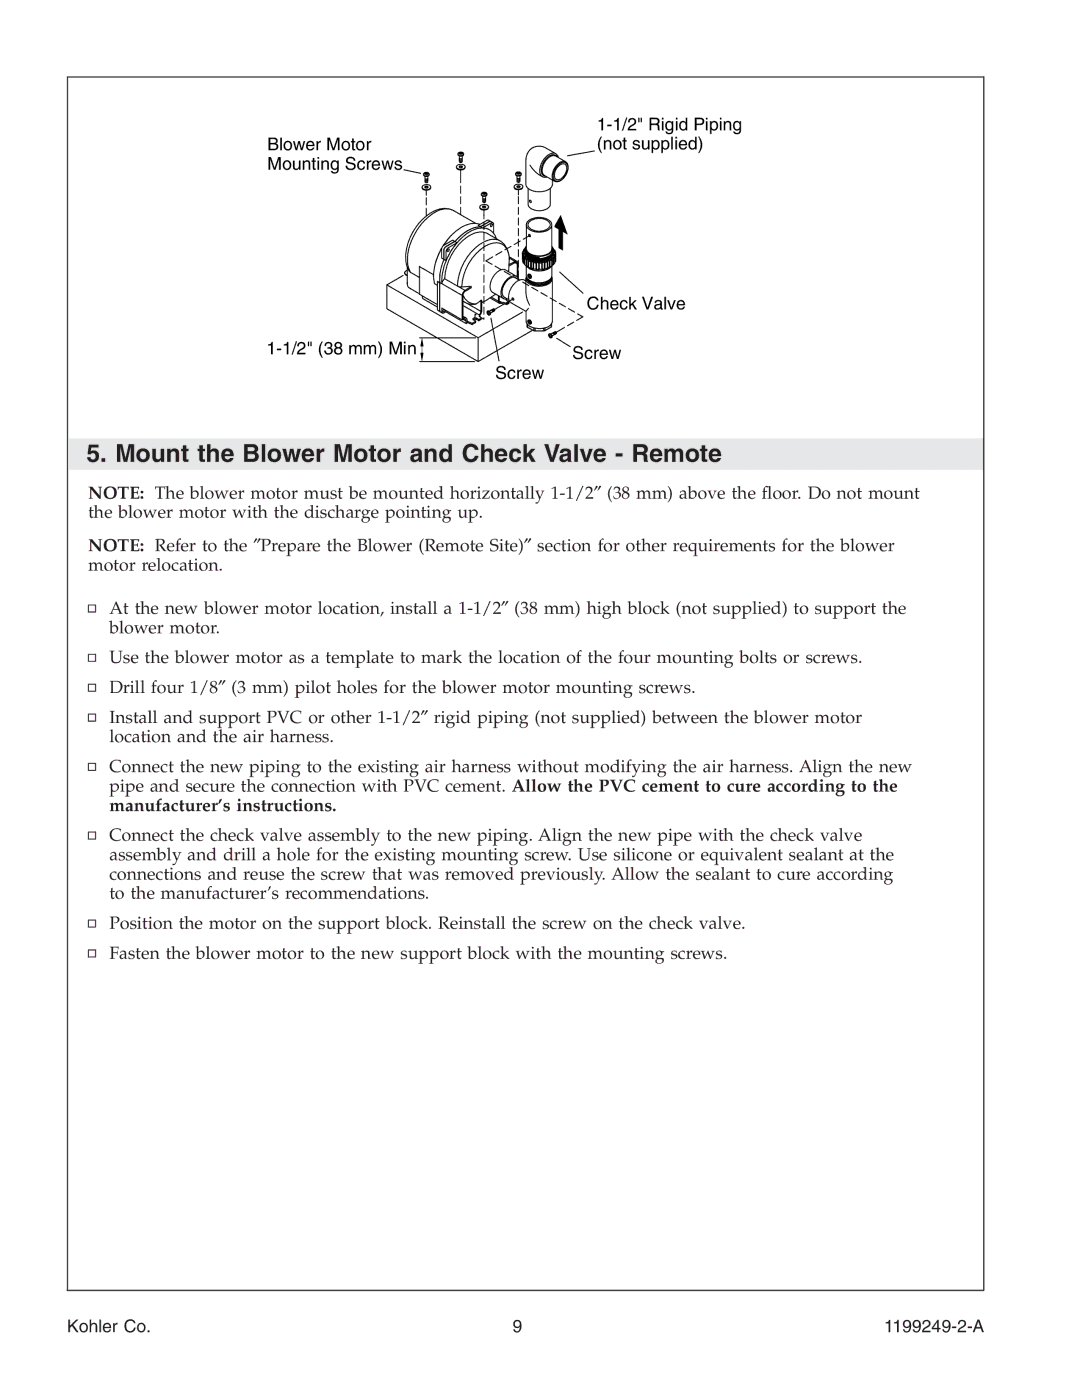
Blower Motor | (not supplied) |
Mounting Screws |
|
Check Valve
Screw | |
| Screw |
5. Mount the Blower Motor and Check Valve - Remote
NOTE: The blower motor must be mounted horizontally
NOTE: Refer to the ″Prepare the Blower (Remote Site)″ section for other requirements for the blower motor relocation.
At the new blower motor location, install a
Use the blower motor as a template to mark the location of the four mounting bolts or screws. Drill four 1/8″ (3 mm) pilot holes for the blower motor mounting screws.
Install and support PVC or other
Connect the new piping to the existing air harness without modifying the air harness. Align the new pipe and secure the connection with PVC cement. Allow the PVC cement to cure according to the
manufacturer’s instructions.
Connect the check valve assembly to the new piping. Align the new pipe with the check valve assembly and drill a hole for the existing mounting screw. Use silicone or equivalent sealant at the connections and reuse the screw that was removed previously. Allow the sealant to cure according to the manufacturer’s recommendations.
Position the motor on the support block. Reinstall the screw on the check valve.
Fasten the blower motor to the new support block with the mounting screws.
Kohler Co. | 9 |
