DRIVE MODES
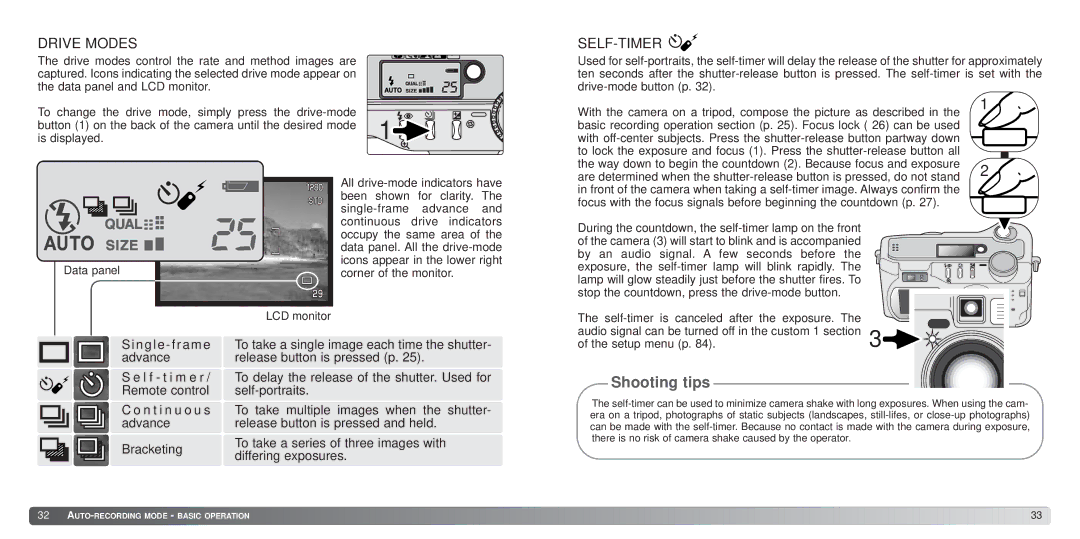
The drive modes control the rate and method images are captured. Icons indicating the selected drive mode appear on the data panel and LCD monitor.
SELF-TIMER 
Used for
To change the drive mode, simply press the | 1 |
button (1) on the back of the camera until the desired mode | |
is displayed. |
With the camera on a tripod, compose the picture as described in the basic recording operation section (p. 25). Focus lock ( 26) can be used with
1
| All |
| been shown for clarity. The |
| |
| continuous drive indicators |
| occupy the same area of the |
| data panel. All the |
Data panel | icons appear in the lower right |
corner of the monitor. | |
| LCD monitor |
are determined when the
During the countdown, the
The
S i n g l e - f r a m e advance
S e l f - t i m e r / Remote control
C o n t i n u o u s advance
Bracketing
To take a single image each time the shutter- release button is pressed (p. 25).
To delay the release of the shutter. Used for
To take multiple images when the shutter- release button is pressed and held.
To take a series of three images with differing exposures.
of the setup menu (p. 84).
Shooting tips
The
![]() 32
32 ![]()
![]()
![]()
![]()
![]()
![]()
![]()
![]()
![]()
![]()
![]()
![]()
![]()
![]()
![]()
![]()
![]()
![]()
![]()
![]()
![]()
![]()
![]()
![]()
![]()
![]()
![]()
![]()
![]()
![]()
![]()
![]()
![]()
![]()
![]()
![]()
![]()
![]()
![]()
![]()
![]()
![]()
![]()
![]()
![]()
![]()
![]()
![]()
![]()
![]()
![]()
![]()
![]()
![]()
![]()
![]()
![]()
![]()
![]()
![]()
![]()
![]()
![]()
![]()
![]()
![]()
![]()
![]()
![]()
![]()
![]()
![]()
![]()
![]()
![]()
![]()
![]()
![]()
![]()
![]() 33
33![]()