To connect a device with a RS-485 port to the VP-1608:
•Connect the A (+) pin on the RS-485 port of the PC to the A (+) pin on the RS-485 port on the rear panel of the VP-1608
•Connect the B (–) pin on the RS-485 port of the PC to the B (–) pin on the RS-485 port on the rear panel of the VP-1608
•Connect the G pin on the RS-485 port of the PC to the G pin on the RS-485 port on the rear panel of the VP-1608
5.4Setting the MACHINE # DIP-Switches
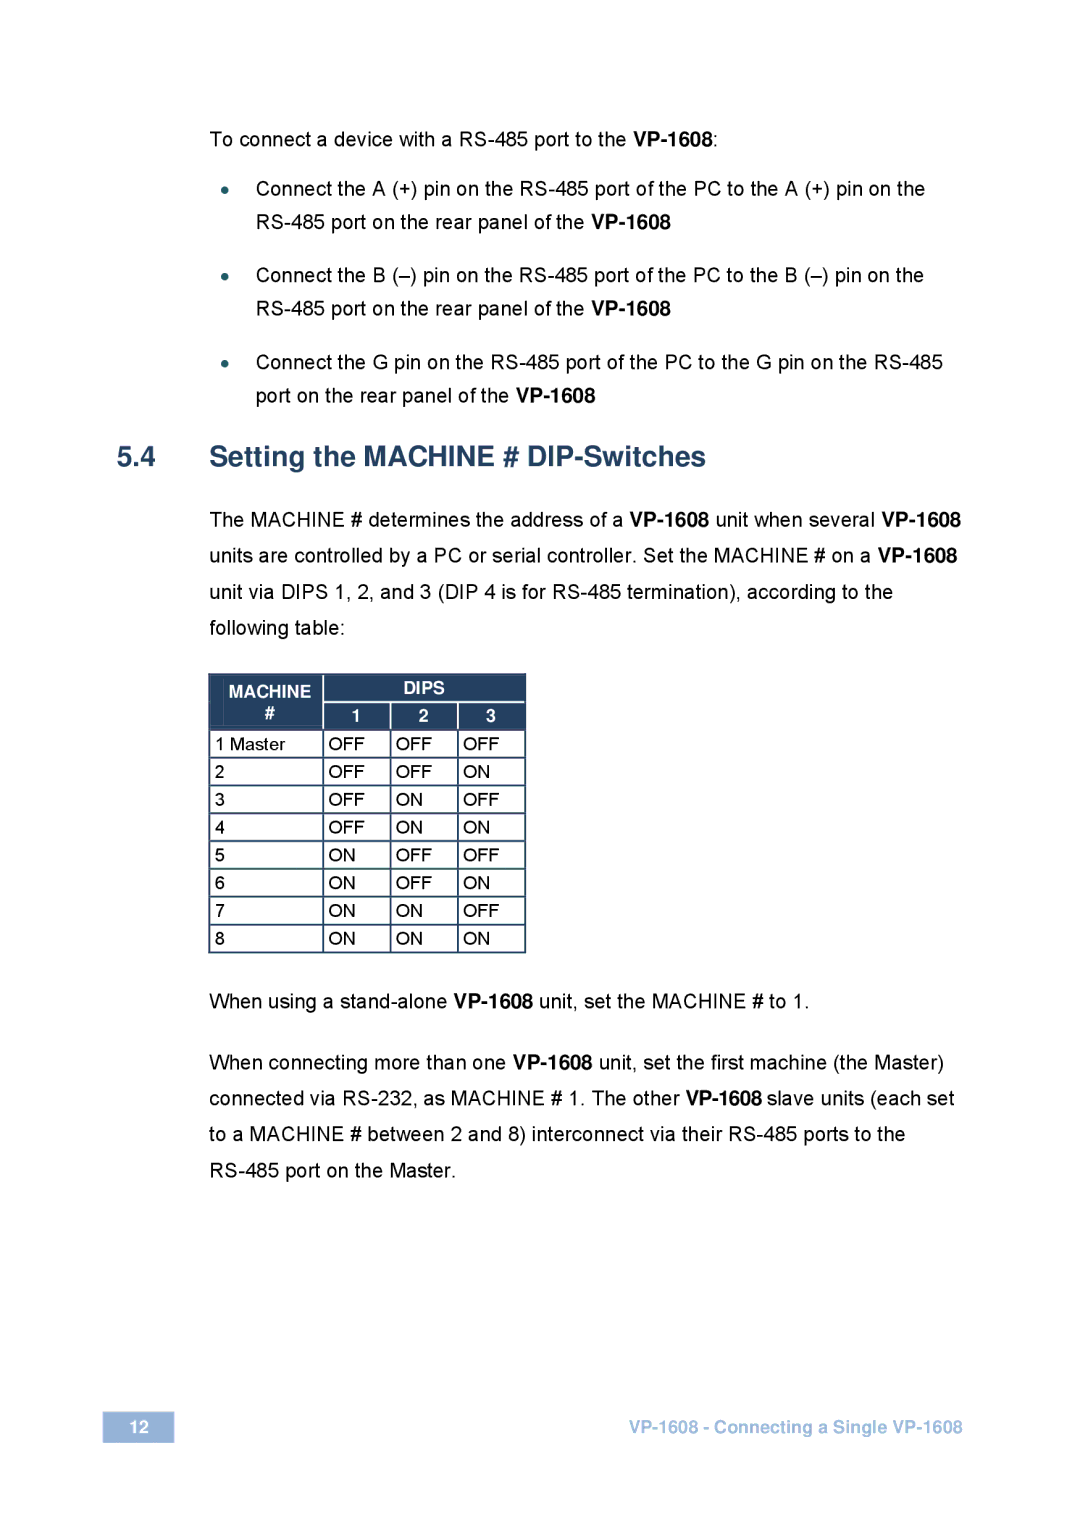
The MACHINE # determines the address of a VP-1608unit when several VP-1608units are controlled by a PC or serial controller. Set the MACHINE # on a VP-1608unit via DIPS 1, 2, and 3 (DIP 4 is for RS-485 termination), according to the following table:
MACHINE | | | | DIPS | |
# | | 1 | | 2 | | 3 |
1 Master | | OFF | | OFF | | OFF |
2 | | OFF | | OFF | | ON |
3 | | OFF | | ON | | OFF |
4 | | OFF | | ON | | ON |
5 | | ON | | OFF | | OFF |
6 | | ON | | OFF | | ON |
7 | | ON | | ON | | OFF |
8 | | ON | | ON | | ON |
When using a stand-alone VP-1608unit, set the MACHINE # to 1.
When connecting more than one VP-1608unit, set the first machine (the Master) connected via RS-232, as MACHINE # 1. The other VP-1608slave units (each set to a MACHINE # between 2 and 8) interconnect via their RS-485 ports to the RS-485 port on the Master.
12 | VP-1608 - Connecting a Single VP-1608 |