1.7. Memory Expansion Installation
DIMM to be used
See your Kyocera dealer for purchasing information of the DIMM that are best suited for use with this printer.
Either a 8 MB, 16 MB, 32 MB or 64 MB DIMM can be used for memory expansion.
Installing and Removing The DIMM
Installing DIMM
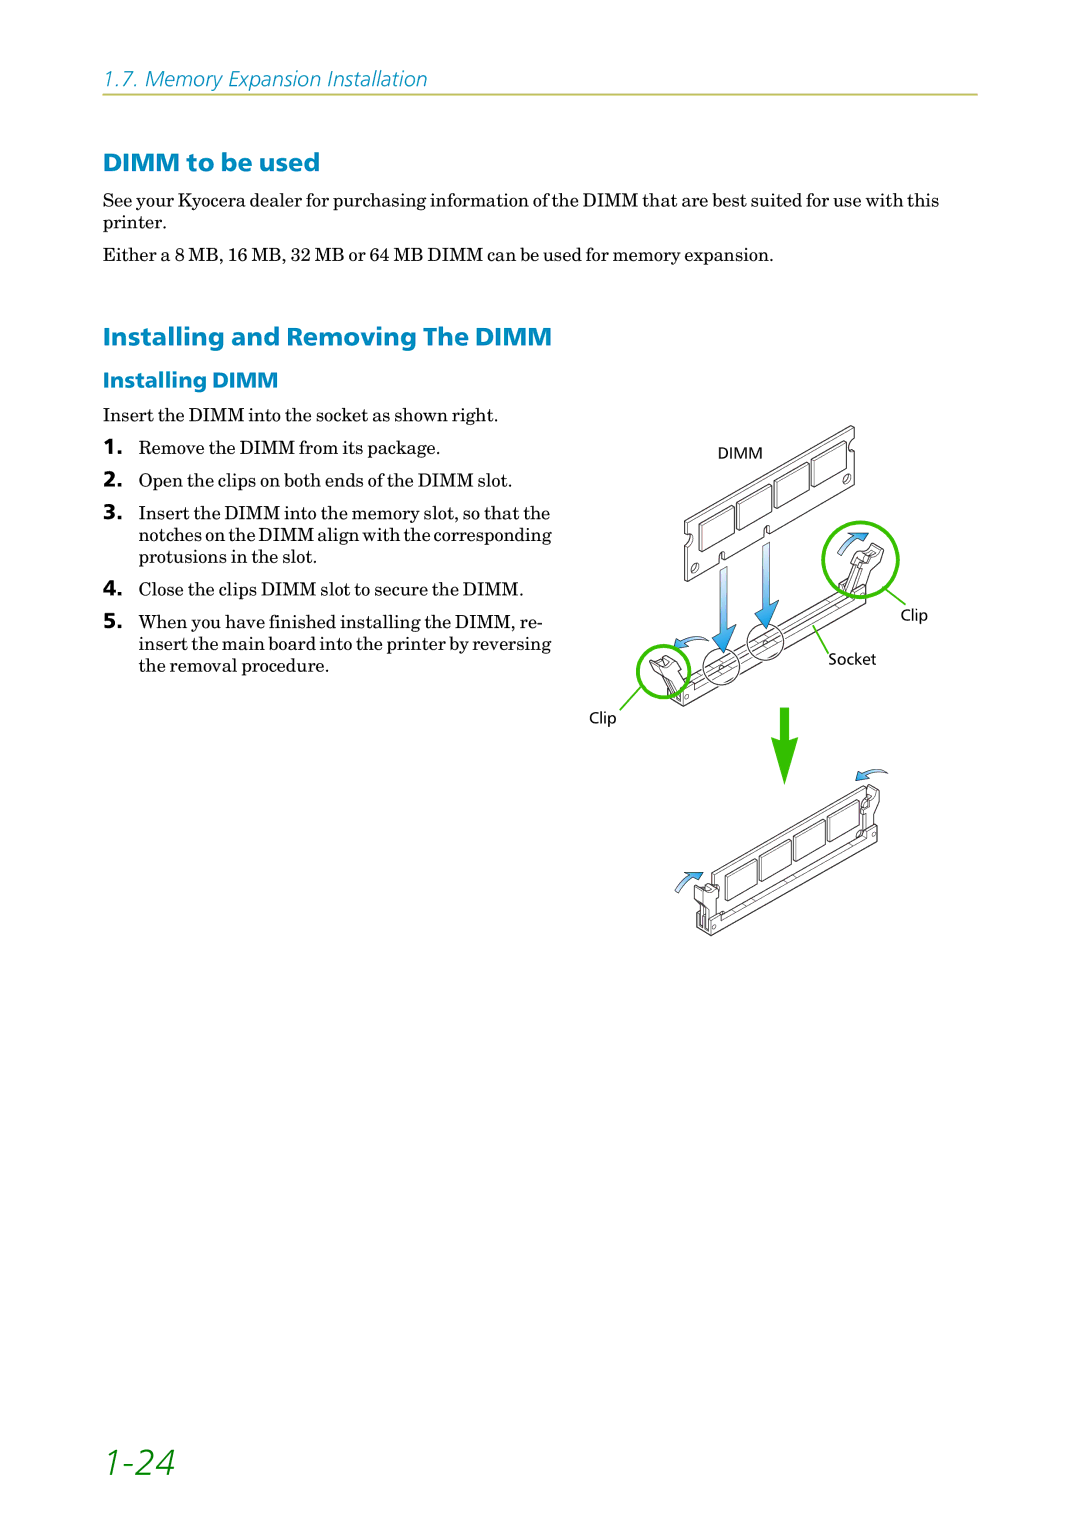
Insert the DIMM into the socket as shown right.
1.Remove the DIMM from its package.
2.Open the clips on both ends of the DIMM slot.
3.Insert the DIMM into the memory slot, so that the notches on the DIMM align with the corresponding protusions in the slot.
4.Close the clips DIMM slot to secure the DIMM.
5.When you have finished installing the DIMM, re- insert the main board into the printer by reversing the removal procedure.
DIMM
Clip
Socket
Clip