1.1. Positioning the Printer
Chapter 1
Installing the Printer
This chapter explains how to unpack and install the printer. The topics covered are:
Positioning the printer
Unpacking and inspection
Names of parts
Setting up and interfacing
1.1.Positioning the Printer
Clearance
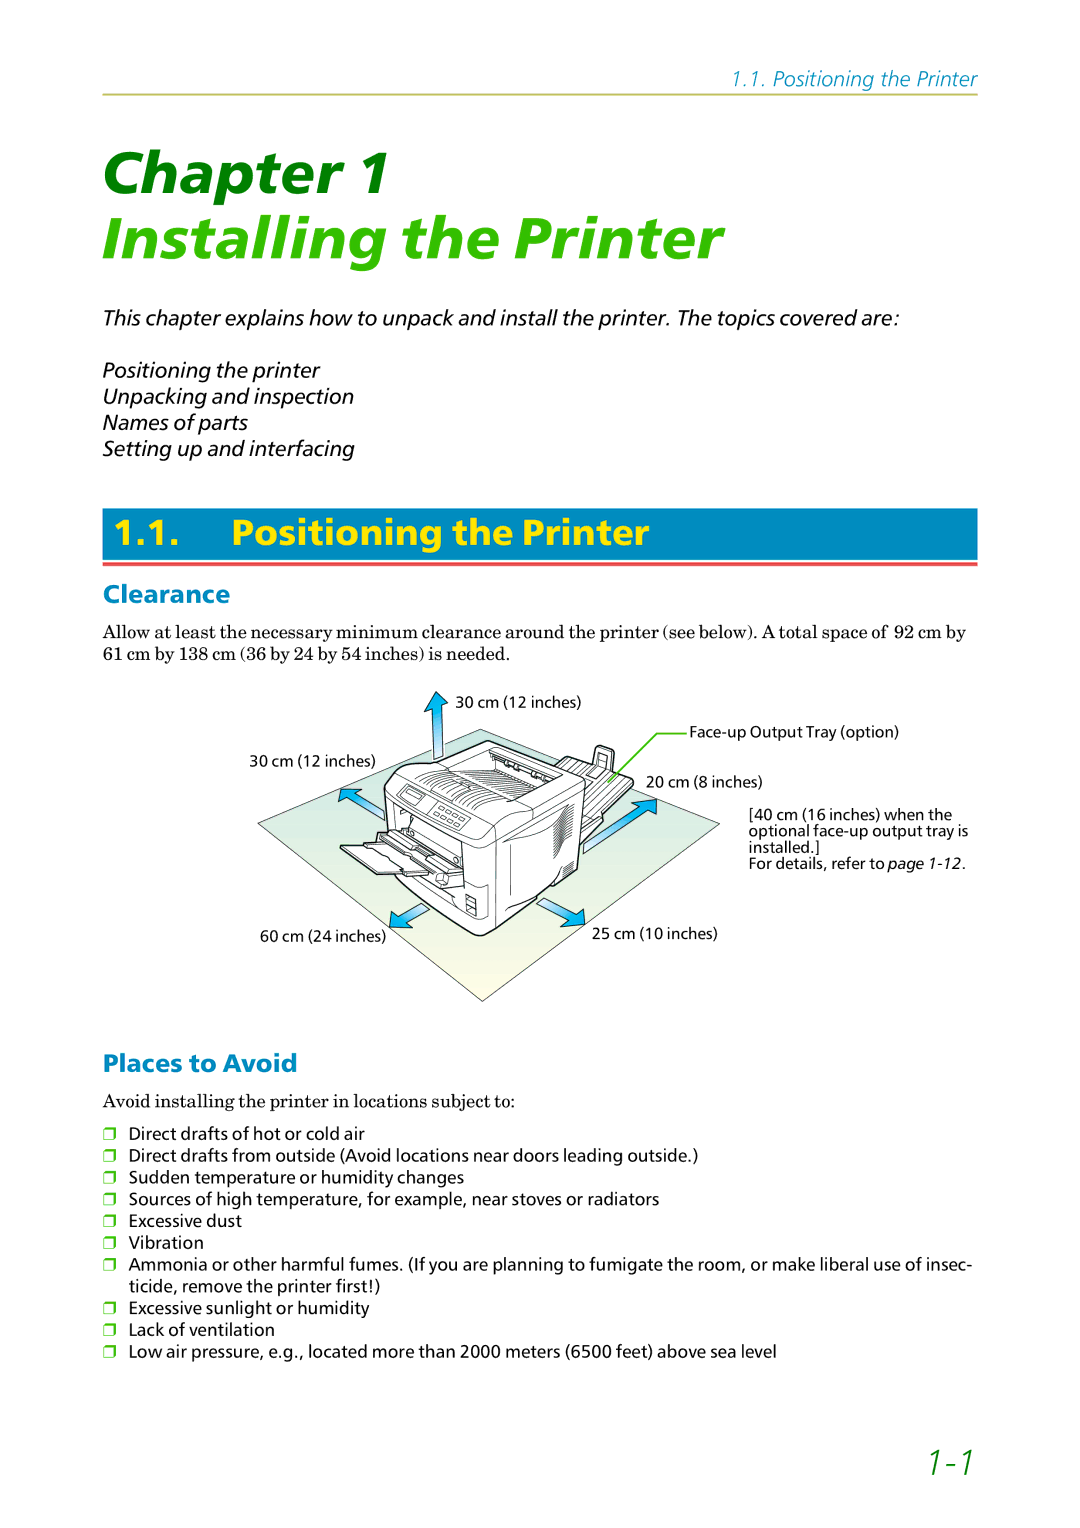
Allow at least the necessary minimum clearance around the printer (see below). A total space of 92 cm by 61 cm by 138 cm (36 by 24 by 54 inches) is needed.
![]() 30 cm (12 inches)
30 cm (12 inches)
30 cm (12 inches) ![]()
20 cm (8 inches)
[40 cm (16 inches) when the optional
For details, refer to page
60 cm (24 inches) | 25 cm (10 inches) |
Places to Avoid
Avoid installing the printer in locations subject to:
❒Direct drafts of hot or cold air
❒Direct drafts from outside (Avoid locations near doors leading outside.)
❒Sudden temperature or humidity changes
❒Sources of high temperature, for example, near stoves or radiators
❒Excessive dust
❒Vibration
❒Ammonia or other harmful fumes. (If you are planning to fumigate the room, or make liberal use of insec- ticide, remove the printer first!)
❒Excessive sunlight or humidity
❒Lack of ventilation
❒Low air pressure, e.g., located more than 2000 meters (6500 feet) above sea level