1.7. Memory Expansion Installation
Removing DIMM
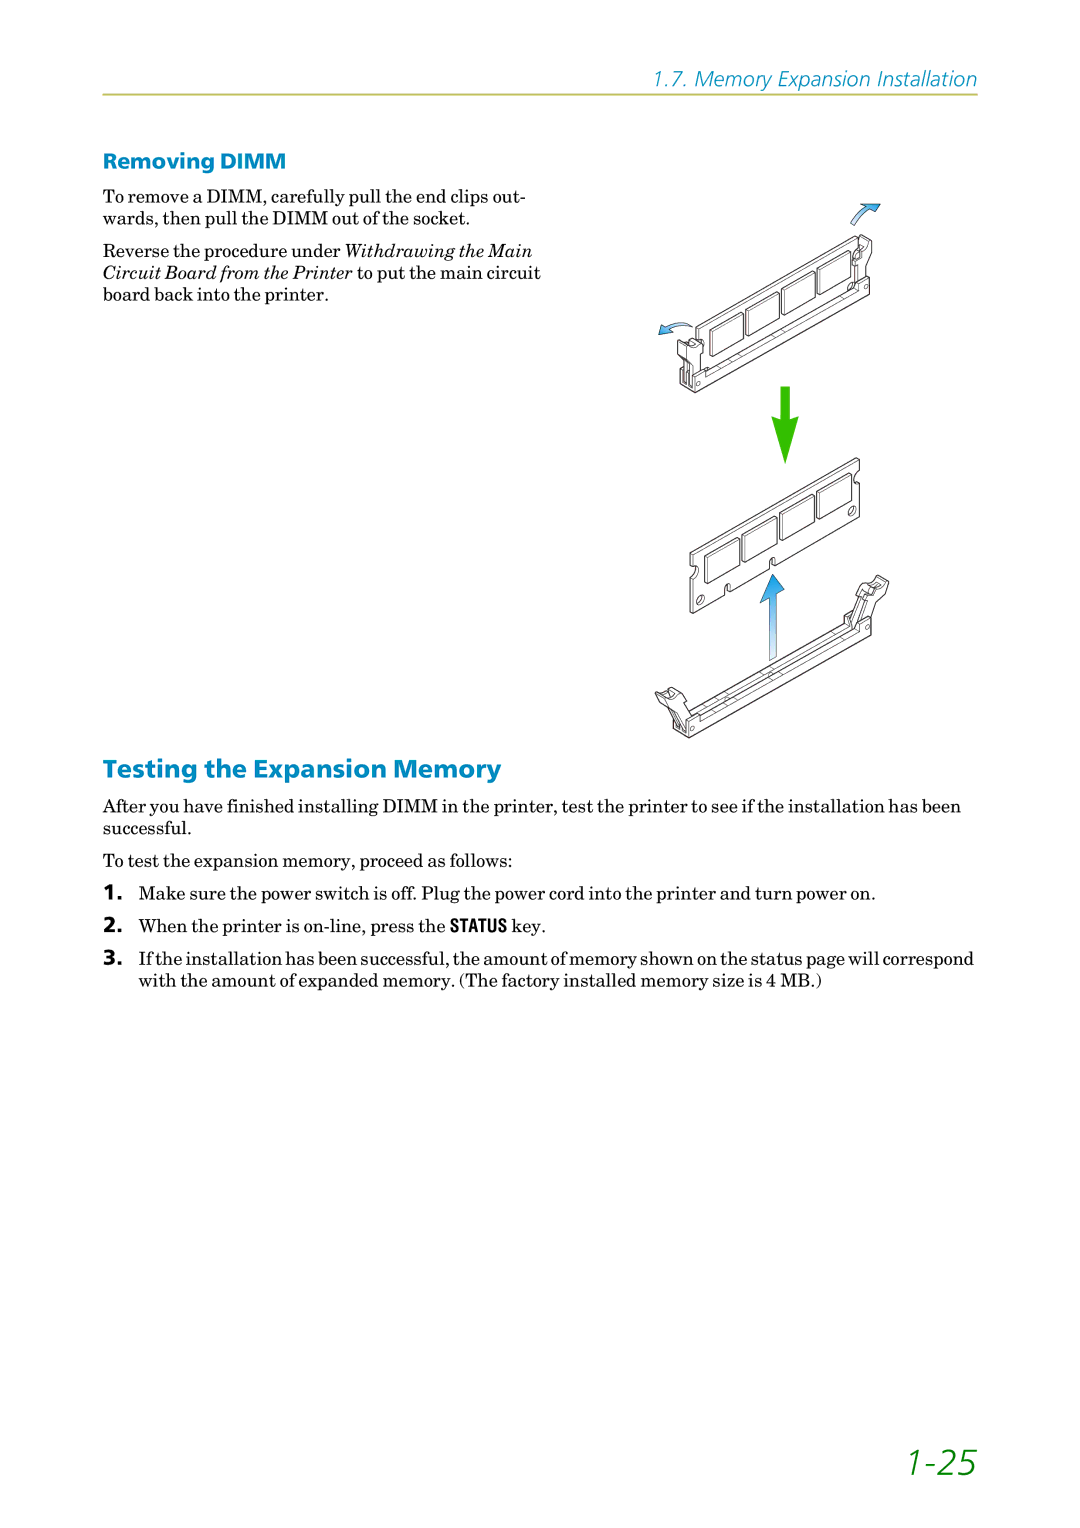
To remove a DIMM, carefully pull the end clips out- wards, then pull the DIMM out of the socket.
Reverse the procedure under Withdrawing the Main Circuit Board from the Printer to put the main circuit board back into the printer.
Testing the Expansion Memory
After you have finished installing DIMM in the printer, test the printer to see if the installation has been successful.
To test the expansion memory, proceed as follows:
1.Make sure the power switch is off. Plug the power cord into the printer and turn power on.
2.When the printer is
3.If the installation has been successful, the amount of memory shown on the status page will correspond with the amount of expanded memory. (The factory installed memory size is 4 MB.)