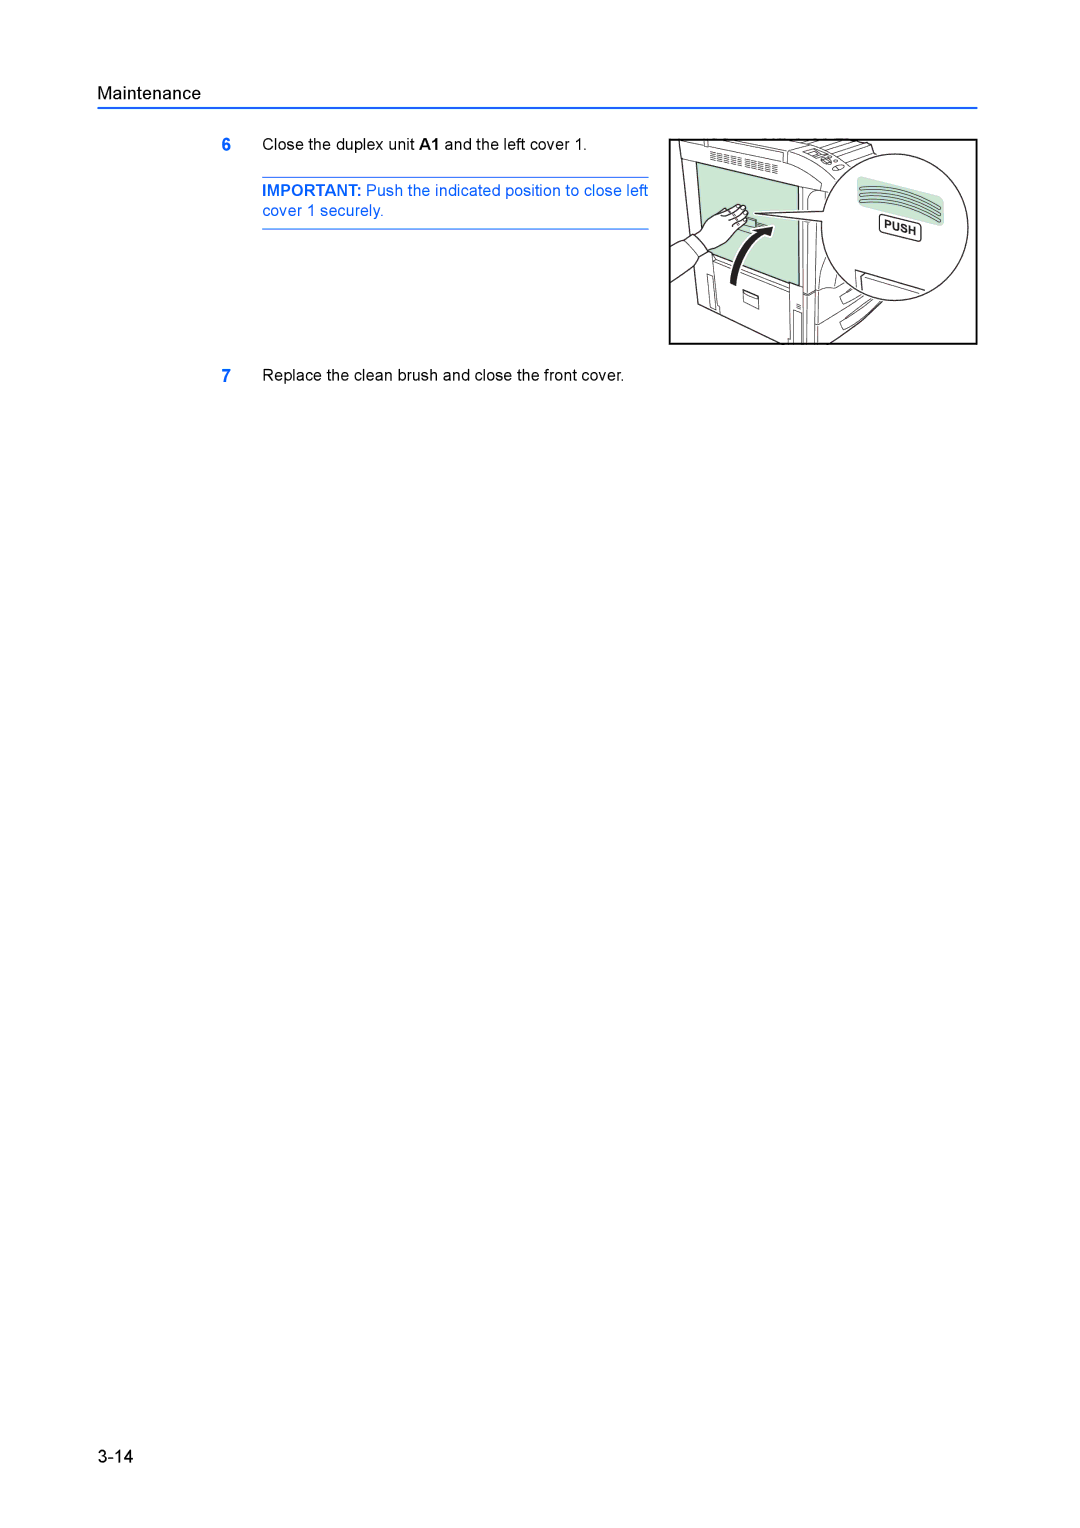
Manuals
/
Kyocera
/
Computer Equipment
/
Printer
Kyocera
FS-C8100DN manual 3-14, Maintenance, Close the duplex unit A1 and the left cover
Models:
FS-C8100DN
1
44
72
72
Download
72 pages
28.82 Kb
41
42
43
44
45
46
47
48
<
>
Troubleshooting
Specifications
Install
Error codes
Replacement on page
Warranty
Maintenance
Refer to Print Quality Problems on page
Memory Card Errors
Paper Width Guide 31 Paper Width Adjusting Tab
Page 44
Image 44
Maintenance
6
Close the duplex unit
A1
and the left cover 1.
IMPORTANT:
Push the indicated position to close left cover 1 securely.
7
Replace the clean brush and close the front cover.
3-14
Page 43
Page 45
Page 44
Image 44
Page 43
Page 45
Contents
Operation Guide
FS-C8100DN
Page
Contents
Maintenance
Troubleshooting
Specifications
Page
Regarding Tradenames
Legal and Safety Information
Notice on Software
2. Limited Warranty
License Agreements
IBM Program License Agreement
1. License
4. General
Typeface Trademark Acknowledgement
Monotype Imaging License Agreement
Compliance and Conformity
FCC Statement for users in the United States
Safety Information
Precautions for Use
Laser Safety
Laser Notice
Caution Labels
viii
CDRH Regulations
Ozone Concentration
Declaration of Conformity for U.S.A
CE Marking Directive
Declaration of Conformity Australia
Canadian Department of Communications Compliance Statement
EN ISO
Disclaimer
Energy Star Program
Group for Energy Efficient Appliances GEEA
Symbols
xiii
Installation Precautions
Environment
Power Supply/Grounding the Machine
Other Precautions
Handling of Plastic Bags
Other Precautions
Precautions for Use
Cautions when Using the Machine
Cautions when Handling Consumables
Other Precautions
Store all consumables in a cool, dark location
xvii
Other Precautions
3 Maintenance
4 Troubleshooting
5 Specifications
About the Operation Guide
Replacement on page
Conventions
WARNING High voltage is
present in the charger section
Page
1 Machine Parts
Machine Parts
Components at the Front of the Printer
Components at the Left of the Printer
Components at the Right of the Printer
11 12 13 14 15 16
20 19
Machine Parts
Internal Components
28 Toner Container Lock Lever 29 Cleaning Brush
30 Paper Width Guide 31 Paper Width Adjusting Tab
32 Paper Length Guide 33 Power Cord Connector
Loading Printer Driver...2-2 Printing from Application Software...2-3
2 Printing Operation
This chapter contains explanations on the following topics
Loading Printer Driver
Printing Operation
Printing from Application Software
Printing Operation
Printing Operation
3 Maintenance
Toner Container Replacement...3-8 Cleaning the Printer...3-13
This chapter contains explanations on the following topics
General Information...3-2 Loading Paper...3-3
Maintenance
General Information
Maintenance
Loading Paper
Loading Paper into the Cassette
Maintenance
NOTE Paper size is printed on the paper cassette
Loading Paper into the MP Multi-Purpose Tray
Maintenance
Maintenance
YES YES NO
Loading paper into the optional paper feeder PF-750
Maintenance
Set paper into the paper cassette
NOTE Do not set folded paper. Otherwise, it may cause paper jams
Do not exceed the upper limit of the cassette
Toner Container Replacement
Frequency of toner container replacement
Understanding Messages Requesting Toner Container Replacement
Starter Toner Containers
Replacing the Toner Container
Maintenance
5 Cover the toner hole with the cap on the rear side of the container
3-10
Maintenance
3-11
Maintenance
3-12
Maintenance
16 Open the cap of the new waste toner box
17 Set the new waste toner box in the printer
Cleaning the Printer
3-13
Maintenance
1 Open the front cover 2 Remove the cleaning brush
3-14
Maintenance
7 Replace the clean brush and close the front cover
6 Close the duplex unit A1 and the left cover
4 Troubleshooting
General Guidelines...4-2 Print Quality Problems...4-3
Error Messages...4-6 Clearing Paper Jams...4-11
If a problem cannot be corrected, contact your service technician
Troubleshooting
Refer to Print Quality Problems on page
General Guidelines
Tips
Troubleshooting
Print Quality Problems
Refer to Cleaning the Printer on page
Container Replacement on page
Troubleshooting
Troubleshooting
Check whether the problem is being caused by a PRESCRIBE command
Error Messages
Troubleshooting
Troubleshooting
Close the cover of the optional mail box
Also refer to Insert the same Memory card on page
Troubleshooting
Troubleshooting
You can abandon printing by pressing Cancel
Storage Error Codes Hard Disk Errors
Memory Card Errors
RAM Disk Errors
4-10
Clearing Paper Jams
Possible Paper Jam Locations
4-11
Troubleshooting
General considerations for clearing jams
Utilizing Online Help Messages
4-12
Operation
Paper Cassette Paper Cassette
4-13
Troubleshooting
1 Open the left cover 2 Remove the jammed paper
Troubleshooting
Paper Cassette
4-14
Troubleshooting
Paper Cassette 3 or 4 option
4-15
Troubleshooting
MP Tray
4-16
4-17
Troubleshooting
Open the duplex unit A1
4 Remove the jammed paper 5 Open the feed guide B1
4-18
Troubleshooting
8 Pull out paper cassette
11 Pull out the feed unit B3
Troubleshooting
Left Cover
4-19
4-20
Troubleshooting
1 Open the left cover 2 Remove the jammed paper
3 Open the duplex unit A1 4 Remove the jammed paper
4-21
Troubleshooting
Left Cover
6 Remove the jammed paper
Top Cover
4-22
Troubleshooting
1 If you can see jammed paper from the exit, pull it out
5 Specifications
Specifications
Page
Page
Page
Rev. 1.12007.2 302HP56011