LANCOM 7111 VPN – LANCOM 8011 VPN
Chapter 2: Installation
2.3.2The back of the unit
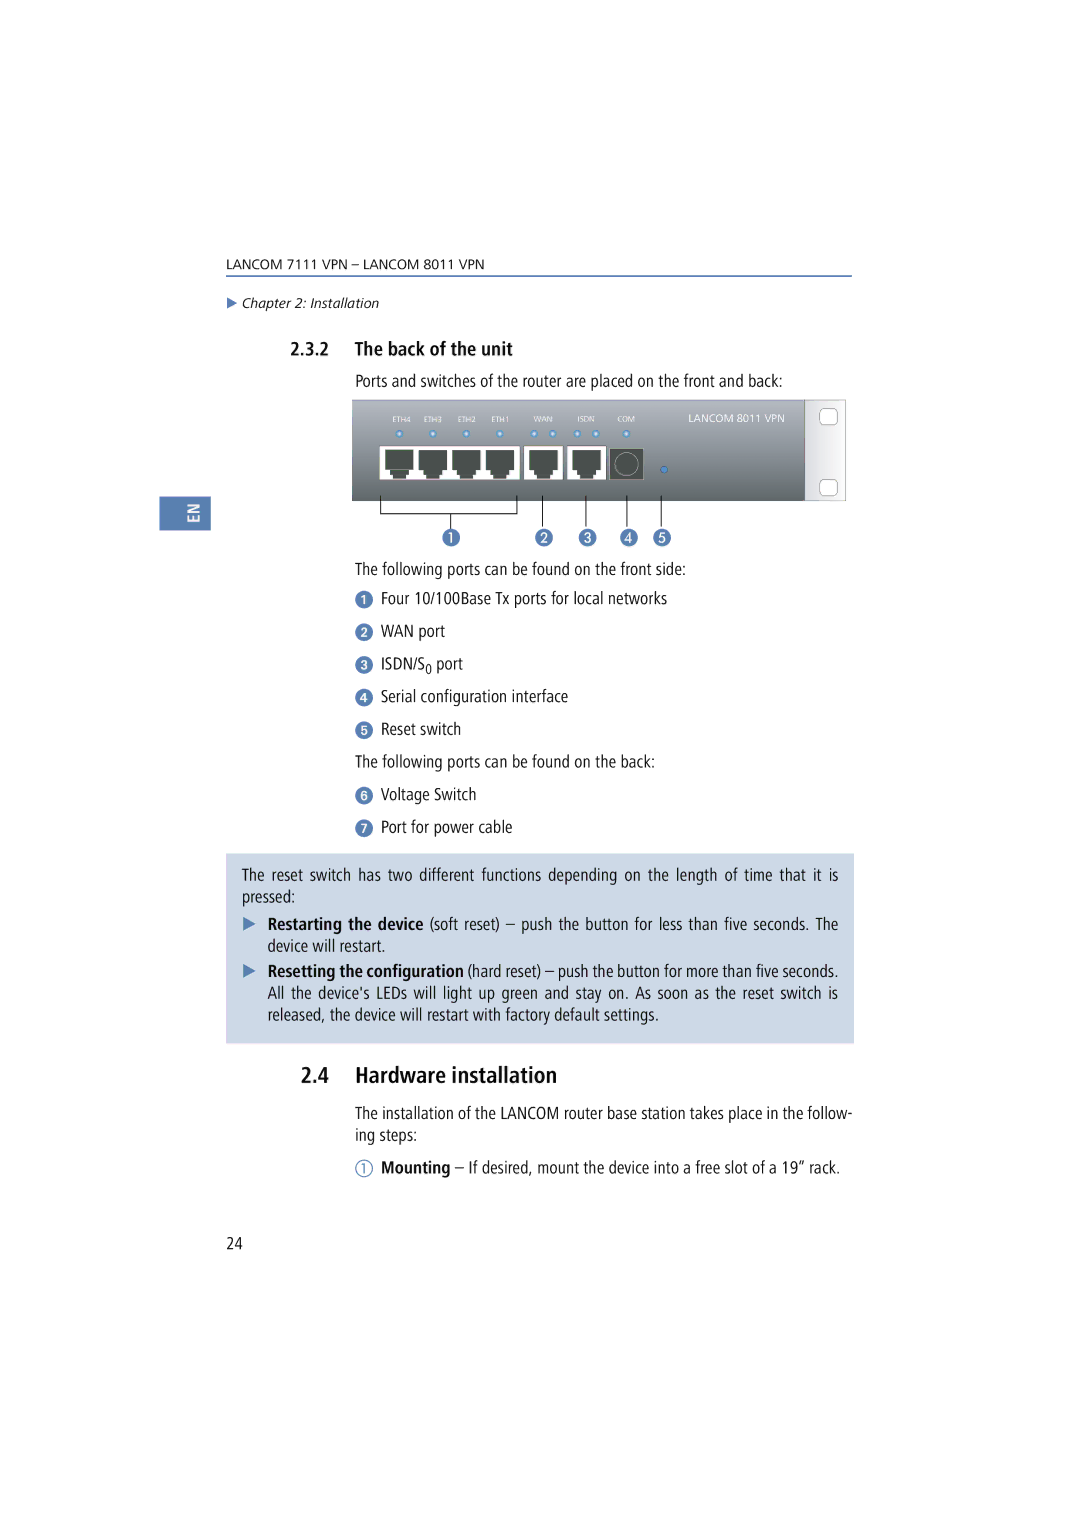
Ports and switches of the router are placed on the front and back:
|
| ETH4 ETH3 ETH2 ETH1 |
|
| WAN |
|
| ISDN COM |
| LANCOM 8011 VPN | ||||||||||
|
|
|
|
|
|
|
|
|
|
|
|
|
|
|
|
|
|
|
|
|
|
|
|
|
|
|
|
|
|
|
|
|
|
|
|
|
|
|
|
|
|
|
|
|
|
|
|
|
|
|
|
|
|
|
|
|
|
|
|
|
|
|
|
|
|
|
|
|
|
|
|
|
|
|
|
|
|
|
|
|
|
|
|
|
|
|
|
|
|
|
|
|
|
|
|
|
|
|
|
|
|
|
|
|
EN
The following ports can be found on the front side:
Four 10/100Base Tx ports for local networks
WAN port
ISDN/S0 port
Serial configuration interface
Reset switch
The following ports can be found on the back:
Voltage Switch
Port for power cable
The reset switch has two different functions depending on the length of time that it is pressed:
Restarting the device (soft reset) – push the button for less than five seconds. The device will restart.
Resetting the configuration (hard reset) – push the button for more than five seconds. All the device's LEDs will light up green and stay on. As soon as the reset switch is released, the device will restart with factory default settings.
2.4Hardware installation
The installation of the LANCOM router base station takes place in the follow- ing steps:
Mounting – If desired, mount the device into a free slot of a 19” rack.
24
