Land Pride | Table of Contents |
Section 2: Operating Instructions
Pre-start Checklist
Hazard control and accident prevention are dependent upon the awareness, concern, prudence and proper training involved in the operation, transport, maintenance and storage of the cutter. Before beginning to operate your cutter, the following inspections should be made.
•Read and follow the Safety Rules carefully, refer to “Important Safety Information” starting on page 1.
•Read all of the Tractor Hook Up in the “Assembly and
•Read the “Operating Instructions” section starting on page 17.
•Refer to the “Maintenance and Lubrication” section starting on page 22 to lubricate the cutter as required.
•Check the cutter initially and periodically for loose bolts and pins, refer to the Torque Values Chart in the “Appendix” section on page 38.
•Make sure all guards and shields are in place, refer to “Important Safety Information” starting on page 1.
•Gearbox Gear Lube, refer to the “Maintenance and Lubrication” section starting on page 31.
Cutter Set-up For Transporting
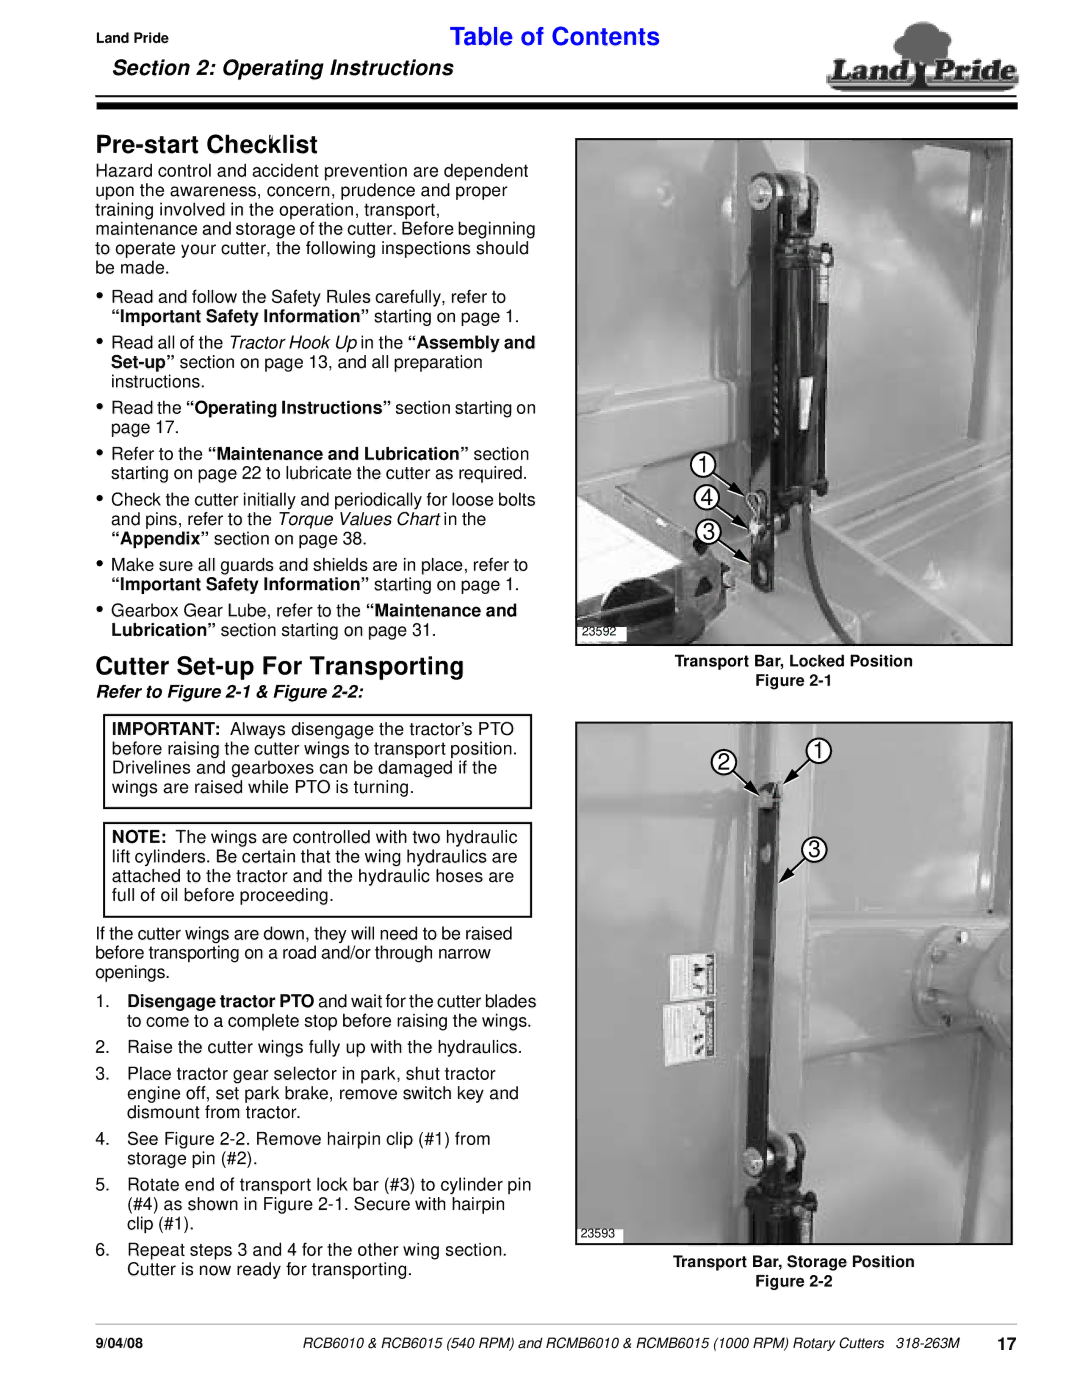
Refer to Figure 2-1 & Figure 2-2:
IMPORTANT: Always disengage the tractor’s PTO before raising the cutter wings to transport position. Drivelines and gearboxes can be damaged if the wings are raised while PTO is turning.
NOTE: The wings are controlled with two hydraulic lift cylinders. Be certain that the wing hydraulics are attached to the tractor and the hydraulic hoses are full of oil before proceeding.
If the cutter wings are down, they will need to be raised before transporting on a road and/or through narrow openings.
1.Disengage tractor PTO and wait for the cutter blades to come to a complete stop before raising the wings.
2.Raise the cutter wings fully up with the hydraulics.
3.Place tractor gear selector in park, shut tractor engine off, set park brake, remove switch key and dismount from tractor.
4.See Figure
5.Rotate end of transport lock bar (#3) to cylinder pin (#4) as shown in Figure
6.Repeat steps 3 and 4 for the other wing section. Cutter is now ready for transporting.
1
4
3
23592
Transport Bar, Locked Position
Figure
2![]() 1
1
3
23593
Transport Bar, Storage Position
Figure
9/04/08 | RCB6010 & RCB6015 (540 RPM) and RCMB6010 & RCMB6015 (1000 RPM) Rotary Cutters | 17 |