4-Plate Assembly
 Step 1
Place hub and friction discs into the housing.
!WARNING!
Excessive wear on skid shoes may cause inadequate operation of cutter and create a safety hazard!
There are two skid shoes mounted on either side of the center section and one skid shoe mounted on each wing section. Check all skid shoes for wear and replace if necessary. Order only genuine Land Pride parts from your local Land Pride Dealer.
 Step 2
Compress Belleville Springs to the pressure plate by tightening the four hex nuts and then placing the assembly into the clutch housing.
 Step 3
Bend retaining lugs inward over the Belleville Spring edges to secure the spring before backing the four hex nuts off.
 Step 4
With lugs bent in, loosen the four hex nuts completely to the end of the threaded studs.
 Step 5
Install end half clamps if available.
Land Pride Skid Shoe Replacement Parts
Part No. | Part Description |
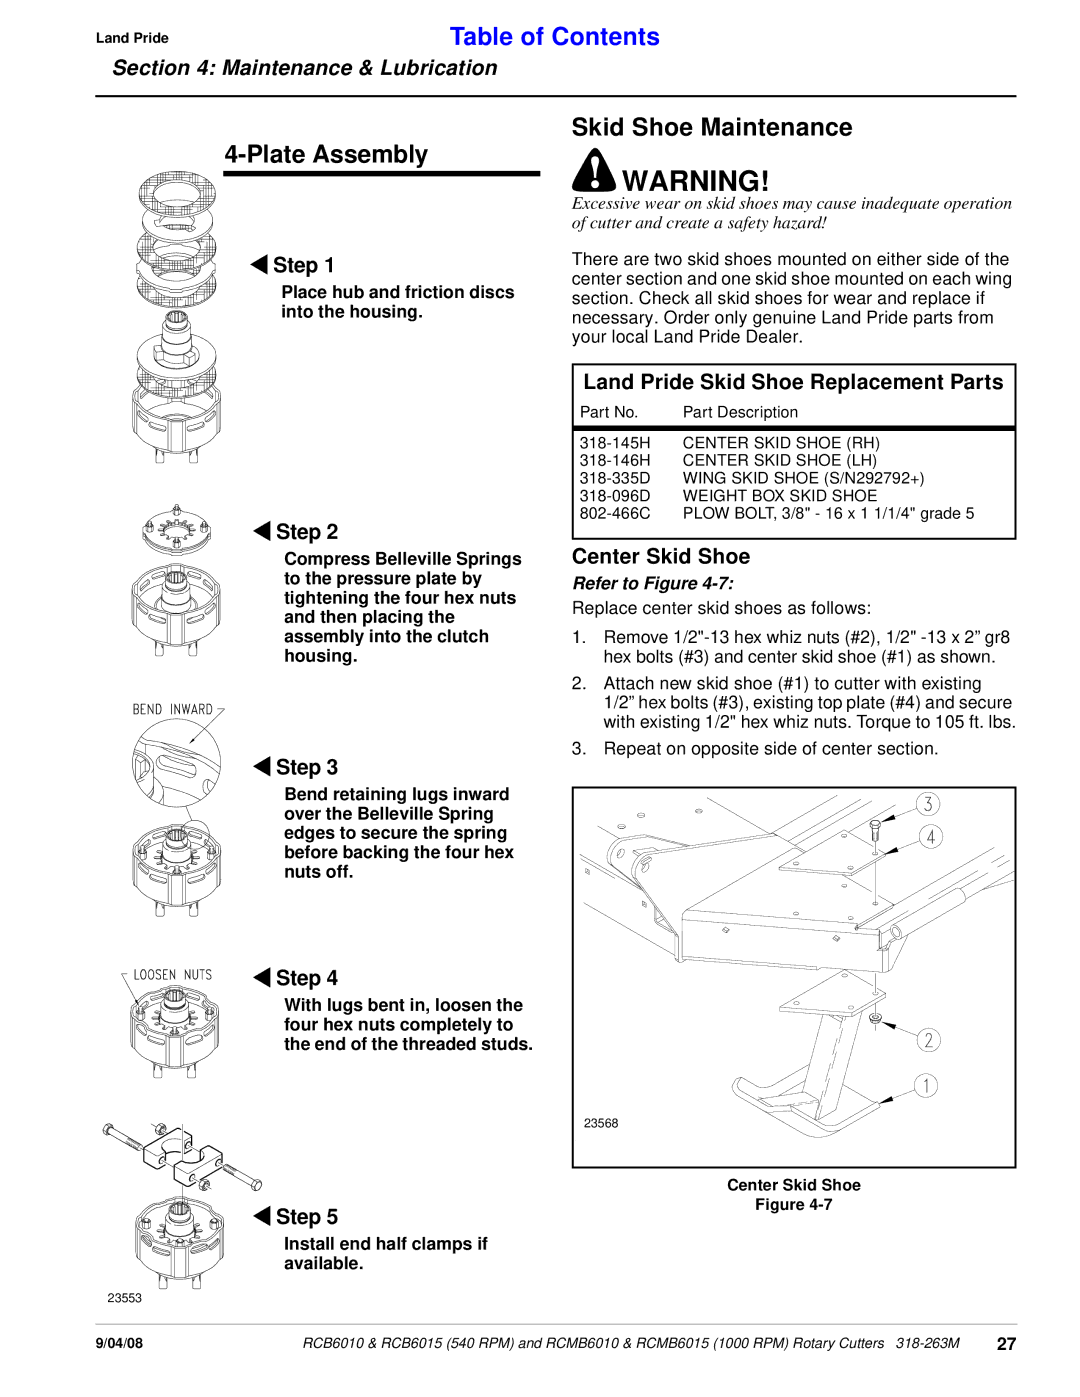
Center Skid Shoe
Refer to Figure 4-7:
Replace center skid shoes as follows:
1.Remove
2.Attach new skid shoe (#1) to cutter with existing 1/2” hex bolts (#3), existing top plate (#4) and secure with existing 1/2" hex whiz nuts. Torque to 105 ft. lbs.
3.Repeat on opposite side of center section.
23568 |
Center Skid Shoe
Figure
23553
9/04/08 | RCB6010 & RCB6015 (540 RPM) and RCMB6010 & RCMB6015 (1000 RPM) Rotary Cutters | 27 |