
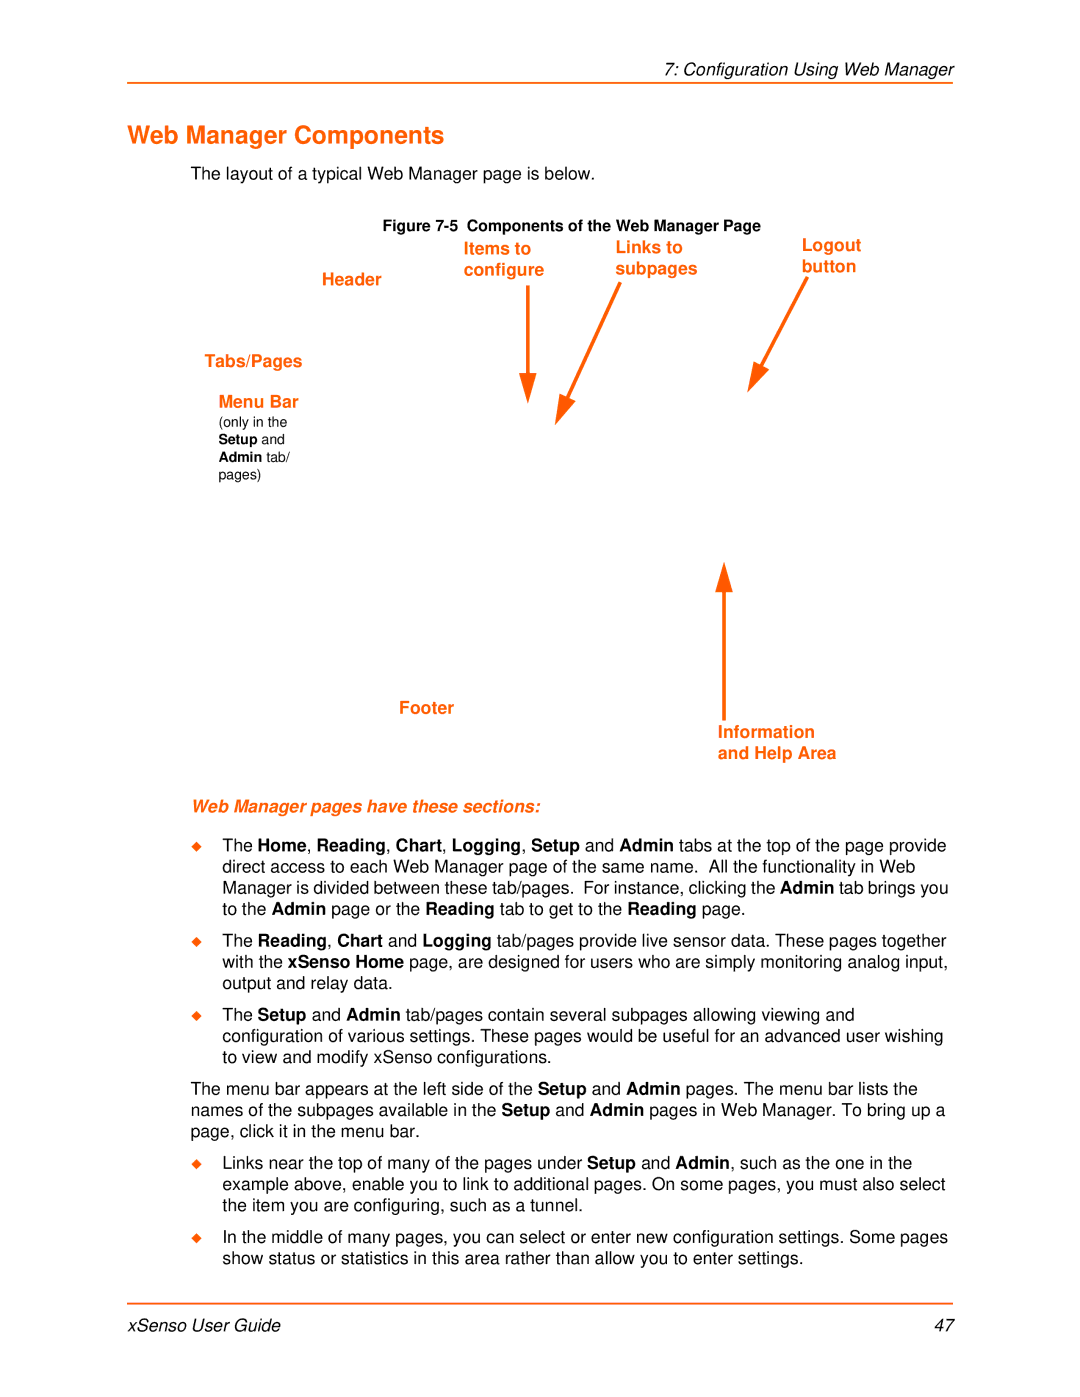
XSENSO 2100, XSENSO 21A2, XSENSO 21R2 specifications
Lantronix, a leader in secure communications and IoT solutions, offers a range of innovative products that cater to various industrial and commercial needs. Among their impressive lineup are the XSENSO 21R2, XSENSO 21A2, and XSENSO 2100 devices, each designed for remote monitoring and control applications that require reliability and versatility.The XSENSO 21R2 is a powerful device focused on advanced sensor management. It features multiple analog and digital inputs, enabling users to monitor a wide variety of environmental parameters such as temperature, humidity, and pressure. This model excels in applications requiring real-time data collection and analysis. Its robust construction ensures high performance in challenging environments, making it ideal for industrial settings. The XSENSO 21R2 also incorporates cloud connectivity options, allowing for seamless data transfer and integration with existing IoT infrastructures.
Similarly, the XSENSO 21A2 is designed for users who prioritize ease of use along with functionality. This device is equipped with a user-friendly interface that simplifies configuration and monitoring. It supports various communication protocols, ensuring compatibility with different systems and applications. The XSENSO 21A2 boasts a compact design, suitable for space-constrained installations, and provides options for local and remote access to data, enhancing user flexibility.
The XSENSO 2100 stands out with its high-performance processing capabilities, making it suitable for complex monitoring tasks. Its enhanced computing power allows it to run sophisticated analytics directly on the device, thereby reducing latency and bandwidth consumption. The XSENSO 2100 is especially useful in scenarios that require extensive data processing at the edge, such as predictive maintenance and machine learning applications. It is equipped with advanced security features, ensuring that sensitive data remains protected during transmission and storage.
All three models embody Lantronix's commitment to innovation, incorporating the latest technologies such as wireless connectivity options, cloud integration, and support for various industry standards. Their scalability makes them suitable for projects of all sizes, from small businesses to large enterprises. These devices not only enhance operational efficiency but also empower businesses to make data-driven decisions, ultimately leading to improved performance and cost savings. With Lantronix’s XSENSO devices, organizations can take a significant step towards realizing their IoT aspirations.