To set the two-tone option, press the MODE button then the CH SET up or down buttons until the display appears. Press and release the MODE button again to select. Scroll through the sub-menu settings with the up or down buttons, press the MODE button when TWO TONE appears on screen. Settings include:
INDIVID
GROUP
SUPER GR
You can toggle between these settings with the up or down buttons. When the desired setting appears on screen, press the MODE button to select. Next, toggle between On and Off status settings which occur for each above sub-menu.
Example: INDIVE ON, GROUP OF and SGRP ON .
When the desired setting appears on screen, press the MODE button to select. The radio will save your On or Off selection for the current channel and return to standby mode. NOTE: Individual, Group and Super Group frequencies and timing are programmed by your radio communications Dealer.
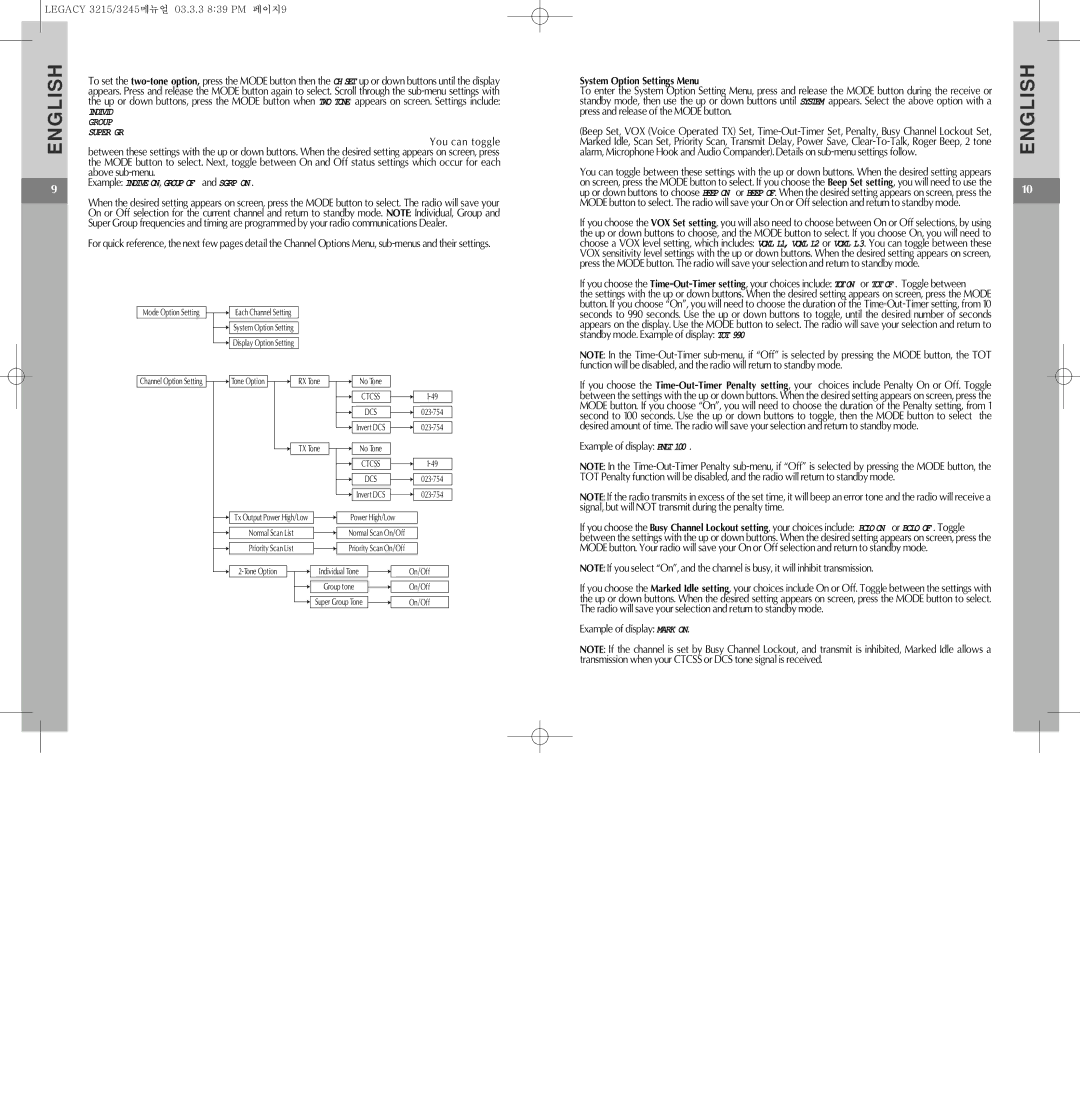
For quick reference, the next few pages detail the Channel Options Menu, sub-menus and their settings.
Mode Option Setting | Each Channel Setting | | | |
| System Option Setting | | | |
| Display Option Setting | | | |
Channel Option Setting | Tone Option | RX Tone | No Tone | |
| | | CTCSS | 1-49 |
| | | DCS | 023-754 |
| | | Invert DCS | 023-754 |
| | TX Tone | No Tone | |
| | | CTCSS | 1-49 |
| | | DCS | 023-754 |
| | | Invert DCS | 023-754 |
| Tx Output Power High/Low | Power High/Low | |
| Normal Scan List | | Normal Scan On/Off | |
| Priority Scan List | | Priority Scan On/Off | |
2-Tone Option | Individual Tone | On/Off |
| Group tone | On/Off |
| Super Group Tone | On/Off |
System Option Settings Menu
To enter the System Option Setting Menu, press and release the MODE button during the receive or standby mode, then use the up or down buttons until SYSTEM appears. Select the above option with a press and release of the MODE button.
(Beep Set, VOX (Voice Operated TX) Set, Time-Out-Timer Set, Penalty, Busy Channel Lockout Set, Marked Idle, Scan Set, Priority Scan, Transmit Delay, Power Save, Clear-To-Talk, Roger Beep, 2 tone alarm, Microphone Hook and Audio Compander). Details on sub-menu settings follow.
You can toggle between these settings with the up or down buttons. When the desired setting appears on screen, press the MODE button to select. If you choose the Beep Set setting, you will need to use the up or down buttons to choose BEEP ON or BEEP OF. When the desired setting appears on screen, press the MODE button to select. The radio will save your On or Off selection and return to standby mode.
If you choose the VOX Set setting, you will also need to choose between On or Off selections, by using the up or down buttons to choose, and the MODE button to select. If you choose On, you will need to choose a VOX level setting, which includes: VOXL L1, VOXL L2 or VOXL L3. You can toggle between these VOX sensitivity level settings with the up or down buttons. When the desired setting appears on screen, press the MODE button. The radio will save your selection and return to standby mode.
If you choose the Time-Out-Timer setting, your choices include: TOTON or TOT OF . Toggle between
the settings with the up or down buttons. When the desired setting appears on screen, press the MODE button. If you choose “On”, you will need to choose the duration of the Time-Out-Timer setting, from 10 seconds to 990 seconds. Use the up or down buttons to toggle, until the desired number of seconds appears on the display. Use the MODE button to select. The radio will save your selection and return to standby mode. Example of display: TOT 990
NOTE: In the Time-Out-Timer sub-menu, if “Off” is selected by pressing the MODE button, the TOT function will be disabled, and the radio will return to standby mode.
If you choose the Time-Out-Timer Penalty setting, your choices include Penalty On or Off. Toggle between the settings with the up or down buttons. When the desired setting appears on screen, press the MODE button. If you choose “On”, you will need to choose the duration of the Penalty setting, from 1 second to 100 seconds. Use the up or down buttons to toggle, then the MODE button to select the desired amount of time. The radio will save your selection and return to standby mode.
Example of display: PNLT 100 .
NOTE: In the Time-Out-Timer Penalty sub-menu, if “Off” is selected by pressing the MODE button, the TOT Penalty function will be disabled, and the radio will return to standby mode.
NOTE: If the radio transmits in excess of the set time, it will beep an error tone and the radio will receive a signal, but will NOT transmit during the penalty time.
If you choose the Busy Channel Lockout setting, your choices include: BCLO ON or BCLO OF . Toggle between the settings with the up or down buttons. When the desired setting appears on screen, press the MODE button. Your radio will save your On or Off selection and return to standby mode.
NOTE: If you select “On”, and the channel is busy, it will inhibit transmission.
If you choose the Marked Idle setting, your choices include On or Off. Toggle between the settings with the up or down buttons. When the desired setting appears on screen, press the MODE button to select. The radio will save your selection and return to standby mode.
Example of display: MARK ON.
NOTE: If the channel is set by Busy Channel Lockout, and transmit is inhibited, Marked Idle allows a transmission when your CTCSS or DCS tone signal is received.

