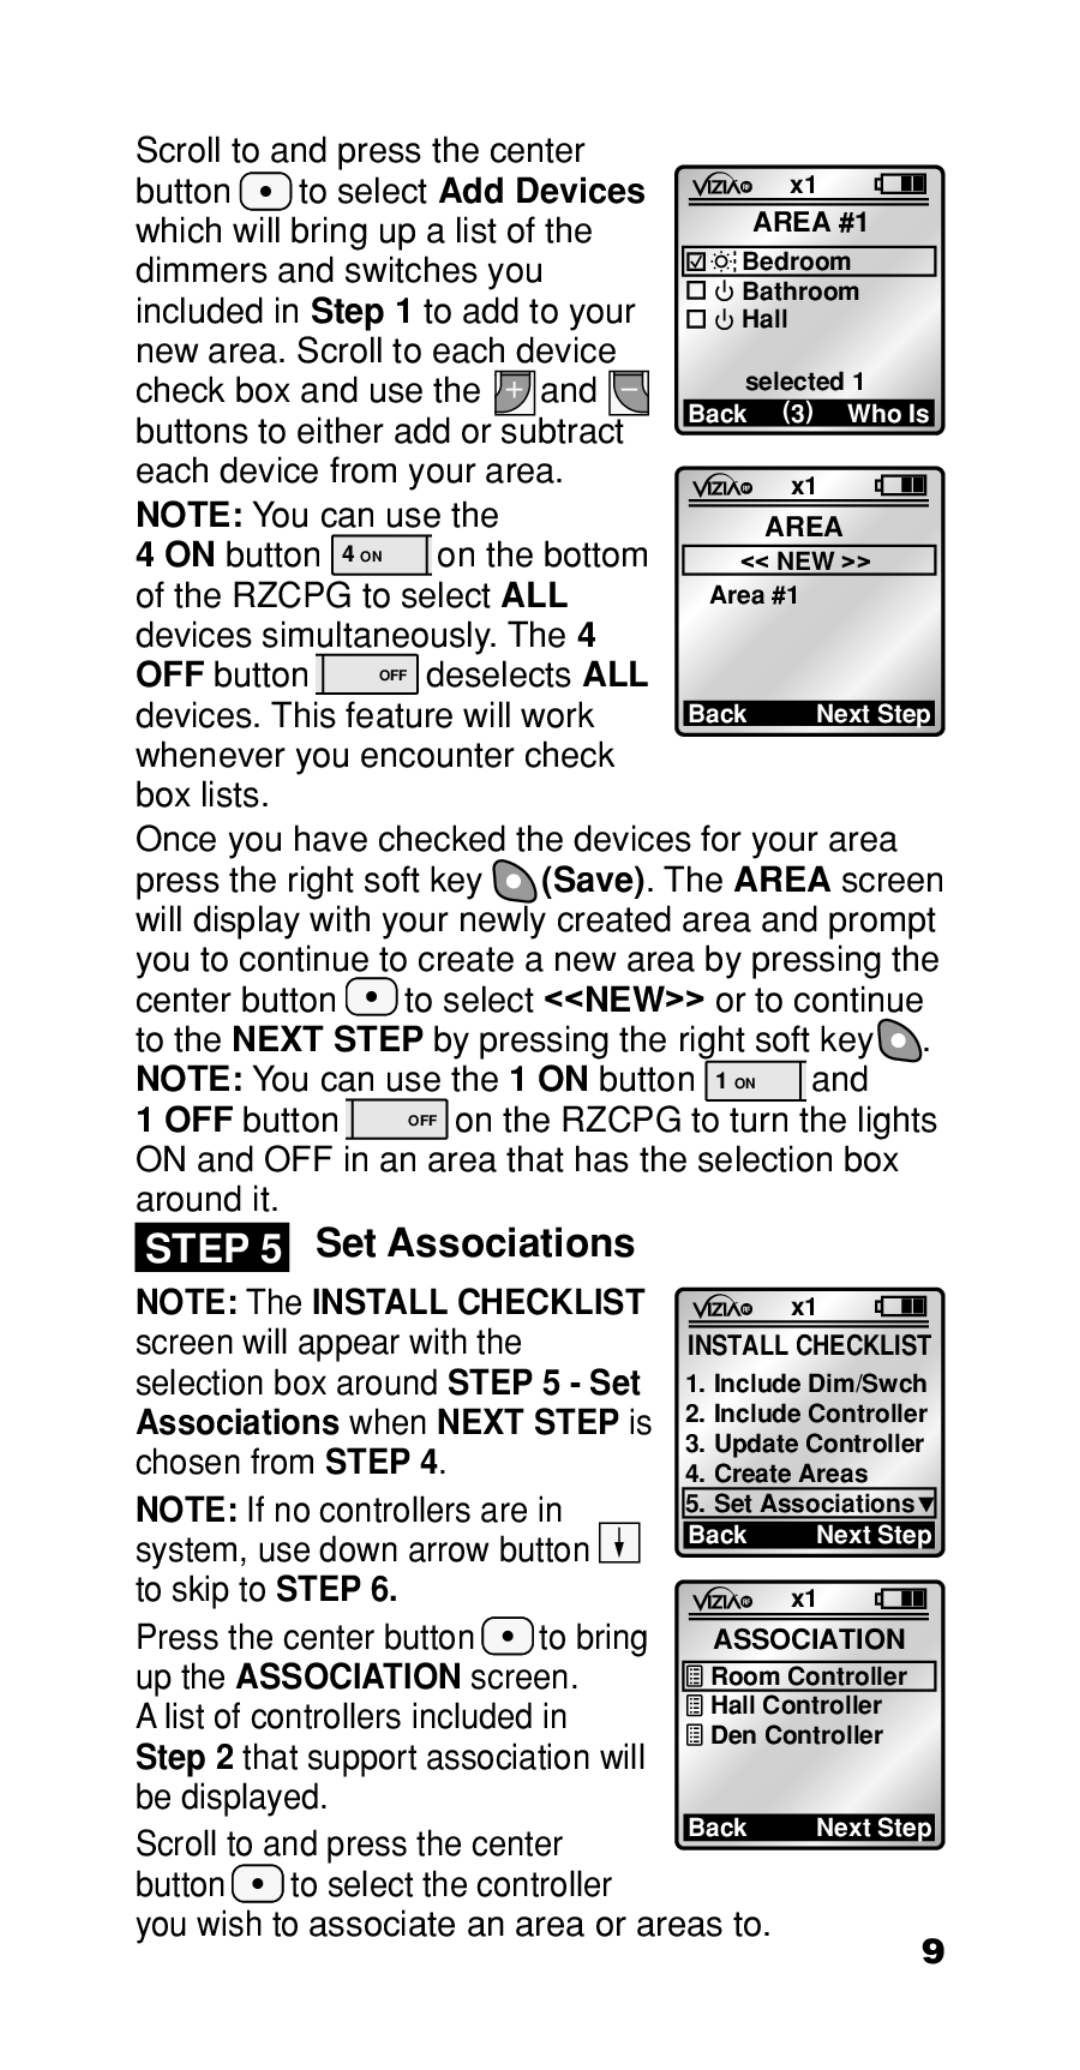
Scroll to and press the center button ![]() to select Add Devices which will bring up a list of the dimmers and switches you included in Step 1 to add to your new area. Scroll to each device check box and use the
to select Add Devices which will bring up a list of the dimmers and switches you included in Step 1 to add to your new area. Scroll to each device check box and use the ![]()
![]() and
and ![]() buttons to either add or subtract each device from your area.
buttons to either add or subtract each device from your area.
NOTE: You can use the
4 ON button | 4 ON | on the bottom |
of the RZCPG to select ALL | ||
devices simultaneously. The 4 | ||
OFF button | OFF | deselects ALL |
devices. This feature will work whenever you encounter check box lists.
x1
AREA #1
![]()
![]()
![]()
![]()
![]() Bedroom
Bedroom
Bathroom
Hall
selected 1 Back (3) Who Is
x1
AREA
<<NEW >> Area #1
Back | Next Step |
Once you have checked the devices for your area press the right soft key ![]() (Save). The AREA screen will display with your newly created area and prompt you to continue to create a new area by pressing the center button
(Save). The AREA screen will display with your newly created area and prompt you to continue to create a new area by pressing the center button ![]() to select <<NEW>> or to continue to the Next step by pressing the right soft key
to select <<NEW>> or to continue to the Next step by pressing the right soft key ![]() .
.
NOTE: You can use the 1 ON button 1 ON | and | |||||||||||
1 OFF button | OFF on the RZCPG to turn the lights | |||||||||||
ON and OFF in an area that has the selection box | ||||||||||||
around it. | Set Associations |
|
|
|
|
|
|
|
| |||
STEP 5 |
|
|
|
|
|
|
|
| ||||
NOTE: The INSTALL CHECKLIST |
| x1 |
|
| ||||||||
screen will appear with the |
|
|
|
|
|
|
|
|
| |||
|
|
| ||||||||||
| INSTALL CHECKLIST | |||||||||||
selection box around STEP 5 - Set | 1. Include Dim/Swch | |||||||||||
Associations when NEXT STEP is | 2. Include Controller | |||||||||||
chosen from STEP 4. |
| 3. Update Controller | ||||||||||
| 4. Create Areas | |||||||||||
NOTE: If no controllers are in | 5. Set Associations |
| ||||||||||
system, use down arrow button | Back | Next Step | ||||||||||
|
|
|
|
|
|
|
| |||||
to skip to STEP 6. |
|
|
| x1 |
|
|
|
|
| |||
Press the center button | to bring |
|
|
|
|
|
|
|
| |||
|
|
|
|
|
|
| ||||||
ASSOCIATION | ||||||||||||
up the ASSOCIATION screen. |
|
| ||||||||||
Room Controller |
| |||||||||||
A list of controllers included in | Hall Controller |
| ||||||||||
Den Controller | ||||||||||||
Step 2 that support association will | ||||||||||||
|
|
|
|
|
|
|
| |||||
be displayed. |
|
| Back | Next Step | ||||||||
Scroll to and press the center | ||||||||||||
|
|
|
|
|
|
|
| |||||
button | to select the controller |
|
|
|
|
|
|
|
| |||
you wish to associate an area or areas to. | 9 | |||||||||||
|
|
|
|
| ||||||||