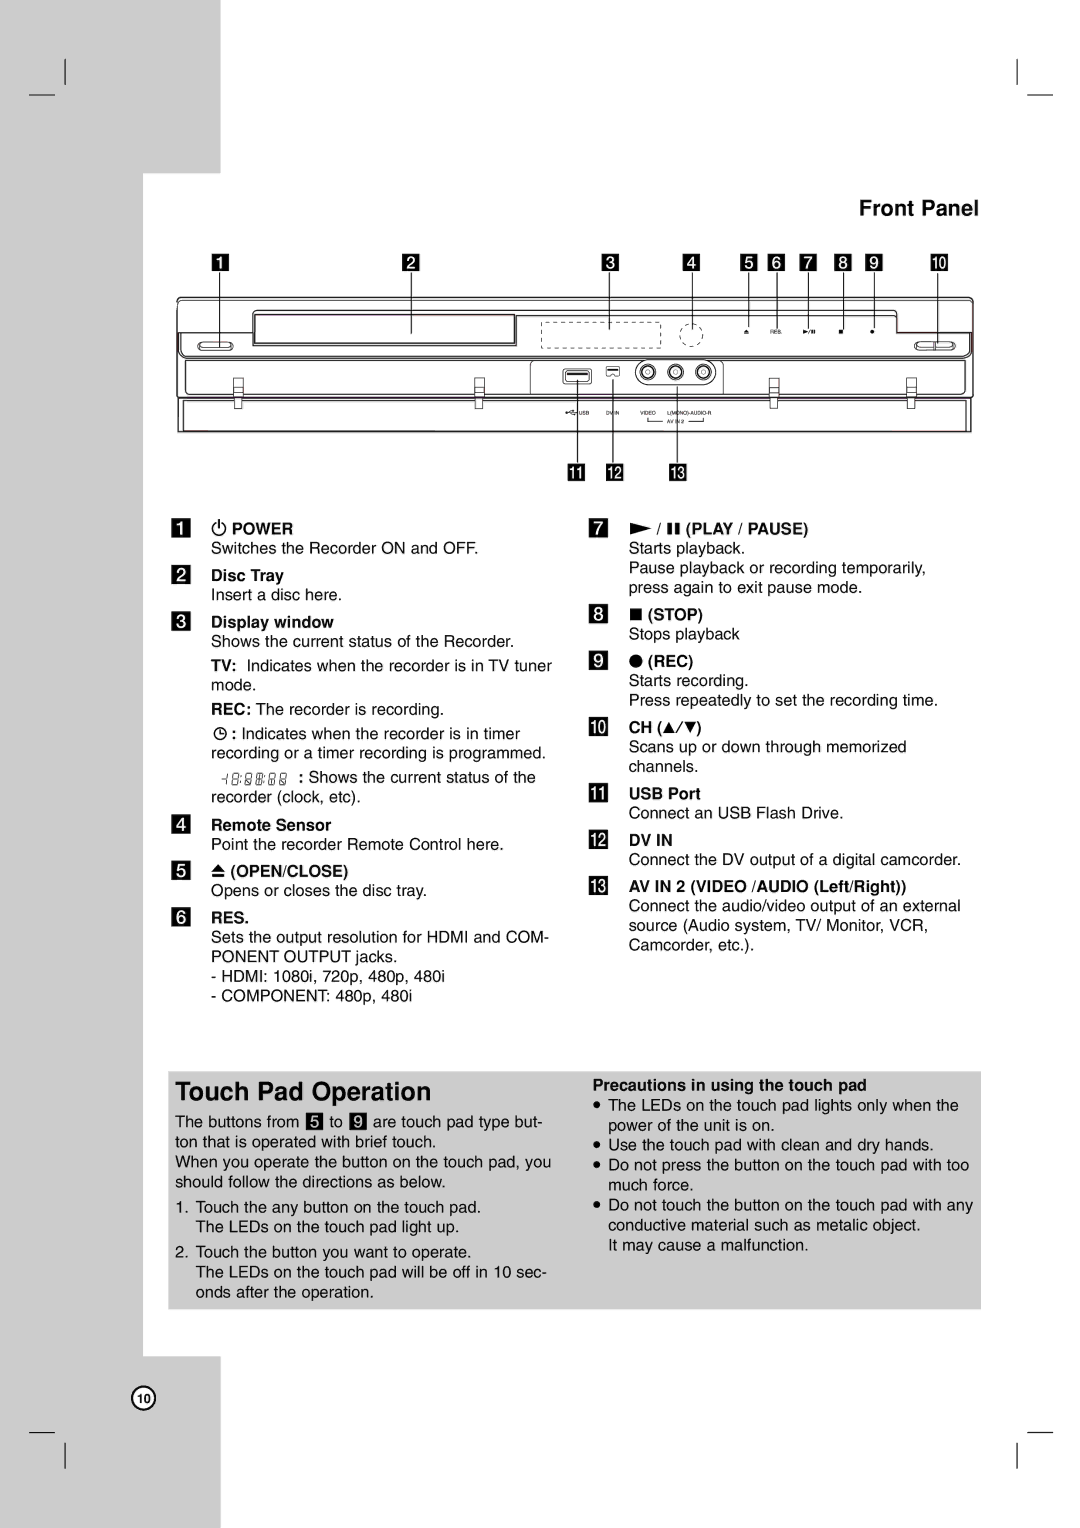
Front Panel
a | b | c | d e f g h i j |
k l m
a1 POWER
Switches the Recorder ON and OFF.
bDisc Tray
Insert a disc here.
cDisplay window
Shows the current status of the Recorder.
TV: Indicates when the recorder is in TV tuner mode.
REC: The recorder is recording.
![]() : Indicates when the recorder is in timer recording or a timer recording is programmed.
: Indicates when the recorder is in timer recording or a timer recording is programmed.
![]() : Shows the current status of the recorder (clock, etc).
: Shows the current status of the recorder (clock, etc).
dRemote Sensor
Point the recorder Remote Control here.
eZ (OPEN/CLOSE)
Opens or closes the disc tray.
fRES.
Sets the output resolution for HDMI and COM- PONENT OUTPUT jacks.
-HDMI: 1080i, 720p, 480p, 480i
-COMPONENT: 480p, 480i
gN / X (PLAY / PAUSE) Starts playback.
Pause playback or recording temporarily, press again to exit pause mode.
hx (STOP) Stops playback
iz (REC)
Starts recording.
Press repeatedly to set the recording time.
jCH (v/V)
Scans up or down through memorized channels.
kUSB Port
Connect an USB Flash Drive.
lDV IN
Connect the DV output of a digital camcorder.
mAV IN 2 (VIDEO /AUDIO (Left/Right)) Connect the audio/video output of an external source (Audio system, TV/ Monitor, VCR, Camcorder, etc.).
Touch Pad Operation | Precautions in using the touch pad | |
The LEDs on the touch pad lights only when the | ||
The buttons from e to i are touch pad type but- | ||
power of the unit is on. | ||
ton that is operated with brief touch. | Use the touch pad with clean and dry hands. | |
When you operate the button on the touch pad, you | Do not press the button on the touch pad with too | |
should follow the directions as below. | much force. | |
1. Touch the any button on the touch pad. | Do not touch the button on the touch pad with any | |
The LEDs on the touch pad light up. | conductive material such as metalic object. | |
2. Touch the button you want to operate. | It may cause a malfunction. | |
| ||
The LEDs on the touch pad will be off in 10 sec- |
| |
onds after the operation. |
| |
|
|
10
