Hookup and Settings
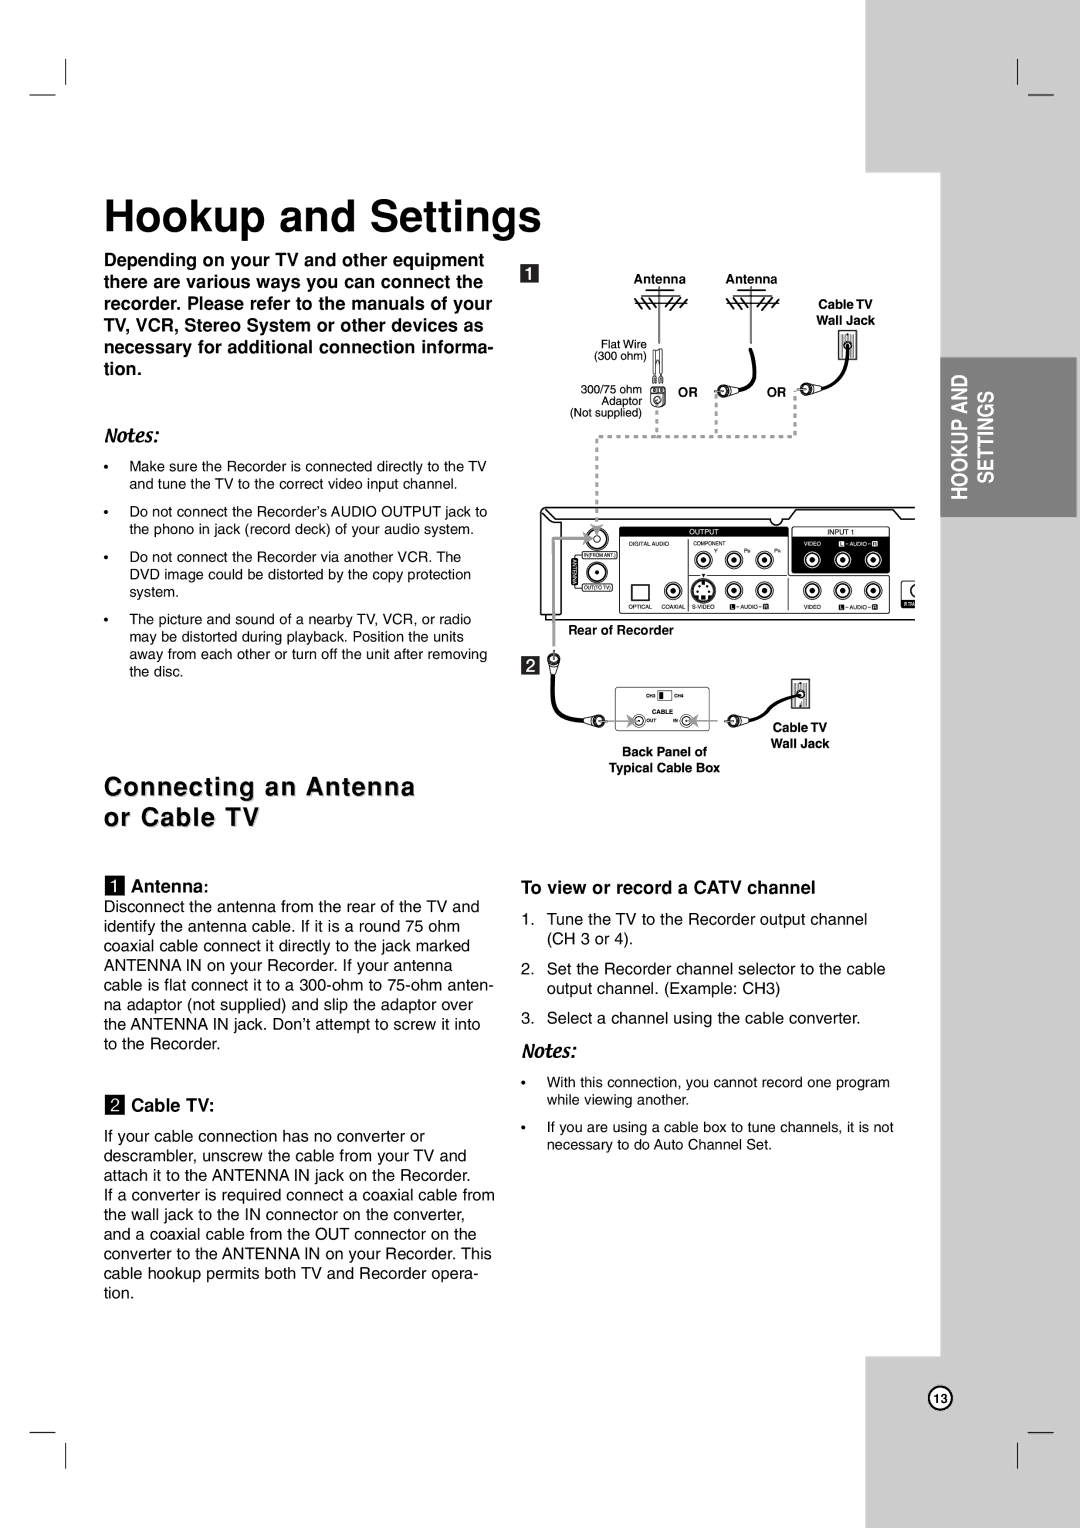
Depending on your TV and other equipment there are various ways you can connect the recorder. Please refer to the manuals of your TV, VCR, Stereo System or other devices as necessary for additional connection informa- tion.
Notes:
•Make sure the Recorder is connected directly to the TV and tune the TV to the correct video input channel.
•Do not connect the Recorder’s AUDIO OUTPUT jack to the phono in jack (record deck) of your audio system.
•Do not connect the Recorder via another VCR. The DVD image could be distorted by the copy protection system.
•The picture and sound of a nearby TV, VCR, or radio may be distorted during playback. Position the units away from each other or turn off the unit after removing the disc.
a | Antenna | Antenna | ||||||||||
|
|
|
|
|
|
|
|
|
|
|
|
|
|
|
|
|
|
|
|
|
|
|
|
|
|
|
|
|
|
|
|
|
|
|
|
|
|
|
OR ![]() OR
OR
Rear of Recorder
b ![]()
HOOKUP AND SETTINGS
Connecting an Antenna or Cable TV
aAntenna:
Disconnect the antenna from the rear of the TV and identify the antenna cable. If it is a round 75 ohm coaxial cable connect it directly to the jack marked ANTENNA IN on your Recorder. If your antenna cable is flat connect it to a
b Cable TV:
If your cable connection has no converter or descrambler, unscrew the cable from your TV and attach it to the ANTENNA IN jack on the Recorder.
If a converter is required connect a coaxial cable from the wall jack to the IN connector on the converter, and a coaxial cable from the OUT connector on the converter to the ANTENNA IN on your Recorder. This cable hookup permits both TV and Recorder opera- tion.
To view or record a CATV channel
1.Tune the TV to the Recorder output channel (CH 3 or 4).
2.Set the Recorder channel selector to the cable output channel. (Example: CH3)
3.Select a channel using the cable converter.
Notes:
•With this connection, you cannot record one program while viewing another.
•If you are using a cable box to tune channels, it is not necessary to do Auto Channel Set.
13
