3
60
1/2 X
2
2
70
3/8” BLACK 81 LOCKWASHER
85
3/8 X 1” BUTTON HEAD 87
32
71
77
54
NOTE: TIGHTEN BOTH AT
THE SAME TIME!
34
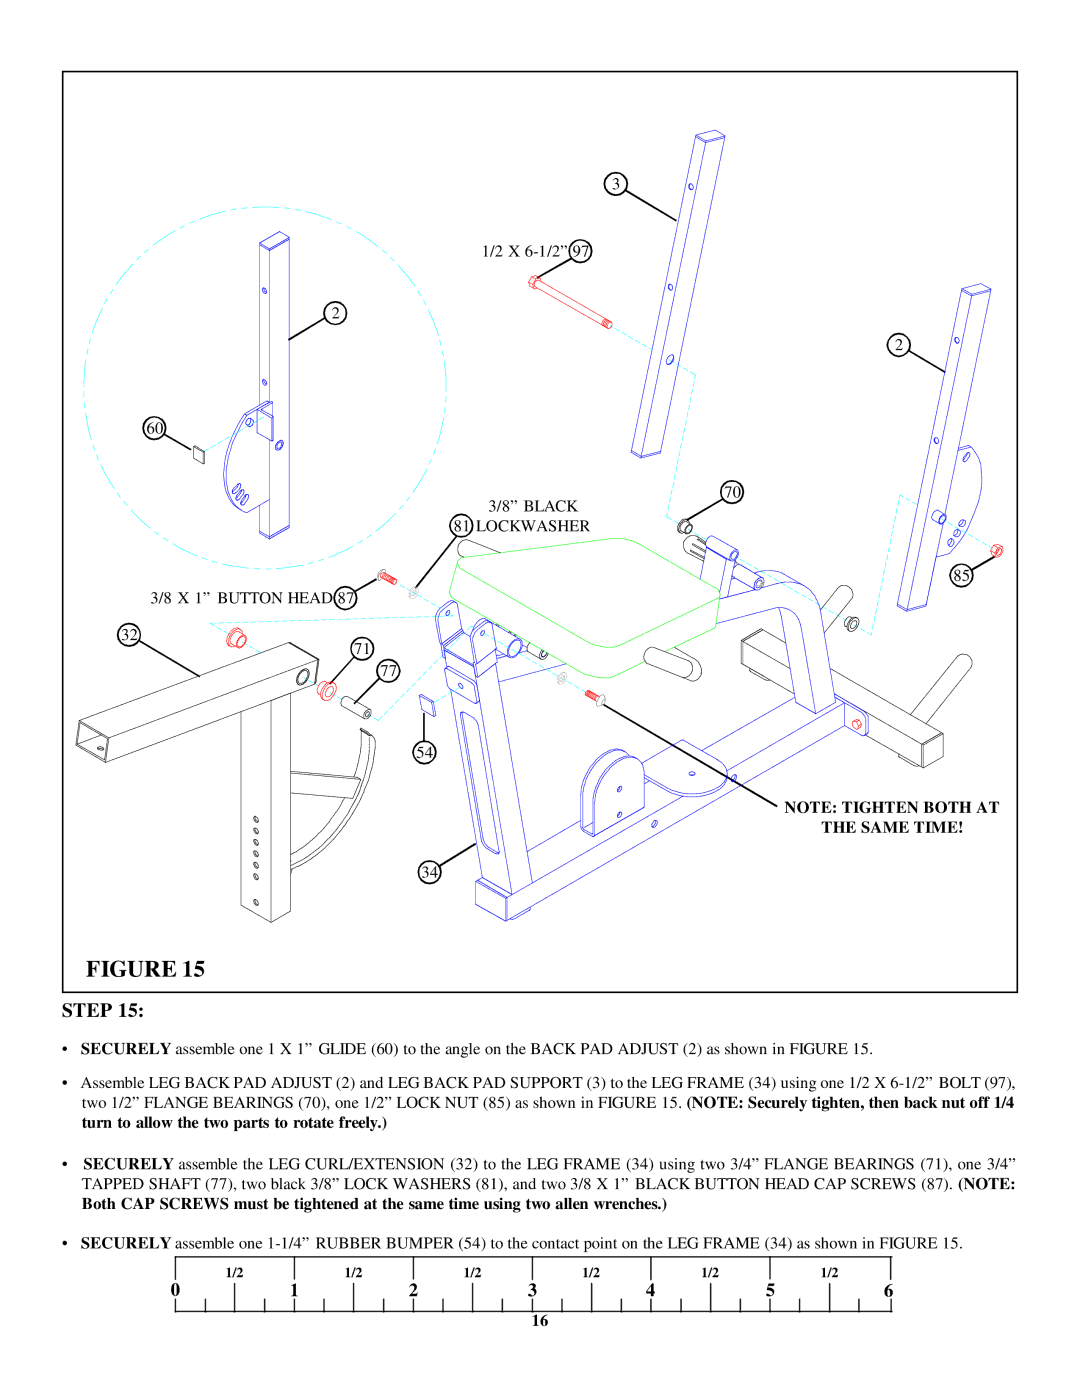
FIGURE 15
STEP 15:
•SECURELY assemble one 1 X 1” GLIDE (60) to the angle on the BACK PAD ADJUST (2) as shown in FIGURE 15.
•Assemble LEG BACK PAD ADJUST (2) and LEG BACK PAD SUPPORT (3) to the LEG FRAME (34) using one 1/2 X
•SECURELY assemble the LEG CURL/EXTENSION (32) to the LEG FRAME (34) using two 3/4” FLANGE BEARINGS (71), one 3/4” TAPPED SHAFT (77), two black 3/8” LOCK WASHERS (81), and two 3/8 X 1” BLACK BUTTON HEAD CAP SCREWS (87). (NOTE:
Both CAP SCREWS must be tightened at the same time using two allen wrenches.)
•SECURELY assemble one
1/2
1/2
1/2
1/2
1/2
1/2
0
1
2
3
4
5
6
16
