OPERATION | ||
|
|
|
To Mount a
The Spindle must be located in the UPPER mounting hole.
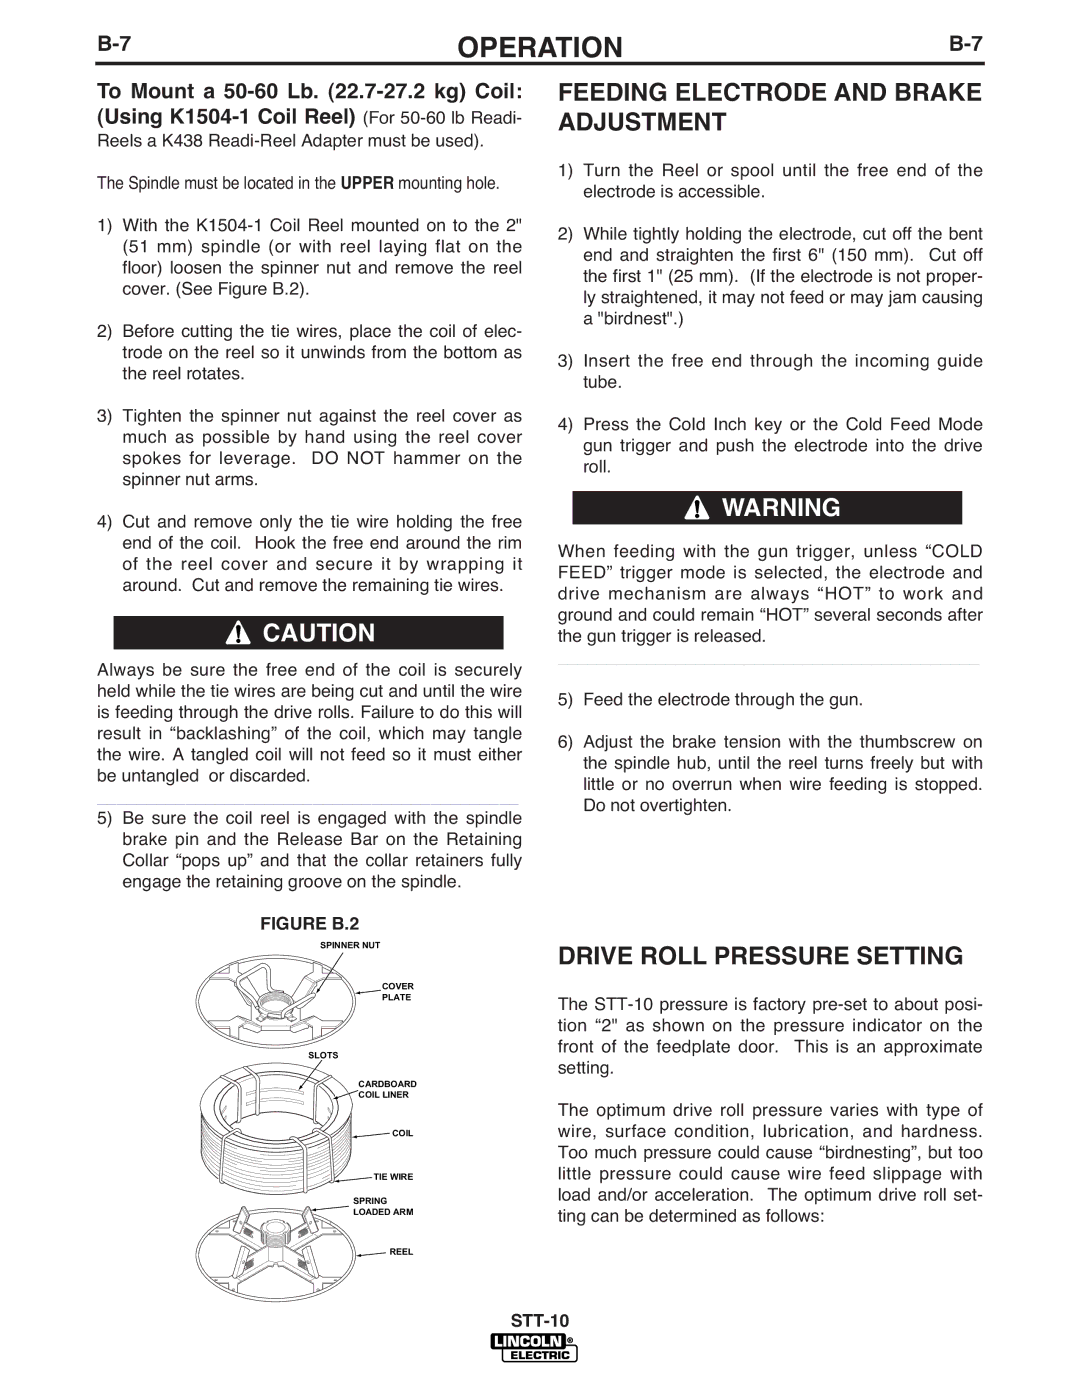
1)With the
2)Before cutting the tie wires, place the coil of elec- trode on the reel so it unwinds from the bottom as the reel rotates.
3)Tighten the spinner nut against the reel cover as much as possible by hand using the reel cover spokes for leverage. DO NOT hammer on the spinner nut arms.
4)Cut and remove only the tie wire holding the free end of the coil. Hook the free end around the rim of the reel cover and secure it by wrapping it around. Cut and remove the remaining tie wires.
![]() CAUTION
CAUTION
Always be sure the free end of the coil is securely held while the tie wires are being cut and until the wire is feeding through the drive rolls. Failure to do this will result in “backlashing” of the coil, which may tangle the wire. A tangled coil will not feed so it must either be untangled or discarded.
___________________________________________
5)Be sure the coil reel is engaged with the spindle brake pin and the Release Bar on the Retaining Collar “pops up” and that the collar retainers fully engage the retaining groove on the spindle.
FIGURE B.2
SPINNER NUT
COVER
PLATE
SLOTS
CARDBOARD
![]() COIL LINER
COIL LINER
![]() COIL
COIL
![]() TIE WIRE
TIE WIRE
SPRING
LOADED ARM
![]() REEL
REEL
FEEDING ELECTRODE AND BRAKE ADJUSTMENT
1)Turn the Reel or spool until the free end of the electrode is accessible.
2)While tightly holding the electrode, cut off the bent end and straighten the first 6" (150 mm). Cut off the first 1" (25 mm). (If the electrode is not proper- ly straightened, it may not feed or may jam causing a "birdnest".)
3)Insert the free end through the incoming guide tube.
4)Press the Cold Inch key or the Cold Feed Mode gun trigger and push the electrode into the drive roll.
![]() WARNING
WARNING
When feeding with the gun trigger, unless “COLD FEED” trigger mode is selected, the electrode and drive mechanism are always “HOT” to work and ground and could remain “HOT” several seconds after the gun trigger is released.
___________________________________________
5)Feed the electrode through the gun.
6)Adjust the brake tension with the thumbscrew on the spindle hub, until the reel turns freely but with little or no overrun when wire feeding is stopped. Do not overtighten.
DRIVE ROLL PRESSURE SETTING
The
The optimum drive roll pressure varies with type of wire, surface condition, lubrication, and hardness. Too much pressure could cause “birdnesting”, but too little pressure could cause wire feed slippage with load and/or acceleration. The optimum drive roll set- ting can be determined as follows:
