2 | LEARNING TO WELD | 2 |
|
|
|
LEARNING TO WELD
Welding is a skill that can only be learned by practic- ing. No one can become an accomplished welder simply by reading about it. The following pages will help the inexperienced operator to understand the basics about wire welding and provide guidance to help develop this skill. For more detailed information, order a copy of “New Lessons in Arc Welding”.
THE ARC-WELDING CIRCUIT
The operators knowledge of arc welding must go beyond the arc itself. The operator must know how to control the arc, and this requires a knowledge of the welding circuit and the equipment that provides the electric current used in the arc. Figure 1 illustrates the welding circuit for a typical welding machine. The cir- cuit begins where the gun cable is attached to the welding machine. Current flows through the gun cable, gun, and contact tip, to the wire and across the arc. On the work side of the arc, current flows through the base metal to the work cable and back to the welding machine. This circuit must be complete for the current to flow. Loose or poor connections anywhere in the circuit will rob voltage from the arc and cause it to become erratic.
This machine’s welding circuit has a voltage output of 32 volts DC maximum. This voltage is quite low and is only present when the gun trigger is pressed.
FIGURE 1
GUN and CABLE
WORKPIECEARC
WORK CLAMP
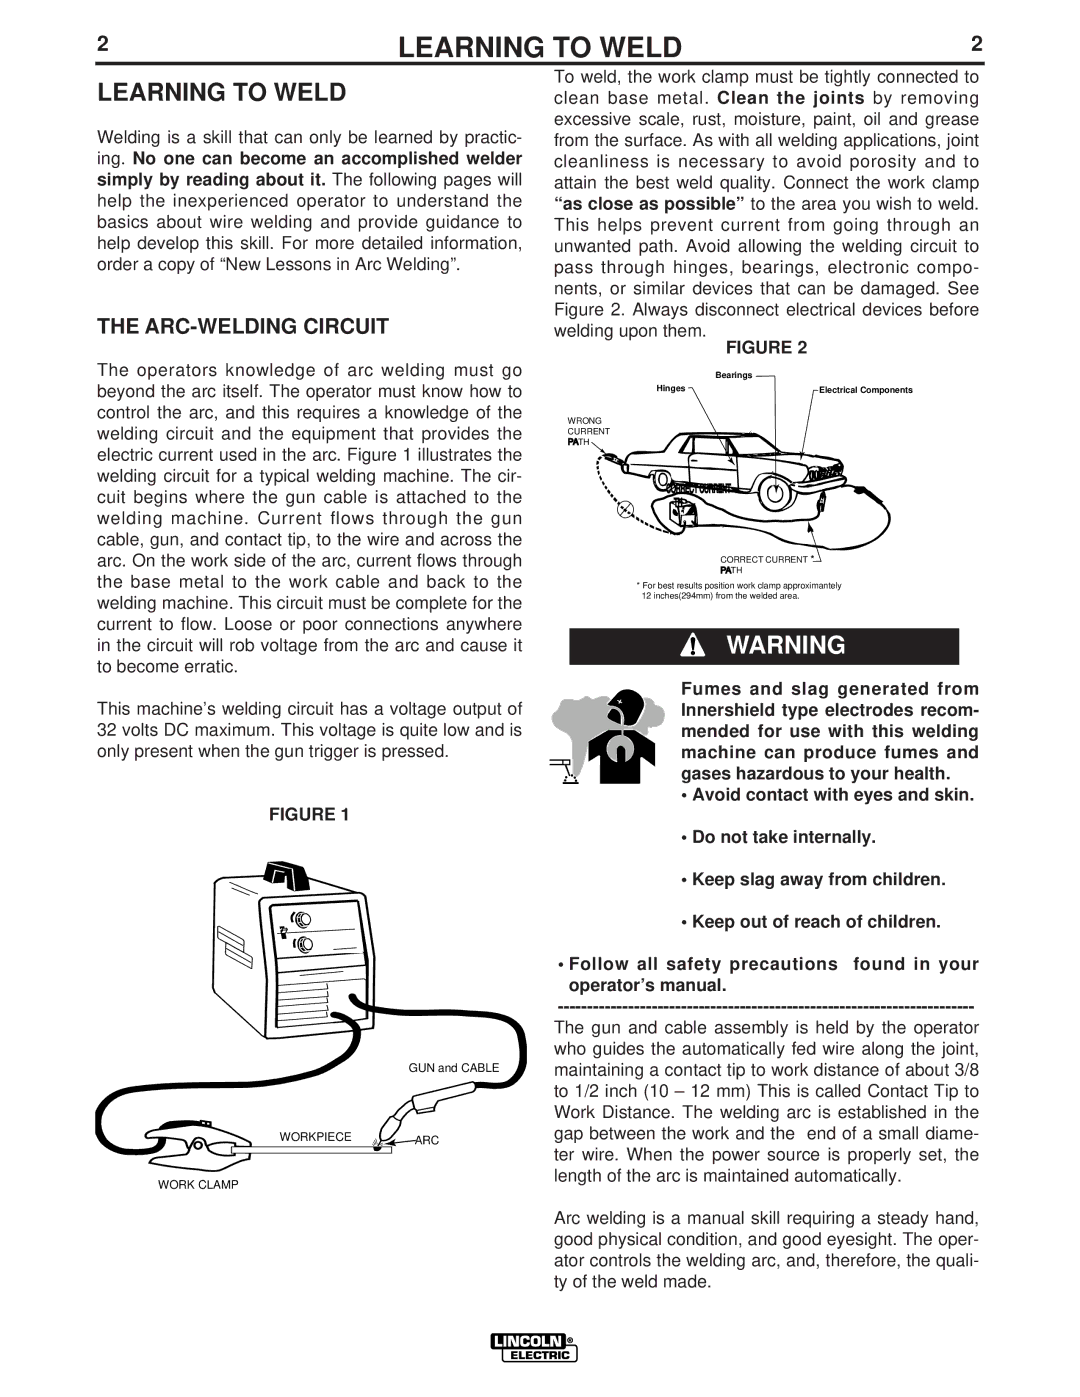
To weld, the work clamp must be tightly connected to clean base metal. Clean the joints by removing excessive scale, rust, moisture, paint, oil and grease from the surface. As with all welding applications, joint cleanliness is necessary to avoid porosity and to attain the best weld quality. Connect the work clamp “as close as possible” to the area you wish to weld. This helps prevent current from going through an unwanted path. Avoid allowing the welding circuit to pass through hinges, bearings, electronic compo- nents, or similar devices that can be damaged. See Figure 2. Always disconnect electrical devices before welding upon them.
FIGURE 2
Bearings
Hinges | Electrical Components |
WRONG
CURRENT
PATH
CORRECT CURRENT |
TH |
CORRECT CURRENT *
PATH
*For best results position work clamp approximantely 12 inches(294mm) from the welded area.
WARNING
Fumes and slag generated from Innershield type electrodes recom- mended for use with this welding machine can produce fumes and gases hazardous to your health.
•Avoid contact with eyes and skin.
•Do not take internally.
•Keep slag away from children.
•Keep out of reach of children.
•Follow all safety precautions found in your operator’s manual.
The gun and cable assembly is held by the operator who guides the automatically fed wire along the joint, maintaining a contact tip to work distance of about 3/8 to 1/2 inch (10 – 12 mm) This is called Contact Tip to Work Distance. The welding arc is established in the gap between the work and the end of a small diame- ter wire. When the power source is properly set, the length of the arc is maintained automatically.
Arc welding is a manual skill requiring a steady hand, good physical condition, and good eyesight. The oper- ator controls the welding arc, and, therefore, the quali- ty of the weld made.