D-2 MAINTENANCE
5.Adjust the gas nozzle as appropriate for the GMAW process to be used. Typically, the contact tip end should be flush to .12" (3.2 mm) extended for the
LINER REMOVAL AND
REPLACEMENT
NOTE: Changing the liner for a different wire size requires replacement of the gas diffuser per the table below to properly secure the different liner.
|
|
| Fixed | Adjustable |
|
|
| Nozzle Gas | Nozzle Gas |
| Replacement | Size Stencilled | Diffuser | Diffuser |
Diameter of | Liner Part | on End of | Part No. | Part No. |
Electrodes Used | Number | Liner Bushing | (and Stencil) | (and Stencil) |
.030" (0.8 mm) | ||||
|
|
|
| |
.045" (1.2 mm) | ||||
|
|
|
| |
3/64" Aluminum | (Plastic Liner) | |||
(1.2 mm) |
|
|
|
|
|
|
|
|
|
LINER REMOVAL, INSTALLATION,
AND TRIMMING INSTRUCTIONS
FOR MAGNUM 250SP
NOTICE: The variation in cable lengths pre- vents the interchangeability of liners between guns. Once a liner has been cut for a particular gun, it should not be installed in another gun unless it can meet the liner cutoff length requirement. Liners are shipped with the jacket of the liner extended the proper
amount.
1.Remove the gas nozzle (and nozzle insulator, if used) to locate the set screw in the gas diffuser which is used to hold the old liner in place. Loosen the set screw with a 5/64" (2.0 mm) Allen wrench.
2.Remove the gas diffuser from the gun tube.
3.Lay the gun and cable
IDEALARC SP-255
out straight on a flat surface. Remove the liner nut from the
4.Insert a new untrimmed liner into the connector end of the cable. Be sure the liner busing is stencilled appropriately for the wire size being used.
5.Fully seat the liner bushing into the con- nector. finger tighten the liner nut onto the cable connector. The gas diffuser, at this time, should not be installed onto the end of the gun tube.
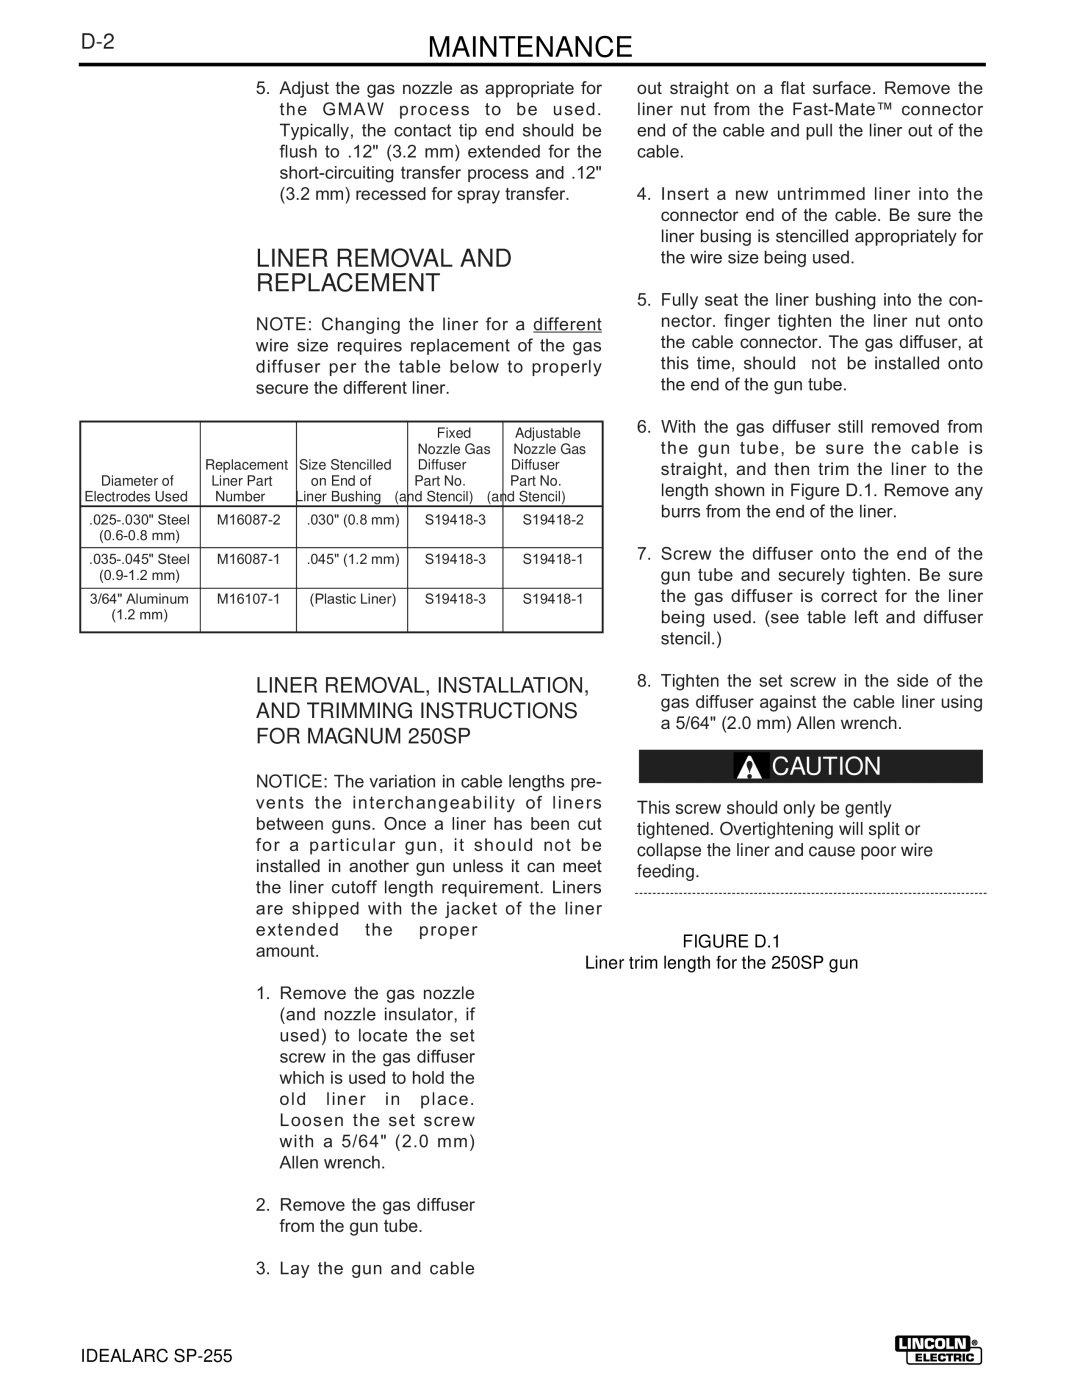
6.With the gas diffuser still removed from the gun tube, be sure the cable is straight, and then trim the liner to the length shown in Figure D.1. Remove any burrs from the end of the liner.
7.Screw the diffuser onto the end of the gun tube and securely tighten. Be sure the gas diffuser is correct for the liner being used. (see table left and diffuser stencil.)
8.Tighten the set screw in the side of the gas diffuser against the cable liner using a 5/64" (2.0 mm) Allen wrench.
![]() CAUTION
CAUTION
This screw should only be gently tightened. Overtightening will split or collapse the liner and cause poor wire feeding.