Chapter 4 | Configuration Using the Console Interface |
File Management
The File Management screen allows you to upload or download files, such as the startup configuration, boot, or image file, using a TFTP server.
Select Edit to change the settings. When your changes are complete, press the Esc key to return to the Action menu, and select Execute to upload or download the designated file. After you download a new image file, the device should be rebooted.
If you are downloading a new boot image, please follow these steps:
1.Download the new boot code. DO NOT RESET THE DEVICE.
2.Download the new software image.
3.Reset the device now.
NOTE: When downloading a configuration file, be sure that it is a valid configuration file. If you have edited the file, ensure that only valid entries have been configured.
Restore System Default Settings
To restore the Switch back to the factory default settings, select Restore System Default Settings and press the Enter key. You will be asked if you want to continue. Press the y key to restore the Switch’s default settings, or press the n key to cancel.
Restore Default
Reboot System
Select Reboot System and press the Enter key if you want to restart the Switch. You will be asked if you want to continue. Press the y key to reboot the Switch, or press the n key to cancel. After the Switch has rebooted, the Switch Main Menu screen will appear.
Reboot System
Back to Main Menu
Select Back to Main Menu if you want to return to the main menu.
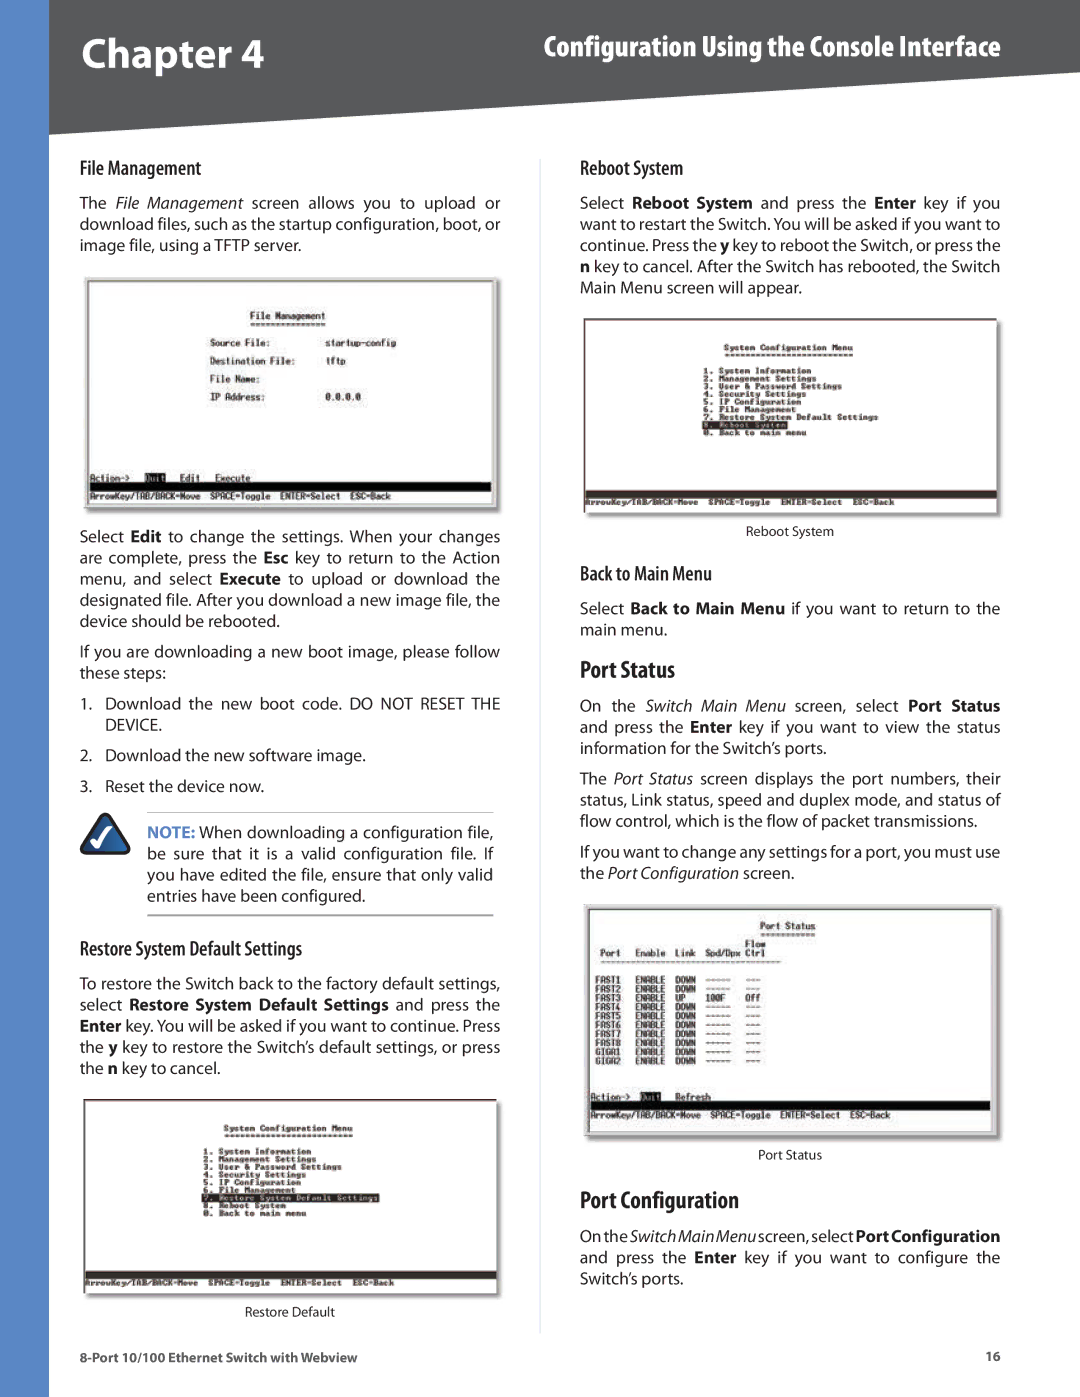
Port Status
On the Switch Main Menu screen, select Port Status and press the Enter key if you want to view the status information for the Switch’s ports.
The Port Status screen displays the port numbers, their status, Link status, speed and duplex mode, and status of flow control, which is the flow of packet transmissions.
If you want to change any settings for a port, you must use the Port Configuration screen.
Port Status
Port Configuration
OntheSwitchMainMenuscreen,selectPortConfiguration and press the Enter key if you want to configure the Switch’s ports.
16