Maintaining Your Appliance | 31 |
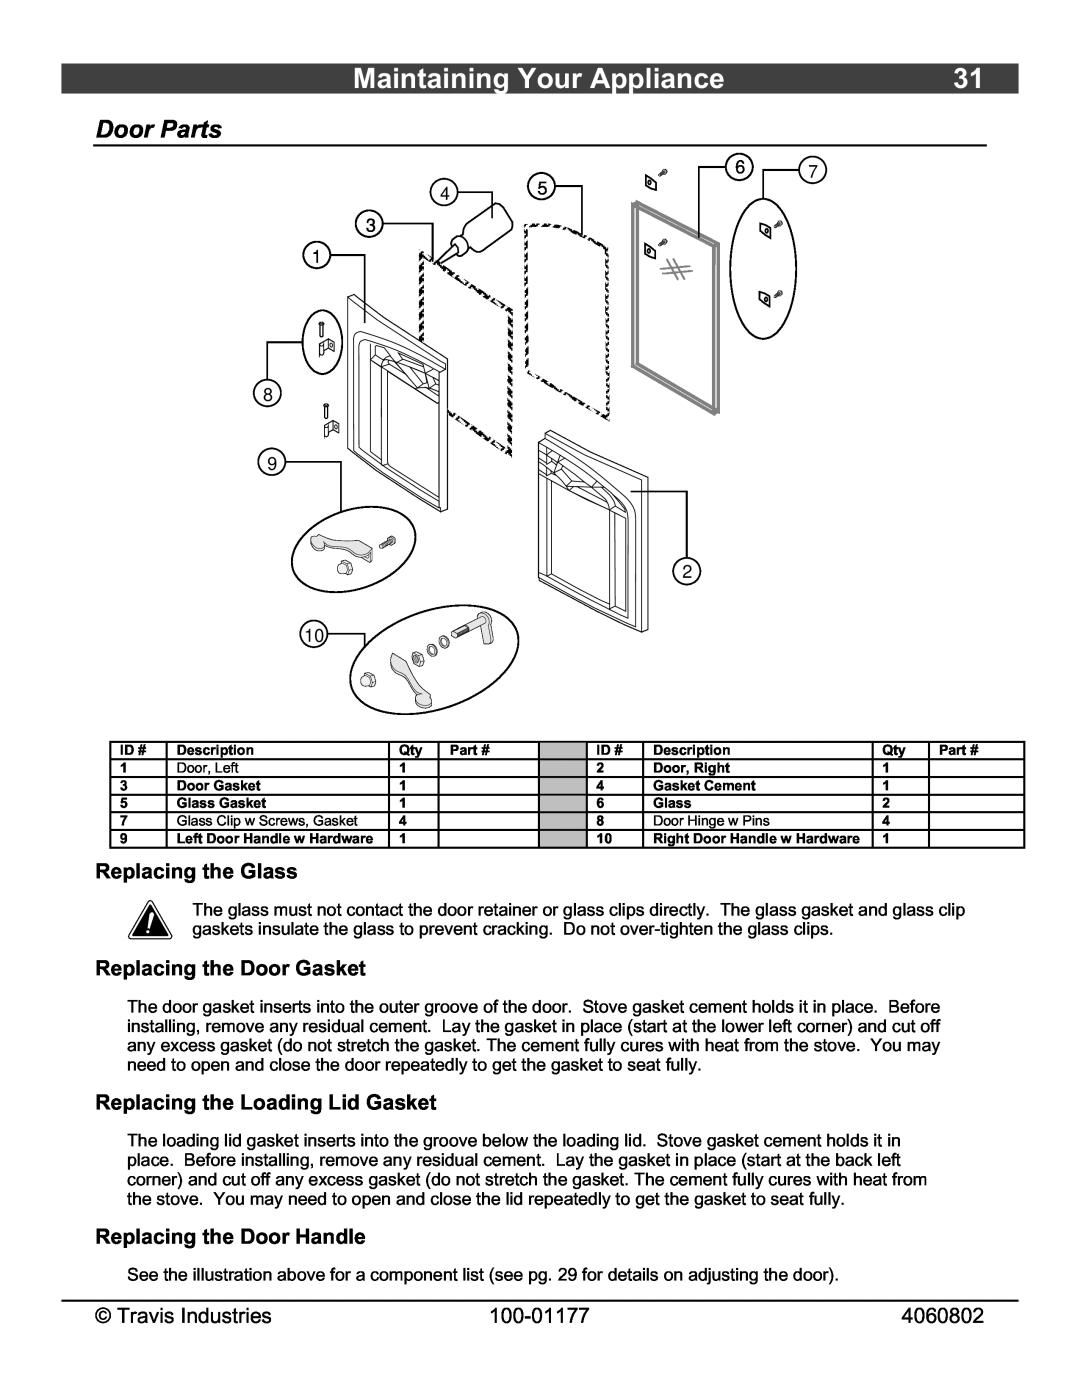
Door Parts
4
3
1
5
6
7
8
9
2
10
ID # | Description | Qty | Part # |
| ID # | Description | Qty | Part # |
1 | Door, Left | 1 |
|
| 2 | Door, Right | 1 |
|
3 | Door Gasket | 1 |
|
| 4 | Gasket Cement | 1 |
|
5 | Glass Gasket | 1 |
|
| 6 | Glass | 2 |
|
7 | Glass Clip w Screws, Gasket | 4 |
|
| 8 | Door Hinge w Pins | 4 |
|
9 | Left Door Handle w Hardware | 1 |
|
| 10 | Right Door Handle w Hardware | 1 |
|
Replacing the Glass
The glass must not contact the door retainer or glass clips directly. The glass gasket and glass clip gaskets insulate the glass to prevent cracking. Do not
Replacing the Door Gasket
The door gasket inserts into the outer groove of the door. Stove gasket cement holds it in place. Before installing, remove any residual cement. Lay the gasket in place (start at the lower left corner) and cut off any excess gasket (do not stretch the gasket. The cement fully cures with heat from the stove. You may need to open and close the door repeatedly to get the gasket to seat fully.
Replacing the Loading Lid Gasket
The loading lid gasket inserts into the groove below the loading lid. Stove gasket cement holds it in place. Before installing, remove any residual cement. Lay the gasket in place (start at the back left corner) and cut off any excess gasket (do not stretch the gasket. The cement fully cures with heat from the stove. You may need to open and close the lid repeatedly to get the gasket to seat fully.
Replacing the Door Handle
See the illustration above for a component list (see pg. 29 for details on adjusting the door).
© Travis Industries | 4060802 |