10 | Stove Installation (for qualified installers only) |
Bypass Handle Installation
See Figure 4 for details on installing the bypass handle.
Line up the set screws on the bypass handle with the dimples on the bypass shaft. Tighten with the included 1/8” hex wrench.
1/8" Hex
Figure 4
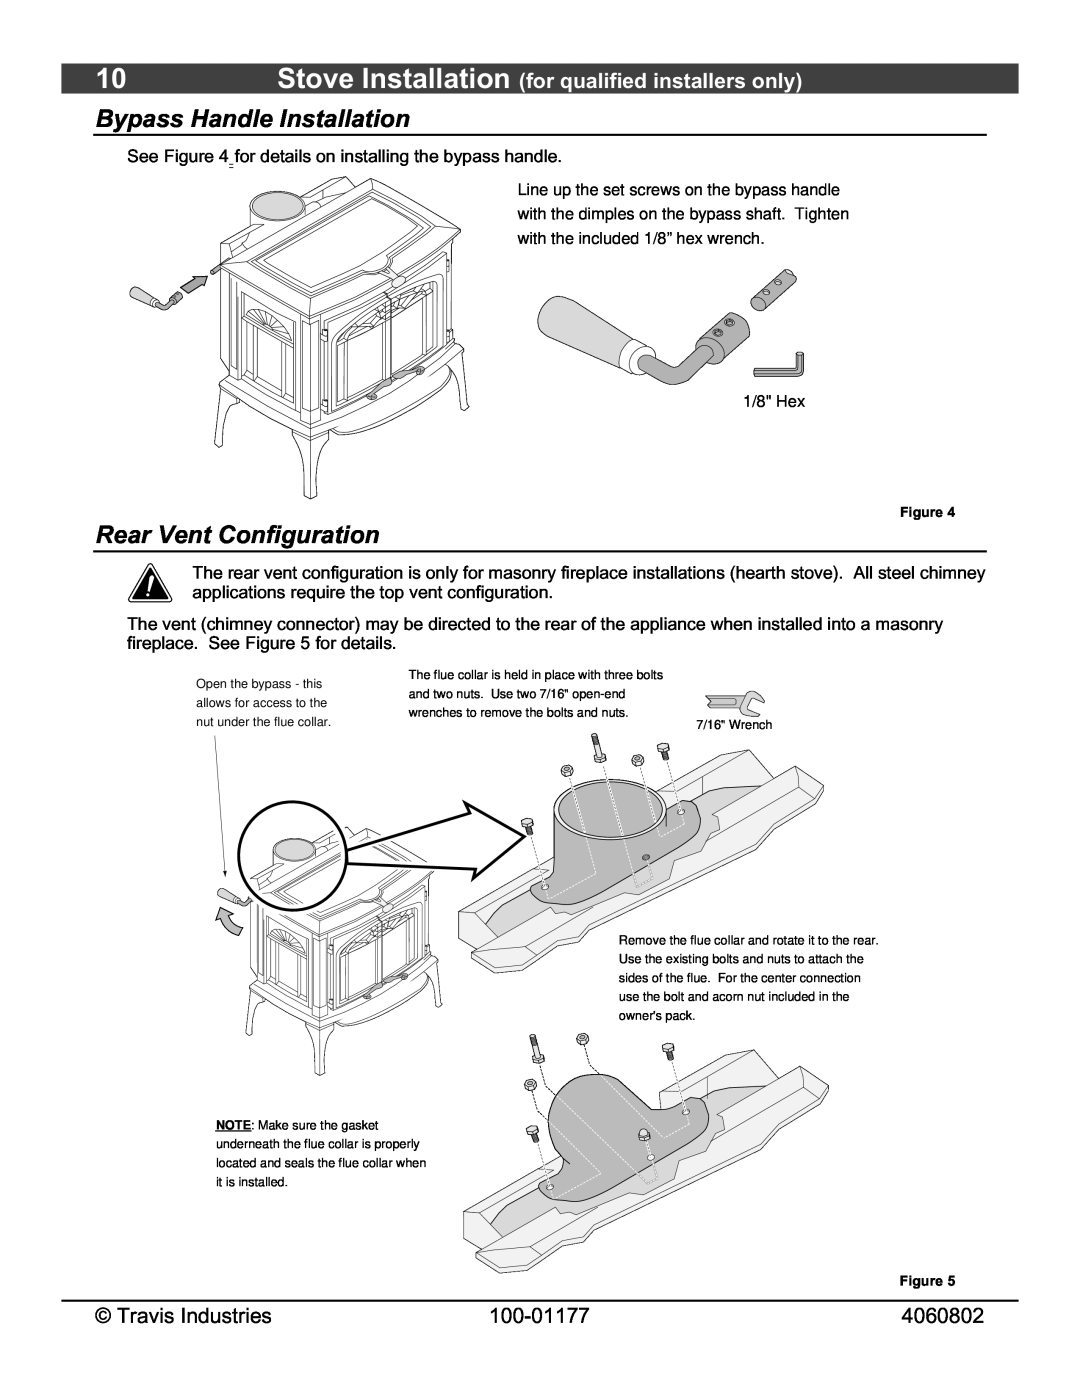
Rear Vent Configuration
The rear vent configuration is only for masonry fireplace installations (hearth stove). All steel chimney applications require the top vent configuration.
The vent (chimney connector) may be directed to the rear of the appliance when installed into a masonry fireplace. See Figure 5 for details.
Open the bypass - this allows for access to the nut under the flue collar.
The flue collar is held in place with three bolts and two nuts. Use two 7/16"
7/16" Wrench
Remove the flue collar and rotate it to the rear. Use the existing bolts and nuts to attach the sides of the flue. For the center connection use the bolt and acorn nut included in the owner's pack.
NOTE: Make sure the gasket underneath the flue collar is properly located and seals the flue collar when it is installed.
Figure 5
© Travis Industries | 4060802 |