Installation1 1
Surround Panel & Circuit Board Installation
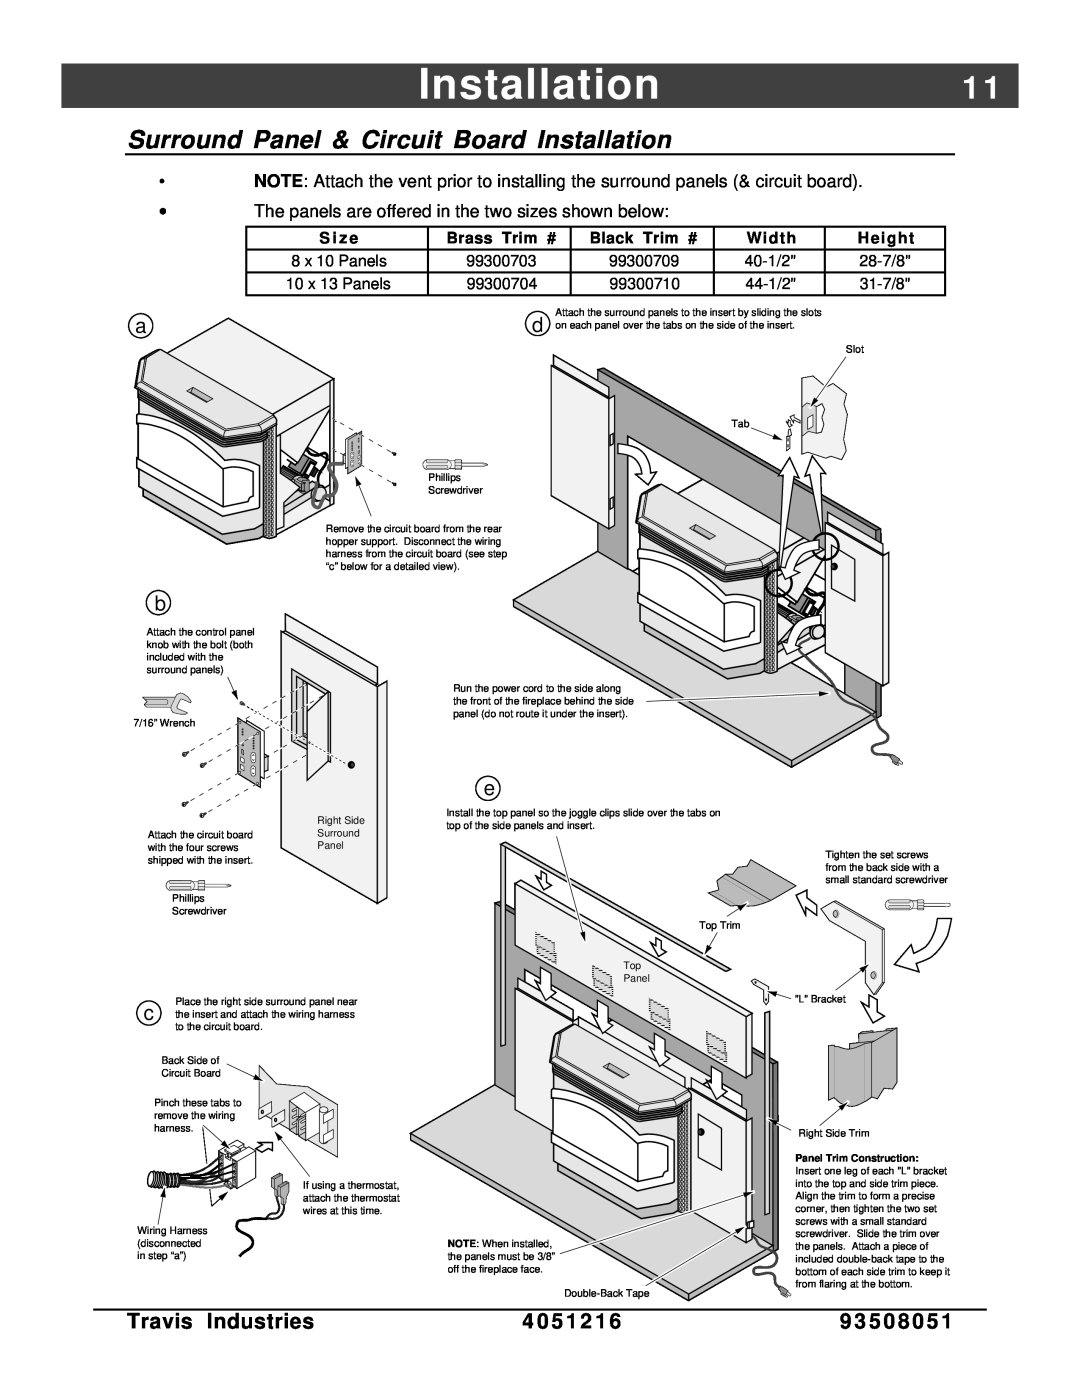
•NOTE: Attach the vent prior to installing the surround panels (& circuit board).
•The panels are offered in the two sizes shown below:
S i z e | Brass Trim # | Black Trim # | Width | Height |
8 x 10 Panels | 99300703 | 99300709 | ||
10 x 13 Panels | 99300704 | 99300710 |
a | Attach the surround panels to the insert by sliding the slots |
d on each panel over the tabs on the side of the insert. | |
| Slot |
| Tab |
Phillips
Screwdriver
Remove the circuit board from the rear hopper support. Disconnect the wiring harness from the circuit board (see step “c” below for a detailed view).
b
Attach the control panel knob with the bolt (both included with the surround panels)
7/16” Wrench
| Right Side |
Attach the circuit board | Surround |
with the four screws | Panel |
shipped with the insert. |
|
Phillips |
|
Screwdriver |
|
Run the power cord to the side along the front of the fireplace behind the side panel (do not route it under the insert).
e
Install the top panel so the joggle clips slide over the tabs on top of the side panels and insert.
Tighten the set screws from the back side with a small standard screwdriver
Place the right side surround panel near c the insert and attach the wiring harness
to the circuit board.
Back Side of
Circuit Board
Pinch these tabs to remove the wiring harness.
If using a thermostat, attach the thermostat wires at this time.
Wiring Harness (disconnected in step “a”)
Top Trim
Top
Panel
NOTE: When installed, the panels must be 3/8” off the fireplace face.
![]() "L" Bracket
"L" Bracket
![]() Right Side Trim
Right Side Trim
Panel Trim Construction:
Insert one leg of each "L" bracket into the top and side trim piece. Align the trim to form a precise corner, then tighten the two set screws with a small standard screwdriver. Slide the trim over the panels. Attach a piece of included
Travis Industries | 4 0 5 1 2 1 6 | 9 3 5 0 8 0 5 1 |