Setting the Measurement Volume Level
When setting the measurement volume level, it is important that you always judge whether the calibra- tion volume is too loud. The calibration volume should not be so loud that it causes:
•uncomfortably loud sounds that are inconvenient to you or your environment, or
•damage to your loudspeakers.
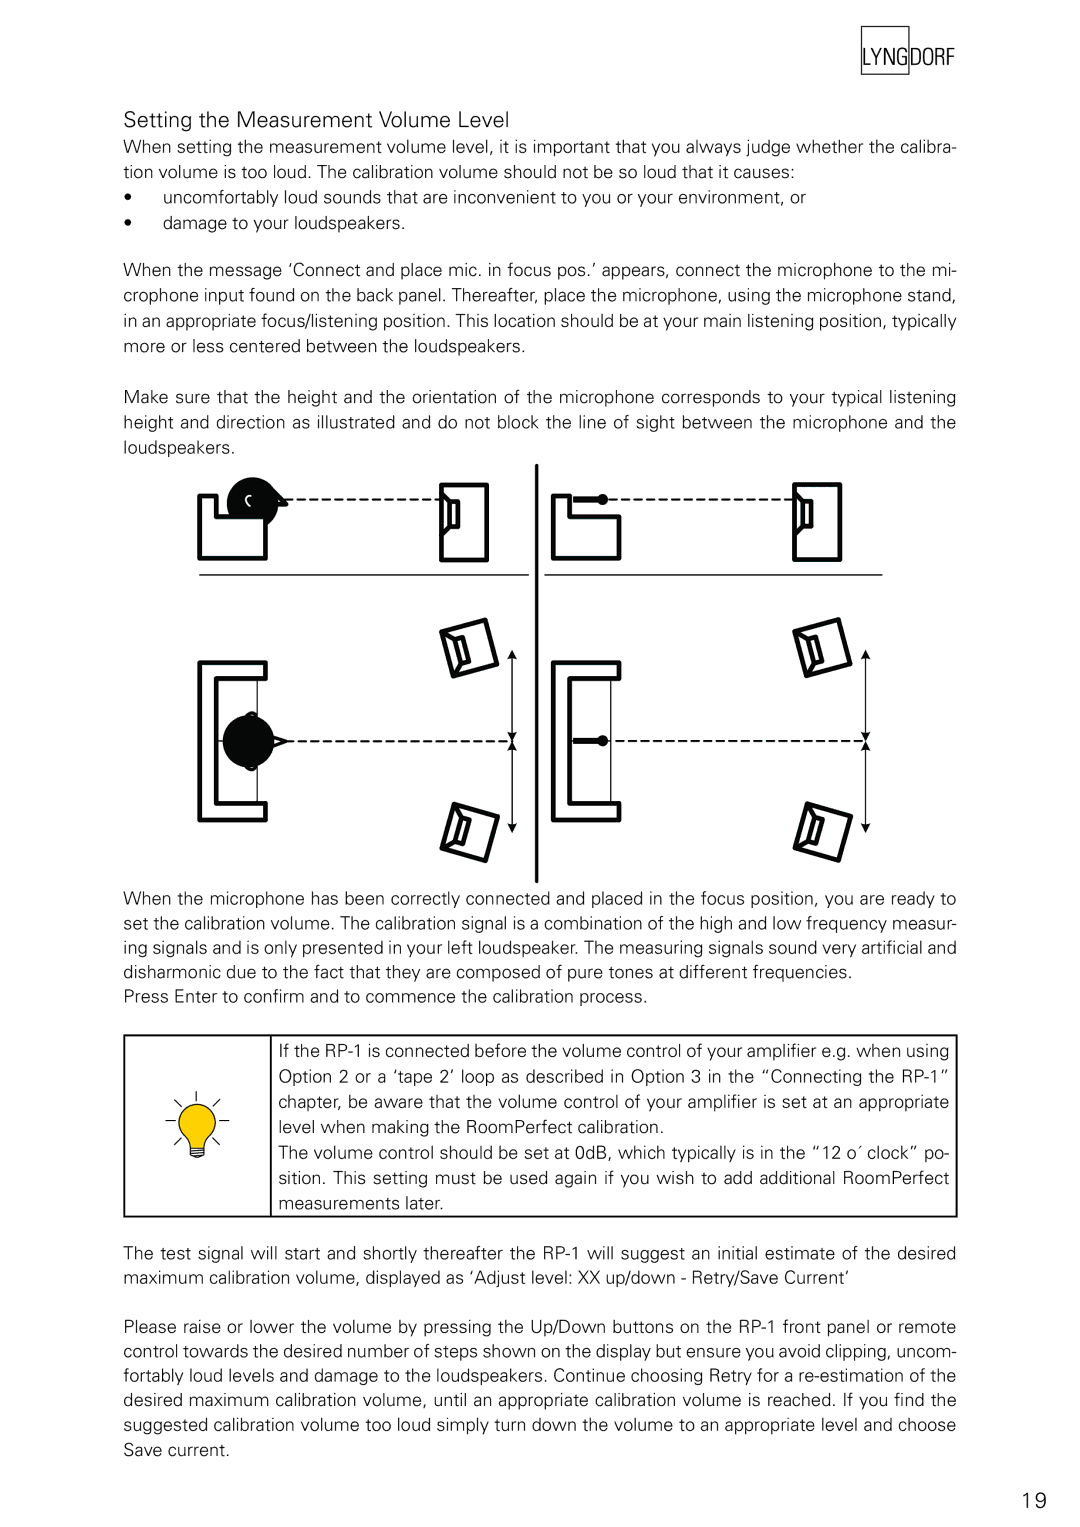
When the message ‘Connect and place mic. in focus pos.’ appears, connect the microphone to the mi- crophone input found on the back panel. Thereafter, place the microphone, using the microphone stand, in an appropriate focus/listening position. This location should be at your main listening position, typically more or less centered between the loudspeakers.
Make sure that the height and the orientation of the microphone corresponds to your typical listening height and direction as illustrated and do not block the line of sight between the microphone and the loudspeakers.
When the microphone has been correctly connected and placed in the focus position, you are ready to set the calibration volume. The calibration signal is a combination of the high and low frequency measur- ing signals and is only presented in your left loudspeaker. The measuring signals sound very artificial and disharmonic due to the fact that they are composed of pure tones at different frequencies.
Press Enter to confirm and to commence the calibration process.
If the
The volume control should be set at 0dB, which typically is in the “12 o´ clock” po- sition. This setting must be used again if you wish to add additional RoomPerfect measurements later.
The test signal will start and shortly thereafter the
Please raise or lower the volume by pressing the Up/Down buttons on the
19