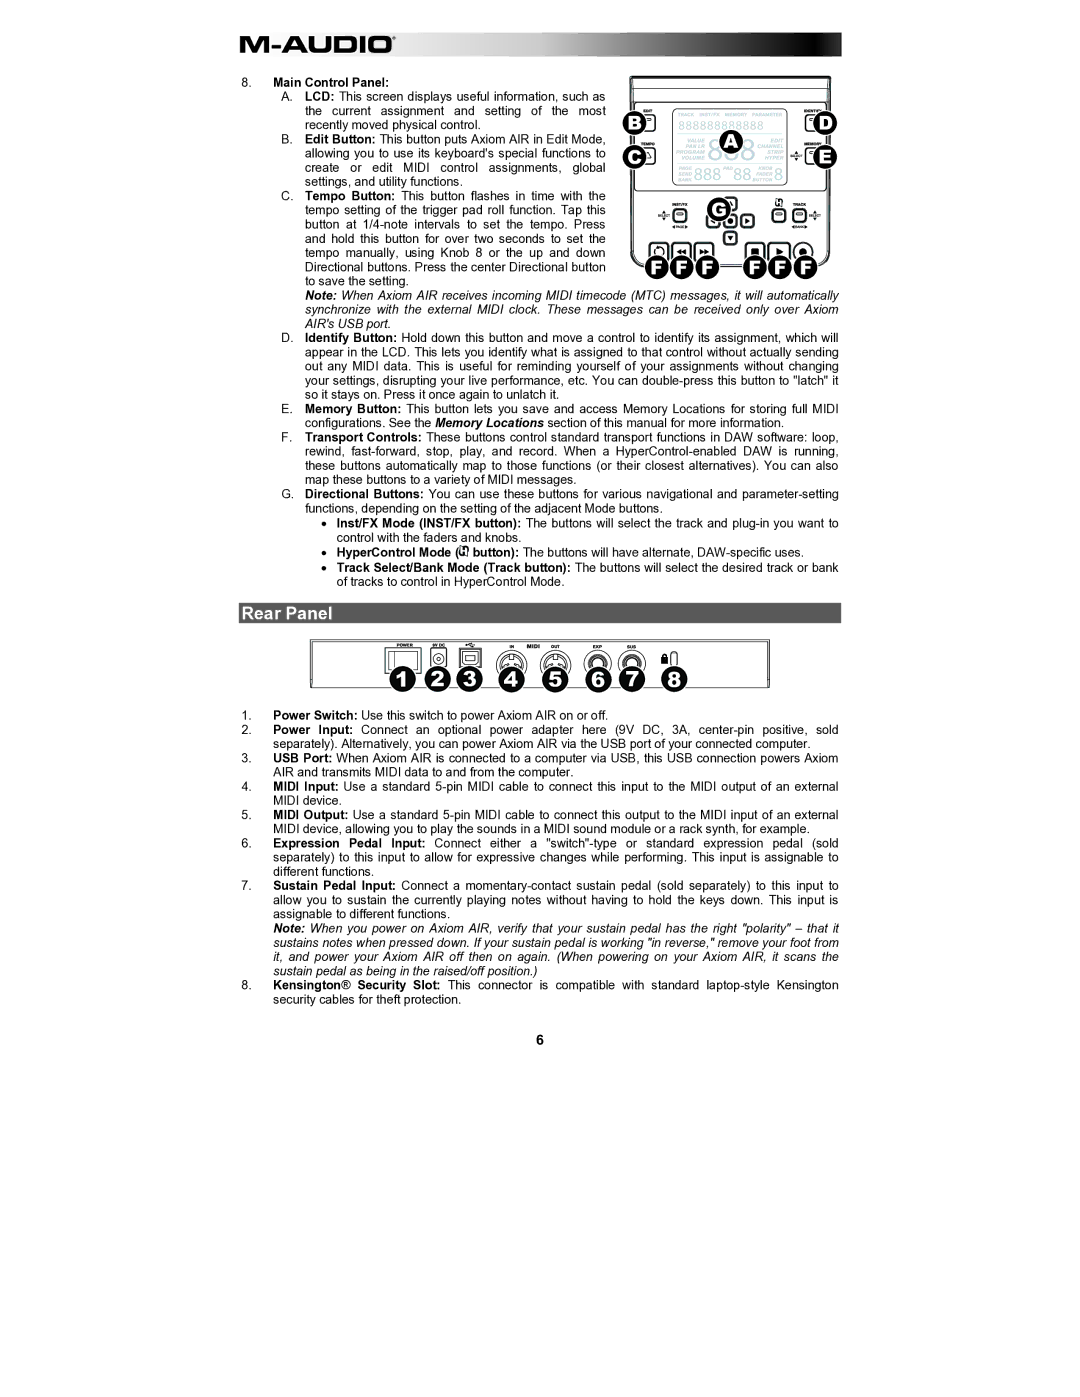
8. | Main Control Panel: |
|
|
|
| A. LCD: This screen displays useful information, such as |
|
|
|
| the current assignment and setting of the most | B |
| D |
| recently moved physical control. |
| ||
| B. Edit Button: This button puts Axiom AIR in Edit Mode, |
| A |
|
| allowing you to use its keyboard's special functions to | C |
| E |
| create or edit MIDI control assignments, global |
|
|
|
| settings, and utility functions. |
|
|
|
| C. Tempo Button: This button flashes in time with the |
|
|
|
| tempo setting of the trigger pad roll function. Tap this |
| G |
|
| button at |
|
|
|
| and hold this button for over two seconds to set the |
|
|
|
| tempo manually, using Knob 8 or the up and down |
|
|
|
| Directional buttons. Press the center Directional button |
| F F F | F F F |
| to save the setting. |
|
|
|
Note: When Axiom AIR receives incoming MIDI timecode (MTC) messages, it will automatically synchronize with the external MIDI clock. These messages can be received only over Axiom AIR's USB port.
D.Identify Button: Hold down this button and move a control to identify its assignment, which will appear in the LCD. This lets you identify what is assigned to that control without actually sending out any MIDI data. This is useful for reminding yourself of your assignments without changing your settings, disrupting your live performance, etc. You can
E.Memory Button: This button lets you save and access Memory Locations for storing full MIDI configurations. See the Memory Locations section of this manual for more information.
F.Transport Controls: These buttons control standard transport functions in DAW software: loop, rewind,
G.Directional Buttons: You can use these buttons for various navigational and
•Inst/FX Mode (INST/FX button): The buttons will select the track and
•HyperControl Mode (![]() button): The buttons will have alternate,
button): The buttons will have alternate,
•Track Select/Bank Mode (Track button): The buttons will select the desired track or bank of tracks to control in HyperControl Mode.
Rear Panel
1 | 2 | 3 | 4 | 5 | 6 | 7 | 8 |
1.Power Switch: Use this switch to power Axiom AIR on or off.
2.Power Input: Connect an optional power adapter here (9V DC, 3A,
3.USB Port: When Axiom AIR is connected to a computer via USB, this USB connection powers Axiom AIR and transmits MIDI data to and from the computer.
4.MIDI Input: Use a standard
5.MIDI Output: Use a standard
6.Expression Pedal Input: Connect either a
7.Sustain Pedal Input: Connect a
Note: When you power on Axiom AIR, verify that your sustain pedal has the right "polarity" – that it sustains notes when pressed down. If your sustain pedal is working "in reverse," remove your foot from it, and power your Axiom AIR off then on again. (When powering on your Axiom AIR, it scans the sustain pedal as being in the raised/off position.)
8.Kensington® Security Slot: This connector is compatible with standard
6
