14 Hookups (cont’d)
Connecting to a TV
and a Stereo with a COAXIAL DIGITAL AUDIO IN jack
Stereo
(example only)
COAXIAL
DIGITAL
AUDIO IN
Back of TV
(example only)
2
VIDEO IN
DVD Player
AUDIO OUT | L | Y | Pr/Cr | COMPONENT |
|
DIGITALAUDIO |
|
|
| VIDEO OUT |
|
OUT PCM / |
|
|
|
|
|
BITSTREAM |
|
|
|
|
|
|
|
|
| I | P |
COAXIAL | R | VIDEO | Pb/Cb | ||
|
| OUT |
| OUT |
|
1
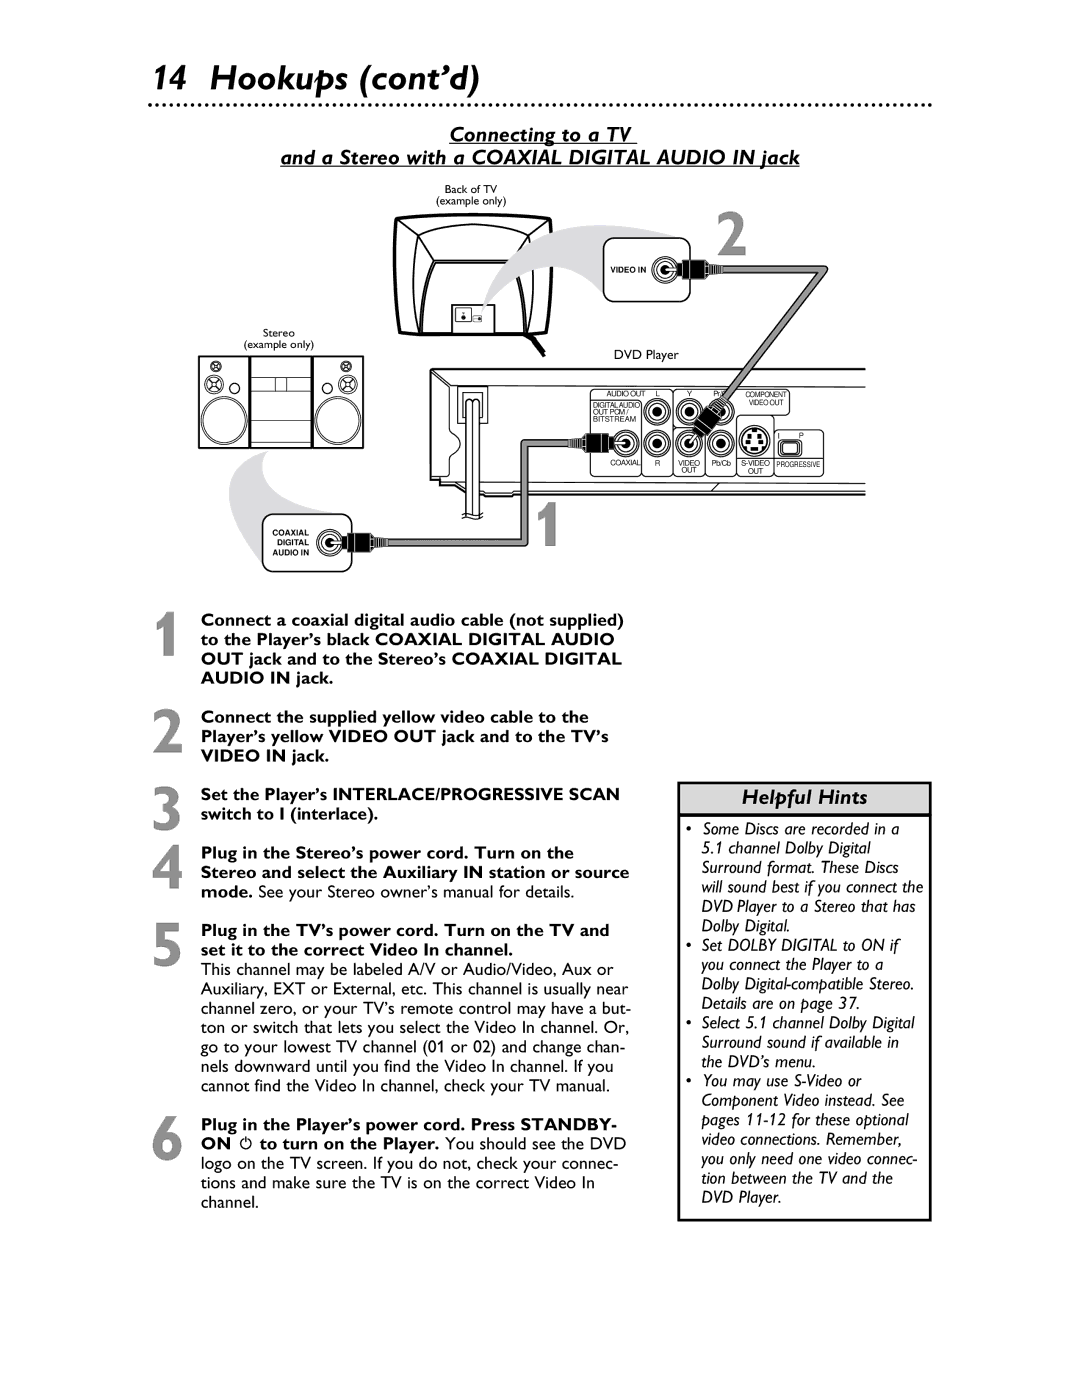
1 Connect a coaxial digital audio cable (not supplied) to the Player’s black COAXIAL DIGITAL AUDIO OUT jack and to the Stereo’s COAXIAL DIGITAL AUDIO IN jack.
2 Connect the supplied yellow video cable to the Player’s yellow VIDEO OUT jack and to the TV’s VIDEO IN jack.
3 Set the Player’s INTERLACE/PROGRESSIVE SCAN switch to I (interlace).
4 Plug in the Stereo’s power cord. Turn on the Stereo and select the Auxiliary IN station or source mode. See your Stereo owner’s manual for details.
5 Plug in the TV’s power cord. Turn on the TV and set it to the correct Video In channel.
This channel may be labeled A/V or Audio/Video, Aux or Auxiliary, EXT or External, etc. This channel is usually near channel zero, or your TV’s remote control may have a but- ton or switch that lets you select the Video In channel. Or, go to your lowest TV channel (01 or 02) and change chan- nels downward until you find the Video In channel. If you cannot find the Video In channel, check your TV manual.
6 Plug in the Player’s power cord. Press STANDBY- ON y to turn on the Player. You should see the DVD logo on the TV screen. If you do not, check your connec- tions and make sure the TV is on the correct Video In channel.
Helpful Hints
•Some Discs are recorded in a 5.1 channel Dolby Digital Surround format. These Discs will sound best if you connect the DVD Player to a Stereo that has Dolby Digital.
•Set DOLBY DIGITAL to ON if you connect the Player to a Dolby
•Select 5.1 channel Dolby Digital Surround sound if available in the DVD’s menu.
•You may use
