Screen Saver, Video Out 29
Screen Saver
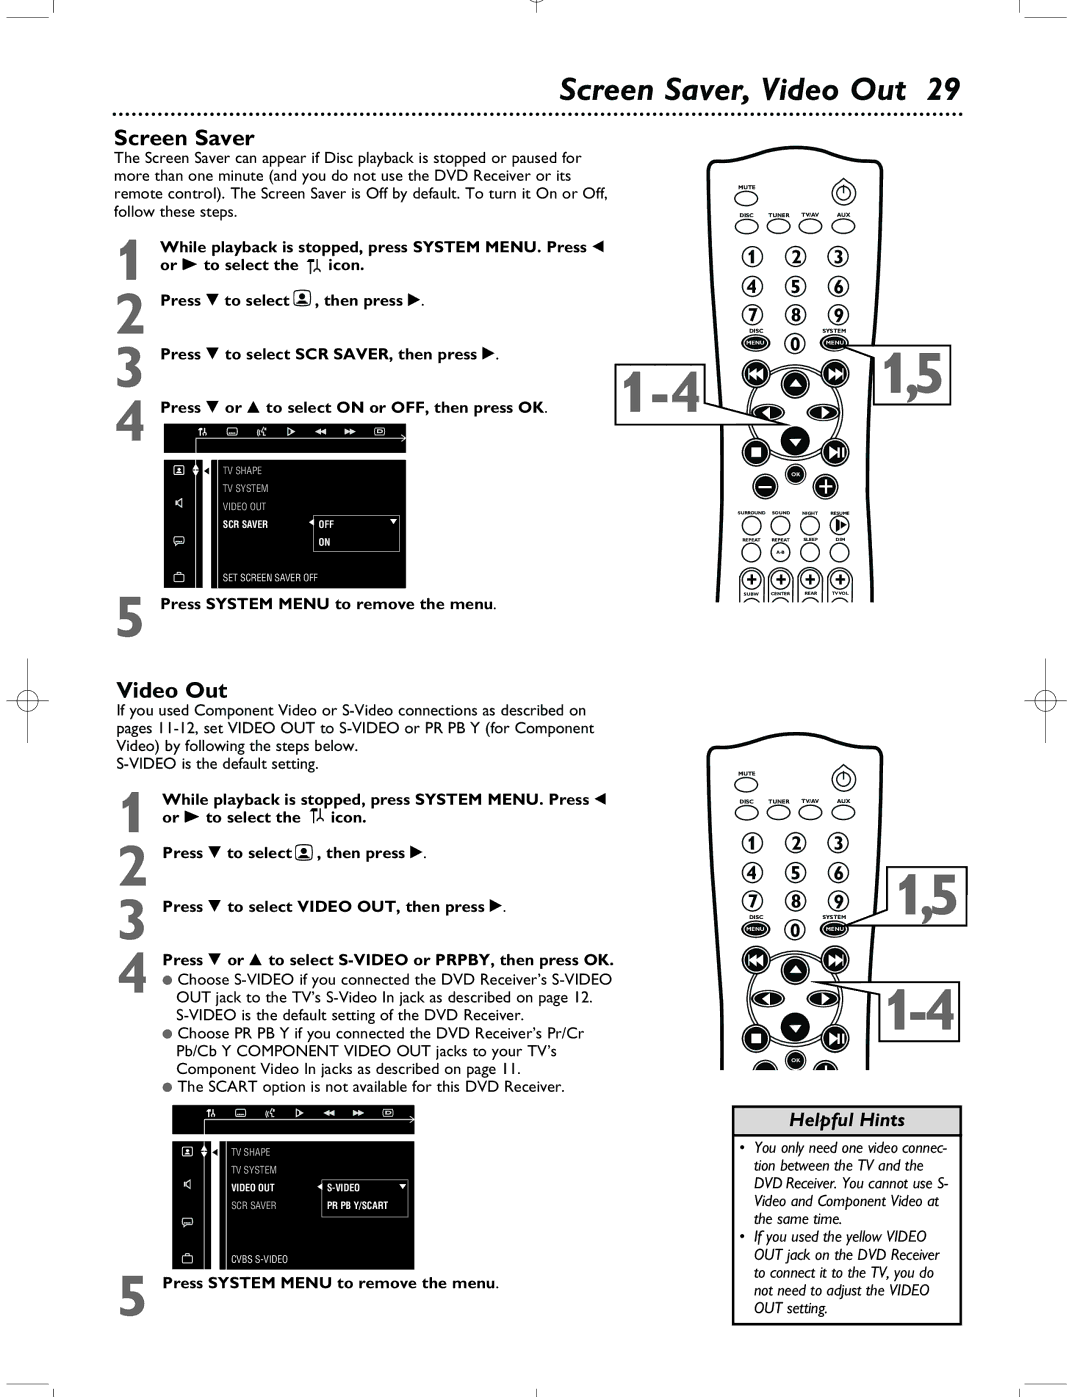
The Screen Saver can appear if Disc playback is stopped or paused for more than one minute (and you do not use the DVD Receiver or its remote control). The Screen Saver is Off by default. To turn it On or Off, follow these steps.
While playback is stopped, press SYSTEM MENU. Press ; | |
1 or - to select the | icon. |
2 Press 9 to select | , then press :. |
MUTE
DISC TUNER TV/AV AUX
1 2 3
4 5 6
7 8 9
DISCSYSTEM
3 Press 9 to select SCR SAVER, then press :. | |
4 Press 9 or 8 to select ON or OFF, then press OK. | |
TV SHAPE |
|
TV SYSTEM |
|
VIDEO OUT |
|
MENU 0 MENU
OK
1,5
SCR SAVER | OFF |
| ON |
SET SCREEN SAVER OFF
5 Press SYSTEM MENU to remove the menu.
Video Out
If you used Component Video or
1
2 Press 9 to select ![]() , then press :.
, then press :.
3 Press 9 to select VIDEO OUT, then press :.
4 Press 9 or 8 to select
●Choose
●Choose PR PB Y if you connected the DVD Receiver’s Pr/Cr Pb/Cb Y COMPONENT VIDEO OUT jacks to your TV’s Component Video In jacks as described on page 11.
●The SCART option is not available for this DVD Receiver.
SURROUND SOUND NIGHT RESUME
REPEAT | REPEAT | SLEEP | DIM |
SUBW CENTER REAR TV VOL
MUTE
DISC TUNER TV/AV AUX
1 | 2 | 3 |
| |
4 | 5 | 6 | 1,5 | |
7 | 8 | 9 | ||
DISC | 0 | SYSTEM | ||
MENU | MENU | |||
| ||||
|
|
| ||
| OK |
|
|
TV SHAPE |
|
TV SYSTEM |
|
|
|
VIDEO OUT | |
SCR SAVER | PR PB Y/SCART |
|
|
CVBS
5 Press SYSTEM MENU to remove the menu.
Helpful Hints
•You only need one video connec- tion between the TV and the DVD Receiver. You cannot use S- Video and Component Video at the same time.
•If you used the yellow VIDEO OUT jack on the DVD Receiver to connect it to the TV, you do not need to adjust the VIDEO OUT setting.
