CF-W4HWEZZBM specifications
The Matsushita CF-W4HWEZZBM is a robust and versatile notebook designed to meet the needs of professionals on the go. This laptop is part of the Toughbook series, renowned for its durability and performance in challenging environments. One of the standout features of the CF-W4HWEZZBM is its lightweight design, making it easy for users to carry without sacrificing functionality.At the core of this notebook is a powerful Intel processor, typically belonging to the Core i5 or i7 family, providing ample power for multitasking and demanding applications. The processor is paired with sufficient RAM, ensuring smooth performance across various tasks, whether it be running office applications, analyzing data, or streaming video content.
The display of the CF-W4HWEZZBM is another highlight, featuring a vibrant LED-backlit screen that offers crisp and clear visuals for presentations and media consumption. The screen size usually falls within the 13 to 14-inch range, striking a balance between portability and usability. Furthermore, the anti-glare coating on the screen enhances visibility in bright conditions, making it suitable for outdoor use, particularly for fieldwork professionals.
In terms of connectivity, the CF-W4HWEZZBM is equipped with a range of ports, including USB, HDMI, and a memory card reader, ensuring compatibility with various peripherals and devices. Additionally, it supports industry-standard wireless technologies such as Wi-Fi and Bluetooth, enabling seamless connectivity with networks and other devices.
Security is a key consideration with this model. Often, it features a fingerprint reader and encrypted hard drive options to protect sensitive data, making it a sensible choice for users handling confidential information. Its battery life is commendable, providing extended usage hours, which is particularly beneficial for those who travel frequently or work remotely.
The construction of the CF-W4HWEZZBM emphasizes durability, with a rugged chassis designed to withstand impacts, spills, and dust. This makes it ideal for industries such as construction, healthcare, and logistics, where equipment is exposed to harsh conditions.
In summary, the Matsushita CF-W4HWEZZBM is a finely crafted laptop that excels in performance, durability, and connectivity. Its combination of lightweight form factor, powerful processing capabilities, exceptional display, and robust security features renders it a reliable choice for mobile professionals who require a dependable computing solution no matter where they are.


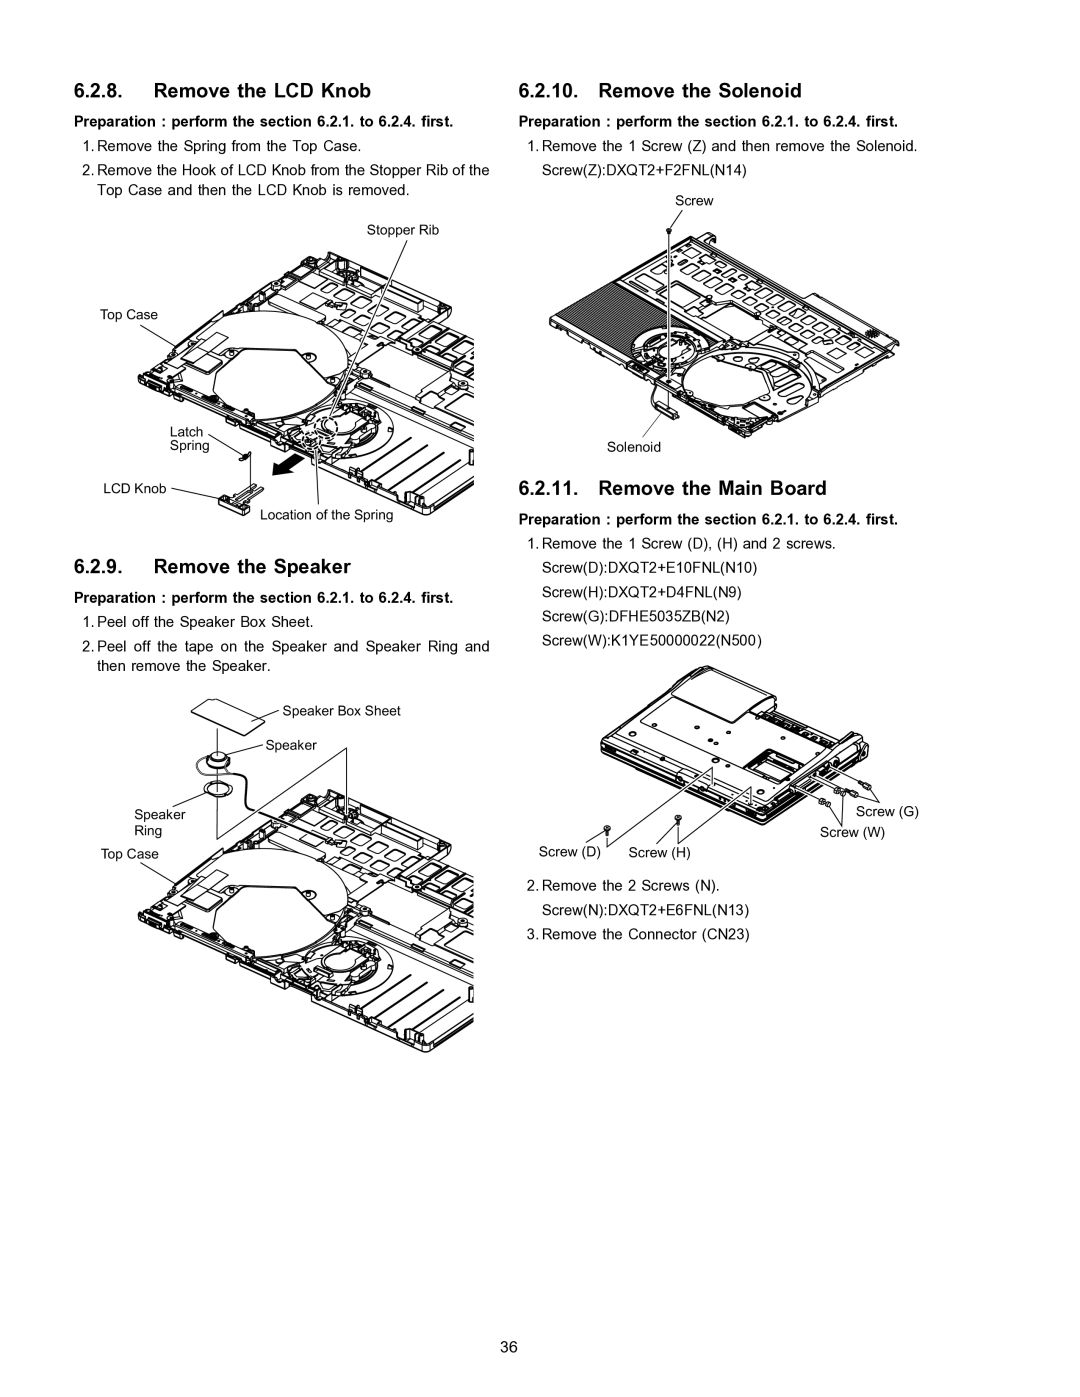
 Screw (G)