Disassembly Procedures
!WARNING
Reversing Motor Relay
1.Disconnection power supply to unit.
2.Remove all four
3.Disconnect all wires attached to Reversing Motor Relay.
4.Remove single screw securing relay.
Note: Notice the positioning tab for ease in mounting and locating relay onto the Control Panel.
To avoid risk of electrical shock, personal injury or death; disconnect power to unit before servicing.
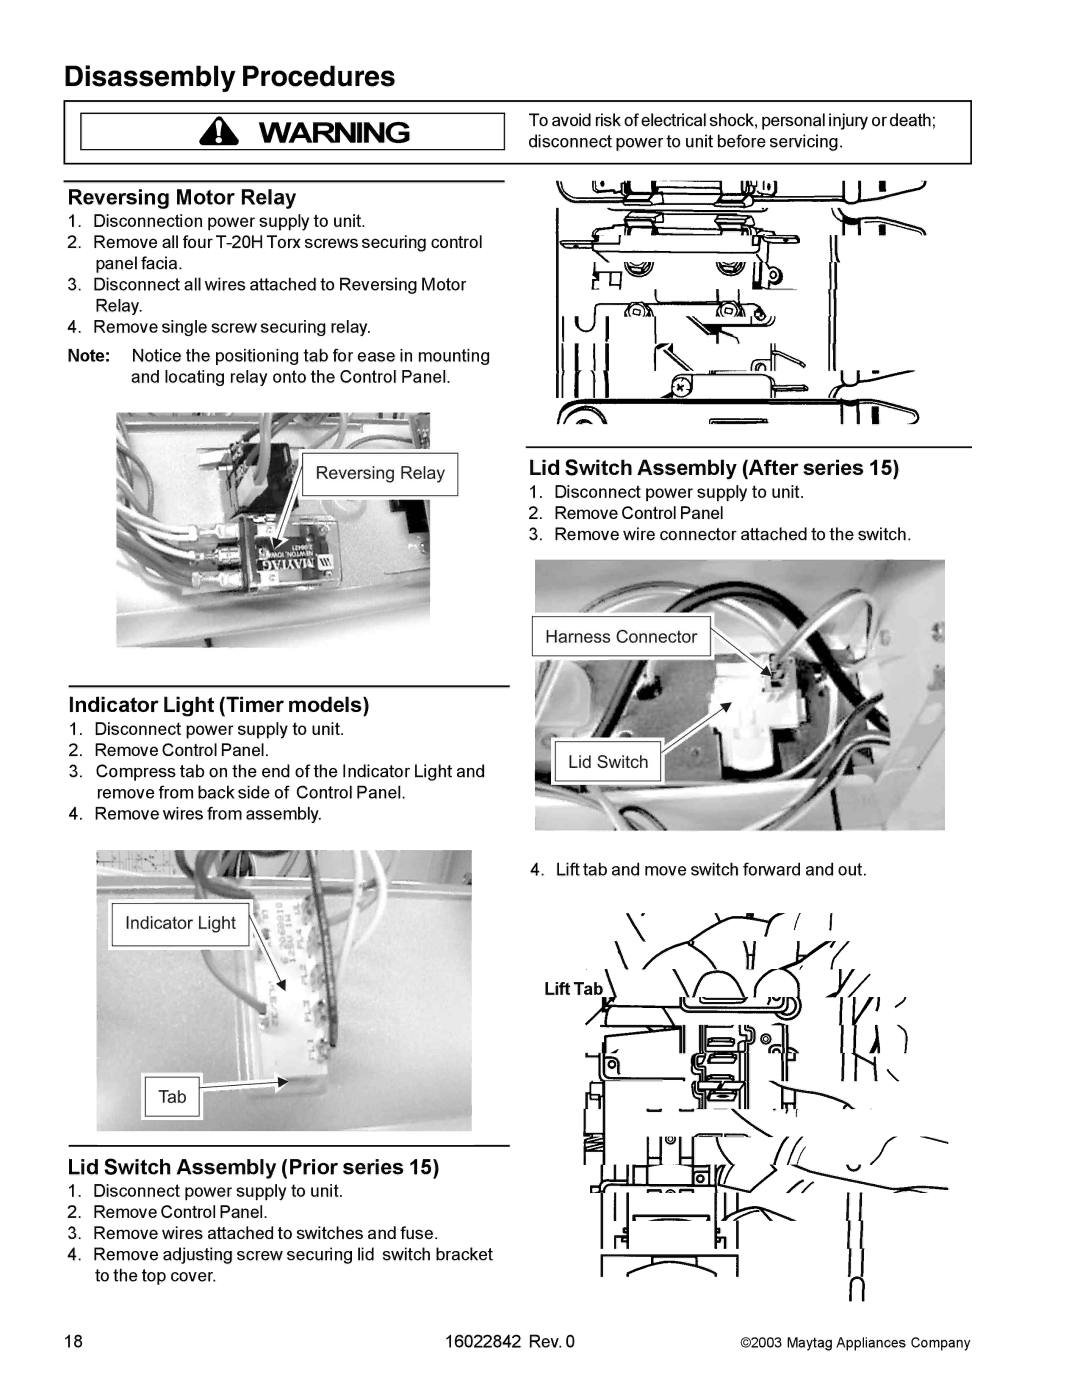
Lid Switch Assembly (After series 15)
1. Disconnect power supply to unit.
2. Remove Control Panel
3. Remove wire connector attached to the switch.
Indicator Light (Timer models)
1.Disconnect power supply to unit.
2.Remove Control Panel.
3.Compress tab on the end of the Indicator Light and remove from back side of Control Panel.
4.Remove wires from assembly.
4. Lift tab and move switch forward and out.
Lift Tab
Lid Switch Assembly (Prior series 15)
1.Disconnect power supply to unit.
2.Remove Control Panel.
3.Remove wires attached to switches and fuse.
4.Remove adjusting screw securing lid switch bracket to the top cover.
18 | 16022842 Rev. 0 | ©2003 Maytag Appliances Company |