Disassembly Procedures
!WARNING
To avoid risk of electrical shock, personal injury or death; disconnect power to unit before servicing.
4.If the proper amount of the tub cover is not visible at the back or the tub is off center on either side, tighten the opposite damper spring and recheck as outlined in previous steps.
Mounting Stem
1.Disconnect power supply to unit
2.Remove Inner Tub.
3.Remove
4. Use spanner wrench to remove Mounting Stem.
Note: This is a left hand thread so it must be turned clockwise. A mallet will be required to loosen.
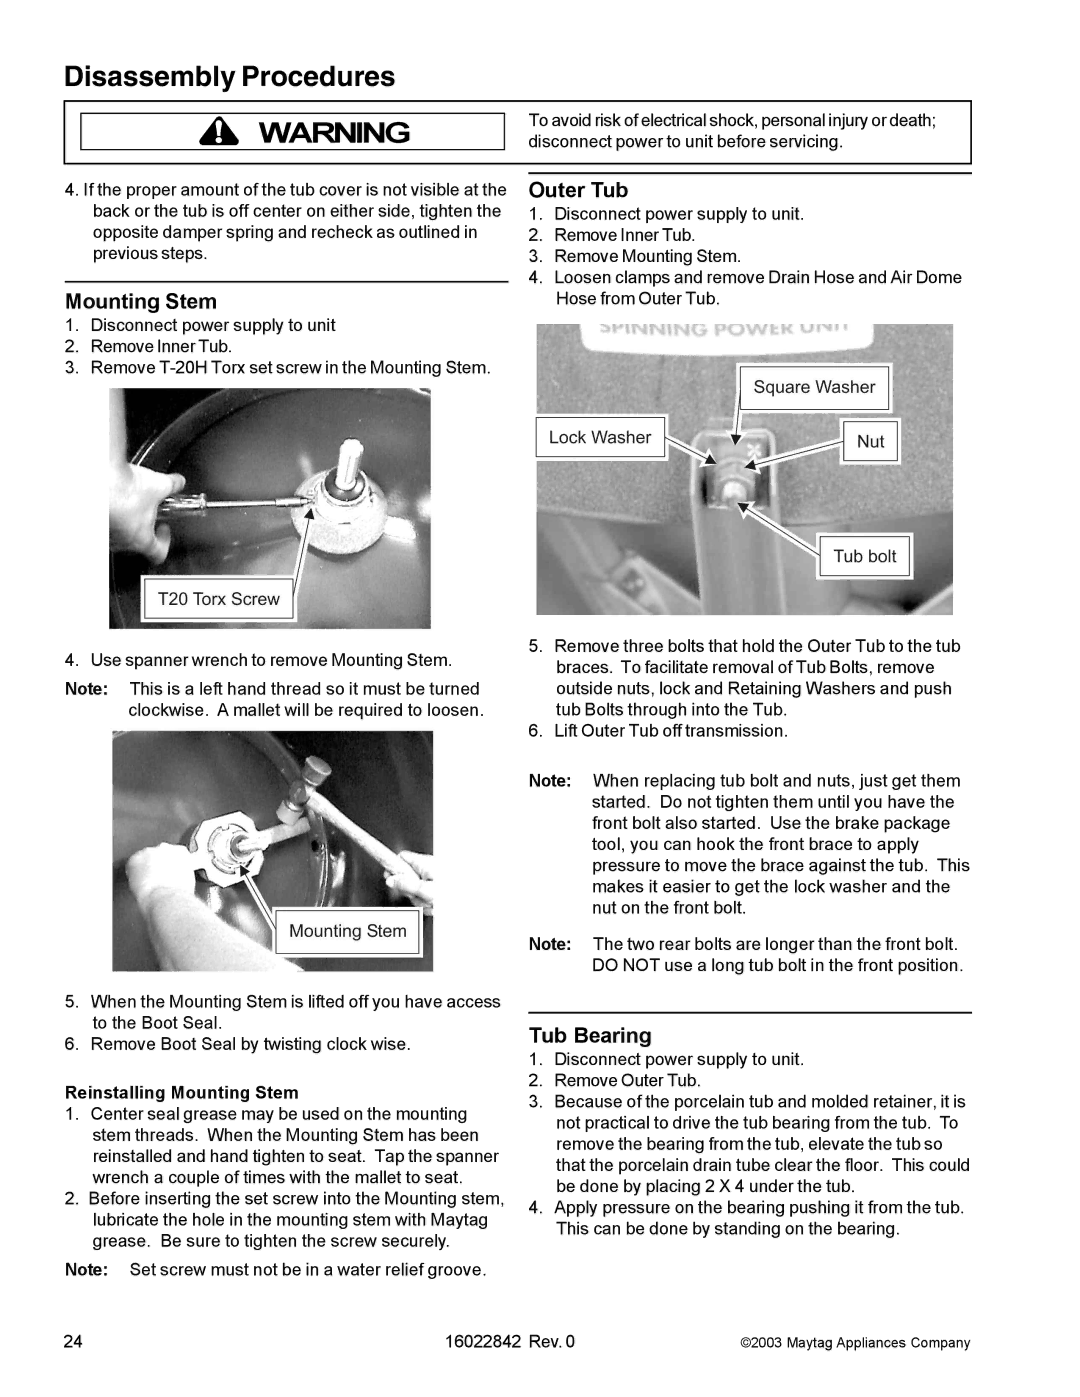
Outer Tub
1.Disconnect power supply to unit.
2.Remove Inner Tub.
3.Remove Mounting Stem.
4.Loosen clamps and remove Drain Hose and Air Dome Hose from Outer Tub.
5.Remove three bolts that hold the Outer Tub to the tub braces. To facilitate removal of Tub Bolts, remove outside nuts, lock and Retaining Washers and push tub Bolts through into the Tub.
6.Lift Outer Tub off transmission.
Note: When replacing tub bolt and nuts, just get them started. Do not tighten them until you have the front bolt also started. Use the brake package tool, you can hook the front brace to apply pressure to move the brace against the tub. This makes it easier to get the lock washer and the nut on the front bolt.
5.When the Mounting Stem is lifted off you have access to the Boot Seal.
6.Remove Boot Seal by twisting clock wise.
Reinstalling Mounting Stem
1.Center seal grease may be used on the mounting stem threads. When the Mounting Stem has been reinstalled and hand tighten to seat. Tap the spanner wrench a couple of times with the mallet to seat.
2.Before inserting the set screw into the Mounting stem, lubricate the hole in the mounting stem with Maytag grease. Be sure to tighten the screw securely.
Note: Set screw must not be in a water relief groove.
Note: The two rear bolts are longer than the front bolt. DO NOT use a long tub bolt in the front position.
Tub Bearing
1.Disconnect power supply to unit.
2.Remove Outer Tub.
3.Because of the porcelain tub and molded retainer, it is not practical to drive the tub bearing from the tub. To remove the bearing from the tub, elevate the tub so that the porcelain drain tube clear the floor. This could be done by placing 2 X 4 under the tub.
4.Apply pressure on the bearing pushing it from the tub. This can be done by standing on the bearing.
24 | 16022842 Rev. 0 | ©2003 Maytag Appliances Company |