Disassembly Procedures
!WARNING
Note: Try using a thin piece of cardboard to place between the tab and outer tub once you have inserted the pencil through the hole to depress the tabs. This will allow you to work on the other tabs for easy removal.
To avoid risk of electrical shock, personal injury or death; disconnect power to unit before servicing.
4.Remove Tub Cover.
5.Remove Agitator.
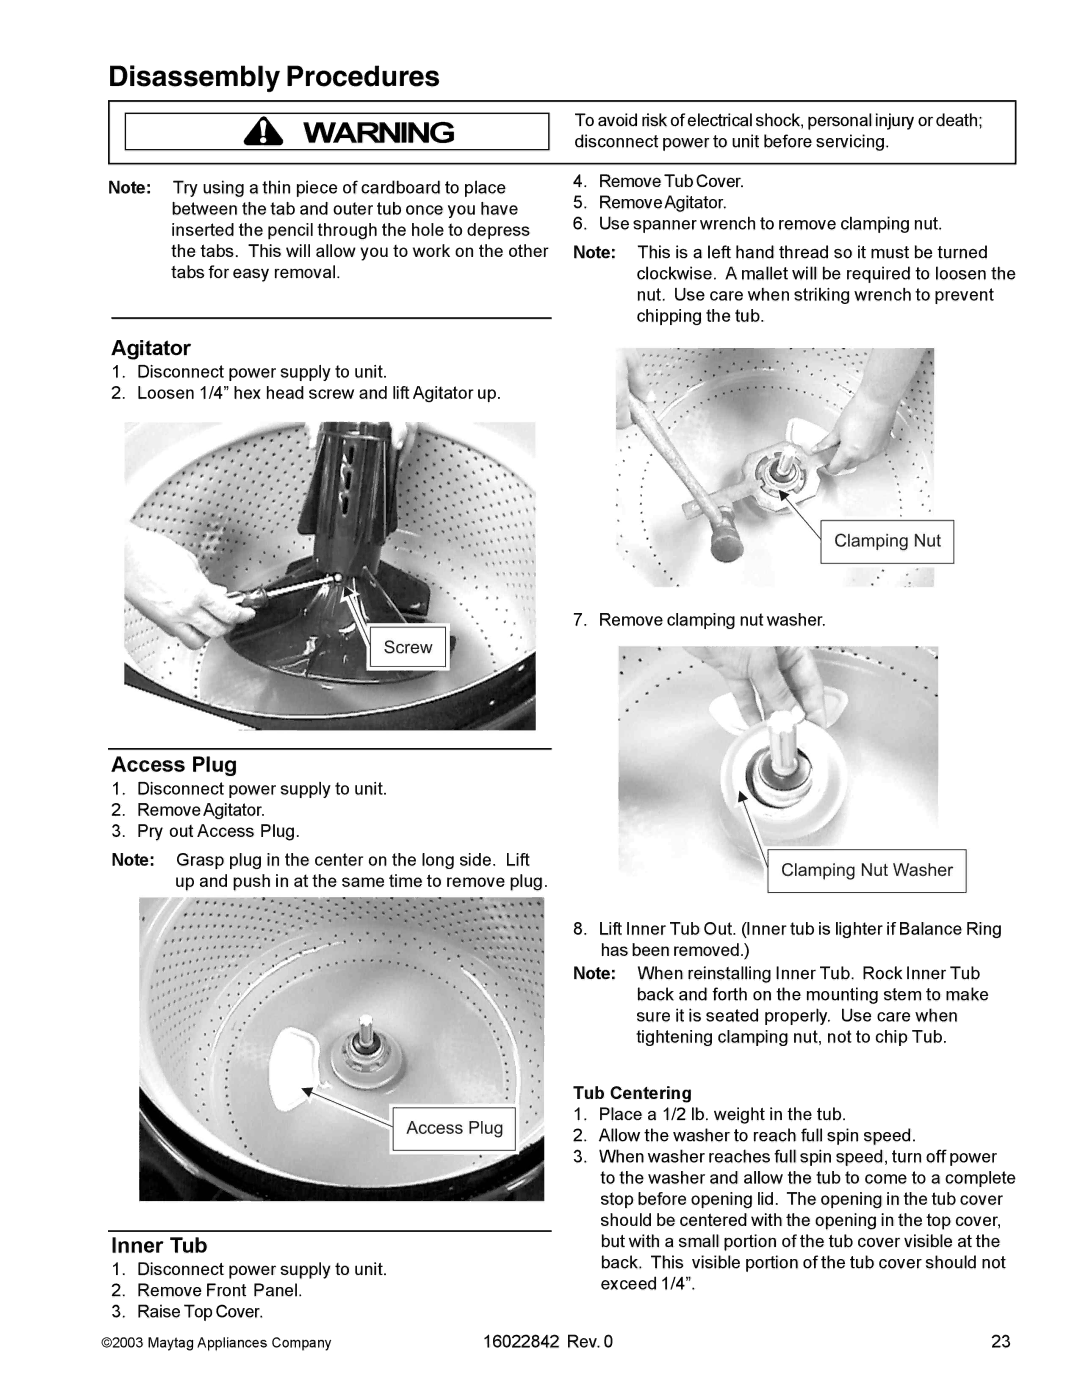
6.Use spanner wrench to remove clamping nut.
Note: This is a left hand thread so it must be turned clockwise. A mallet will be required to loosen the nut. Use care when striking wrench to prevent chipping the tub.
Agitator
1.Disconnect power supply to unit.
2.Loosen 1/4” hex head screw and lift Agitator up.
7. Remove clamping nut washer.
Access Plug
1.Disconnect power supply to unit.
2.Remove Agitator.
3.Pry out Access Plug.
Note: Grasp plug in the center on the long side. Lift up and push in at the same time to remove plug.
Inner Tub
1.Disconnect power supply to unit.
2.Remove Front Panel.
3.Raise Top Cover.
8.Lift Inner Tub Out. (Inner tub is lighter if Balance Ring has been removed.)
Note: When reinstalling Inner Tub. Rock Inner Tub back and forth on the mounting stem to make sure it is seated properly. Use care when tightening clamping nut, not to chip Tub.
Tub Centering
1.Place a 1/2 lb. weight in the tub.
2.Allow the washer to reach full spin speed.
3.When washer reaches full spin speed, turn off power to the washer and allow the tub to come to a complete stop before opening lid. The opening in the tub cover should be centered with the opening in the top cover, but with a small portion of the tub cover visible at the back. This visible portion of the tub cover should not exceed 1/4”.
©2003 Maytag Appliances Company | 16022842 Rev. 0 | 23 |
