Disassembly Procedures
!WARNING
Control Panel
1.Disconnect power supply to unit.
2.Remove top two
3.Carefully lay the control panel forwards.
Note: Use a protective cloth to minimize the chance of scratching the panel on the control console.
To avoid risk of electrical shock, personal injury or death; disconnect power to unit before servicing.
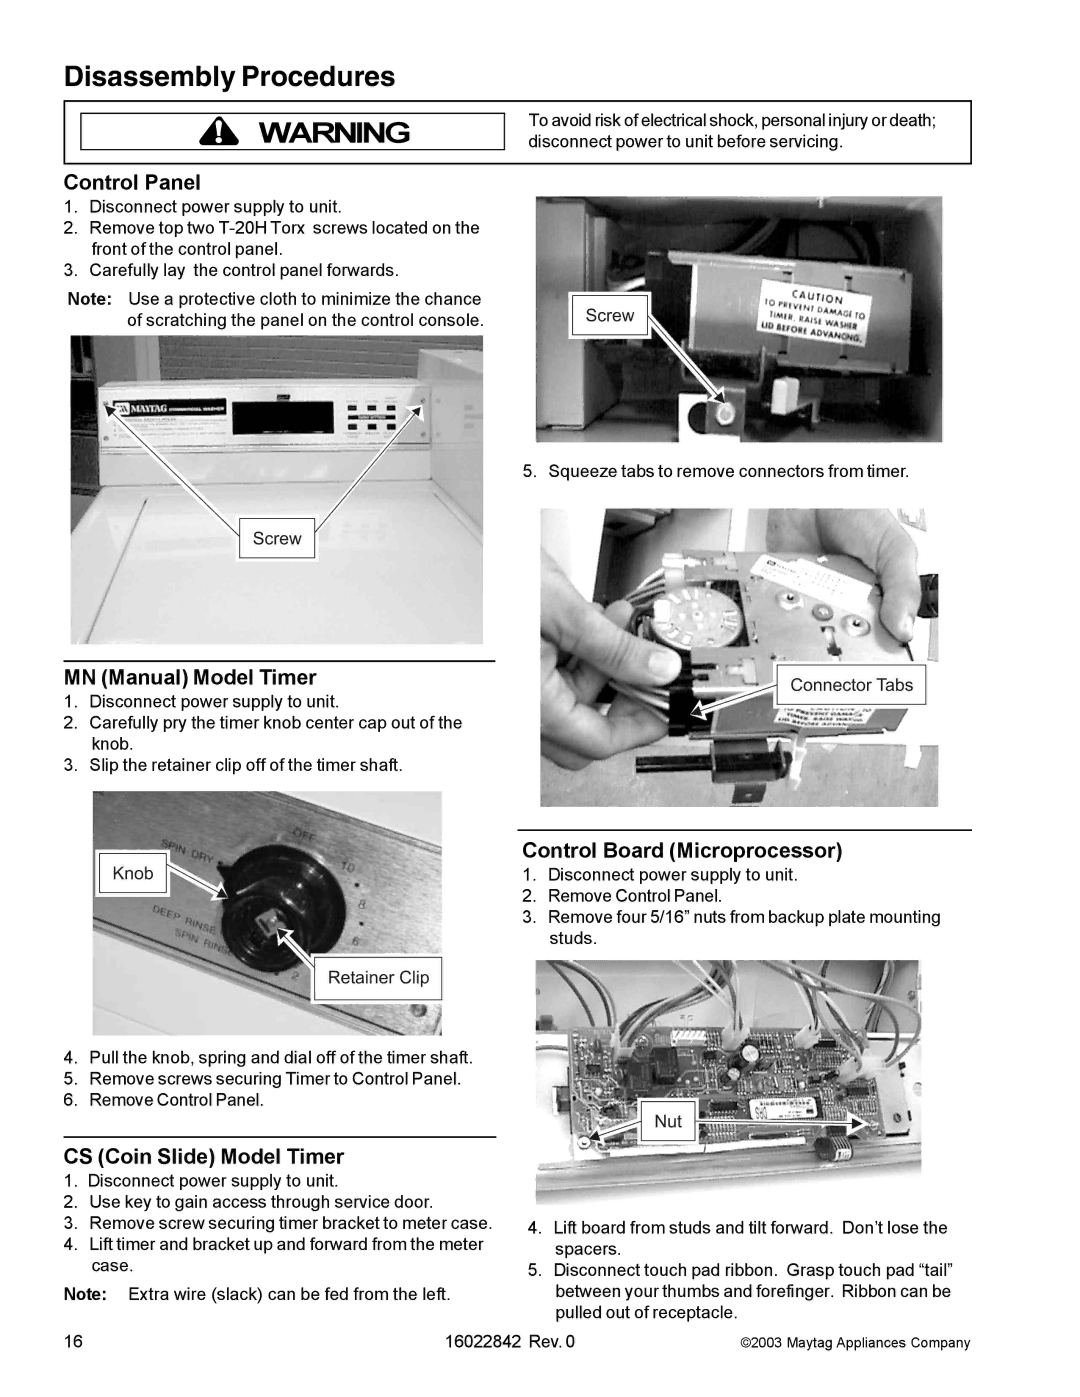
5. Squeeze tabs to remove connectors from timer.
MN (Manual) Model Timer
1.Disconnect power supply to unit.
2.Carefully pry the timer knob center cap out of the knob.
3.Slip the retainer clip off of the timer shaft.
Control Board (Microprocessor)
1. Disconnect power supply to unit.
2. Remove Control Panel.
3. Remove four 5/16” nuts from backup plate mounting studs.
4.Pull the knob, spring and dial off of the timer shaft.
5.Remove screws securing Timer to Control Panel.
6.Remove Control Panel.
CS (Coin Slide) Model Timer
1.Disconnect power supply to unit.
2.Use key to gain access through service door.
3.Remove screw securing timer bracket to meter case.
4.Lift timer and bracket up and forward from the meter case.
Note: Extra wire (slack) can be fed from the left.
4.Lift board from studs and tilt forward. Don’t lose the spacers.
5.Disconnect touch pad ribbon. Grasp touch pad “tail” between your thumbs and forefinger. Ribbon can be pulled out of receptacle.
16 | 16022842 Rev. 0 | ©2003 Maytag Appliances Company |