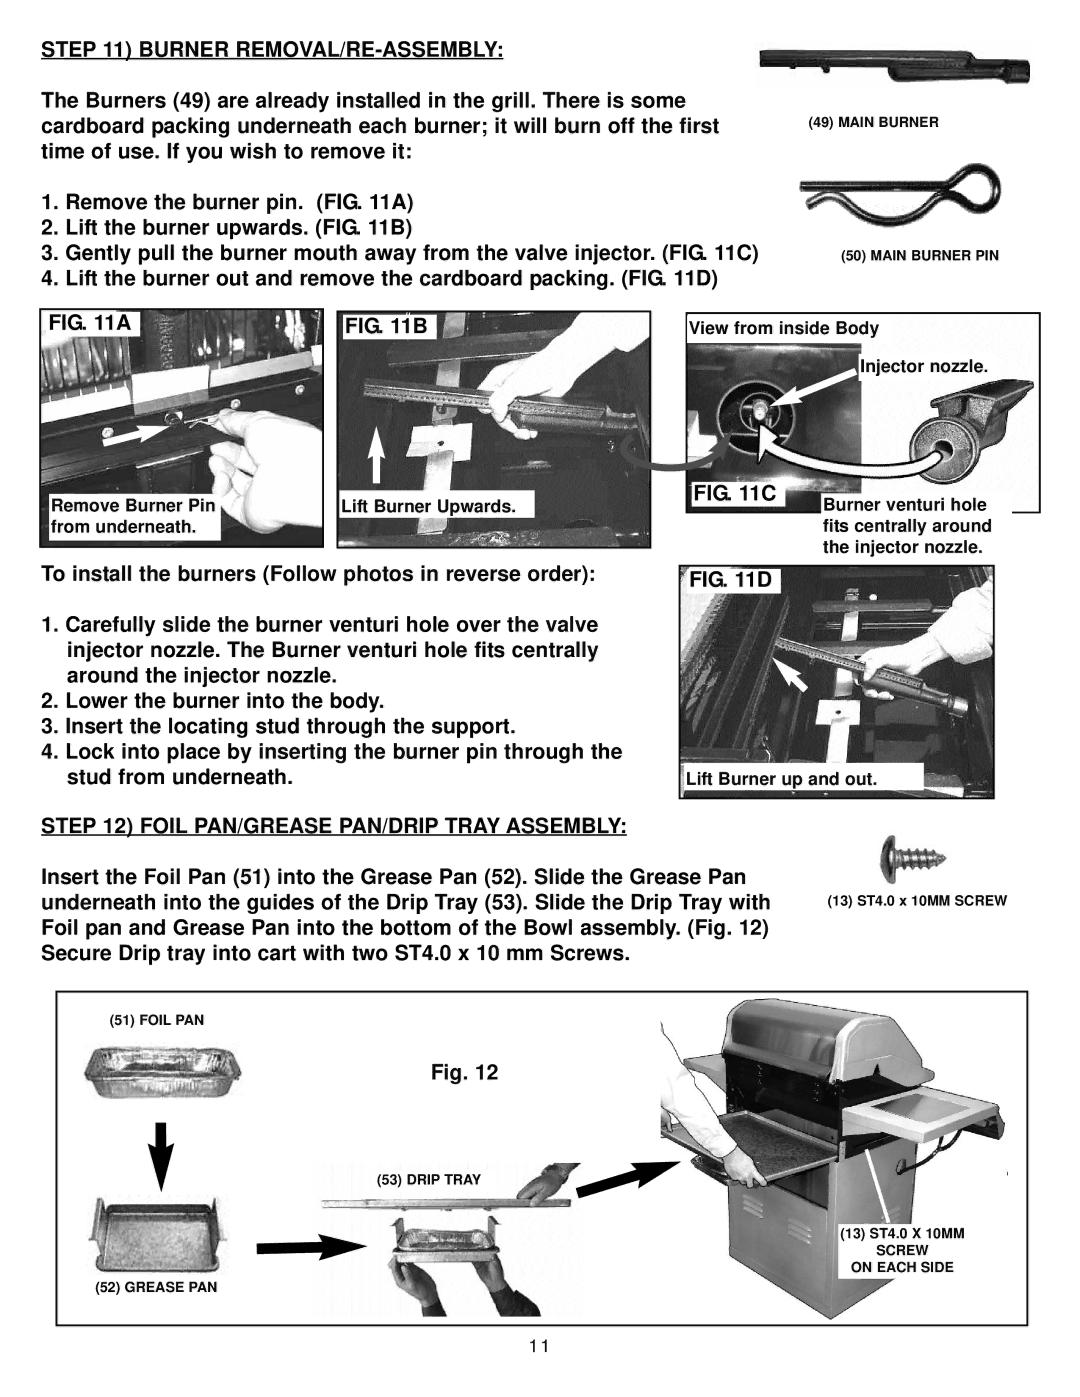
STEP 11) BURNER REMOVAL/RE-ASSEMBLY:
The Burners (49) are already installed in the grill. There is some cardboard packing underneath each burner; it will burn off the first time of use. If you wish to remove it:
1.Remove the burner pin. (FIG. 11A)
2.Lift the burner upwards. (FIG. 11B)
3.Gently pull the burner mouth away from the valve injector. (FIG. 11C)
4.Lift the burner out and remove the cardboard packing. (FIG. 11D)
(49)MAIN BURNER
(50)MAIN BURNER PIN
FIG. 11A
Remove Burner Pin from underneath.
FIG. 11B
Lift Burner Upwards.
View from inside Body
Injector nozzle.
FIG. 11C | Burner venturi hole |
| fits centrally around |
| the injector nozzle. |
To install the burners (Follow photos in reverse order):
1.Carefully slide the burner venturi hole over the valve injector nozzle. The Burner venturi hole fits centrally around the injector nozzle.
2.Lower the burner into the body.
3.Insert the locating stud through the support.
4.Lock into place by inserting the burner pin through the stud from underneath.
FIG. 11D
Lift Burner up and out.
STEP 12) FOIL PAN/GREASE PAN/DRIP TRAY ASSEMBLY:
Insert the Foil Pan (51) into the Grease Pan (52). Slide the Grease Pan underneath into the guides of the Drip Tray (53). Slide the Drip Tray with Foil pan and Grease Pan into the bottom of the Bowl assembly. (Fig. 12) Secure Drip tray into cart with two ST4.0 x 10 mm Screws.
(13) ST4.0 x 10MM SCREW
(51) FOIL PAN
Fig. 12
(53) DRIP TRAY
(13) ST4.0 X 10MM
SCREW
ON EACH SIDE
(52) GREASE PAN
11