SETTING THE MENU (CONTINUED)
PC SETUP (CONTINUED)
Phase
50
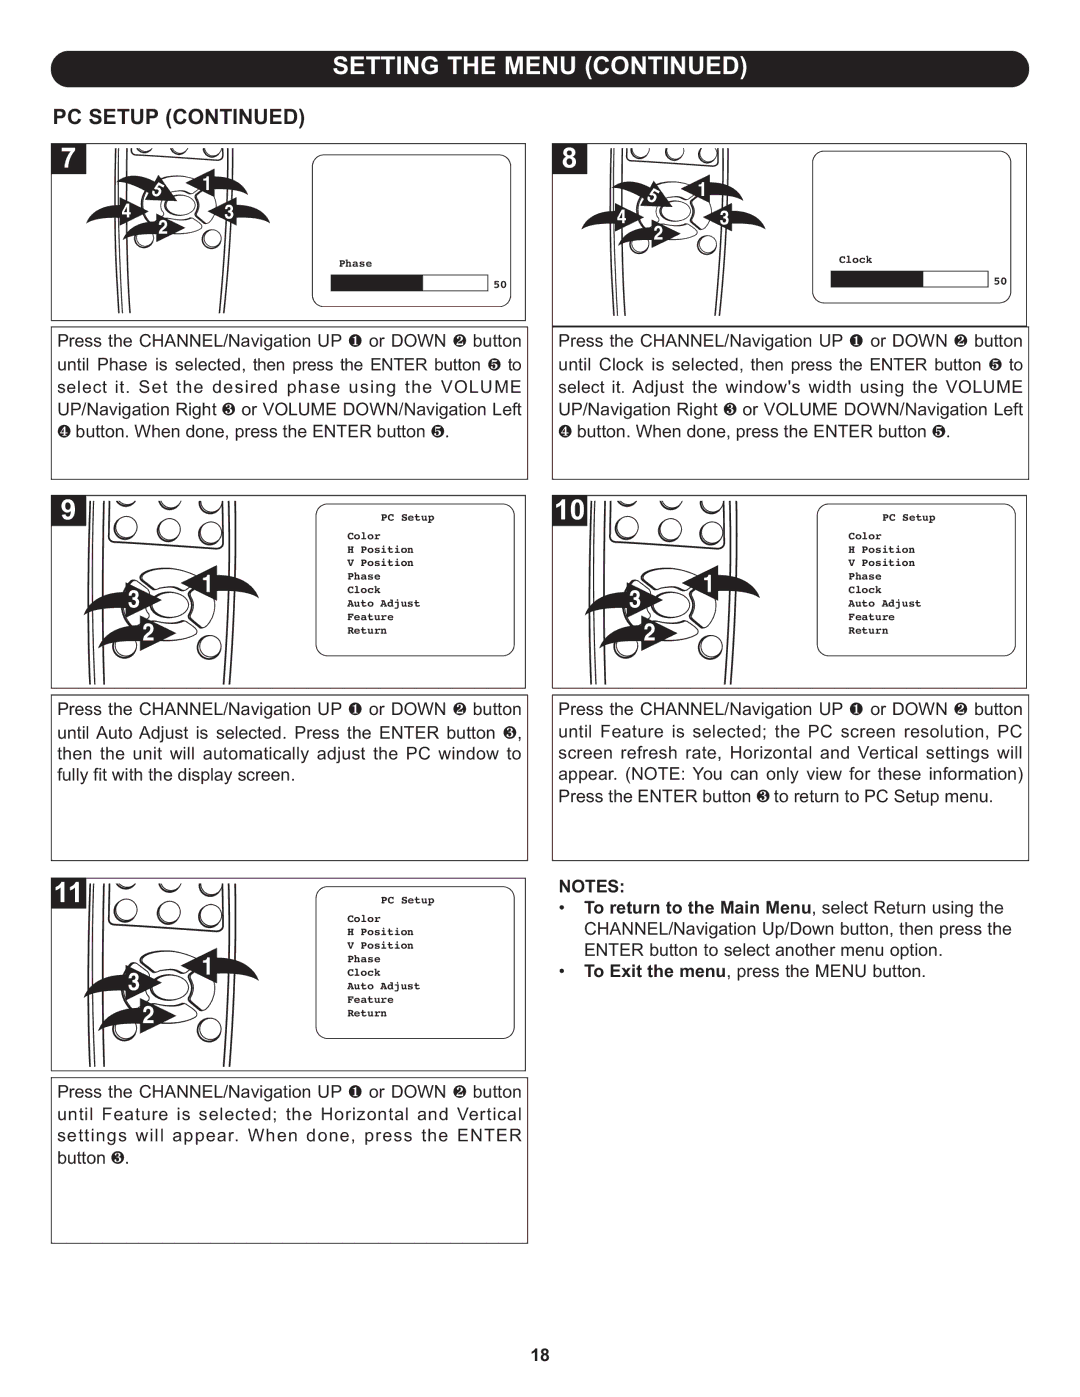
Press the CHANNEL/Navigation UP 1 or DOWN 2 button until Phase is selected, then press the ENTER button 5 to select it. Set the desired phase using the VOLUME UP/Navigation Right 3 or VOLUME DOWN/Navigation Left 4 button. When done, press the ENTER button 5.
Clock
50
Press the CHANNEL/Navigation UP 1 or DOWN 2 button until Clock is selected, then press the ENTER button 5 to select it. Adjust the window's width using the VOLUME UP/Navigation Right 3 or VOLUME DOWN/Navigation Left 4 button. When done, press the ENTER button 5.
ColorPC Setup
H Position
V Position
Phase
Clock
Auto Adjust
Feature
Return
Press the CHANNEL/Navigation UP 1 or DOWN 2 button until Auto Adjust is selected. Press the ENTER button 3, then the unit will automatically adjust the PC window to fully fit with the display screen.
ColorPC Setup
H Position
V Position
Phase
Clock
Auto Adjust
Feature
Return
Press the CHANNEL/Navigation UP 1 or DOWN 2 button until Feature is selected; the Horizontal and Vertical settings will appear. When done, press the ENTER button 3.
ColorPC Setup
H Position
V Position
Phase
Clock
Auto Adjust
Feature
Return
Press the CHANNEL/Navigation UP 1 or DOWN 2 button until Feature is selected; the PC screen resolution, PC screen refresh rate, Horizontal and Vertical settings will appear. (NOTE: You can only view for these information) Press the ENTER button 3 to return to PC Setup menu.
NOTES:
• To return to the Main Menu, select Return using the CHANNEL/Navigation Up/Down button, then press the ENTER button to select another menu option.
• To Exit the menu, press the MENU button.
18
