.A complete Parts List is available at www.MillerWelds.com
6-4. Aligning Drive Rolls and Wire Guide
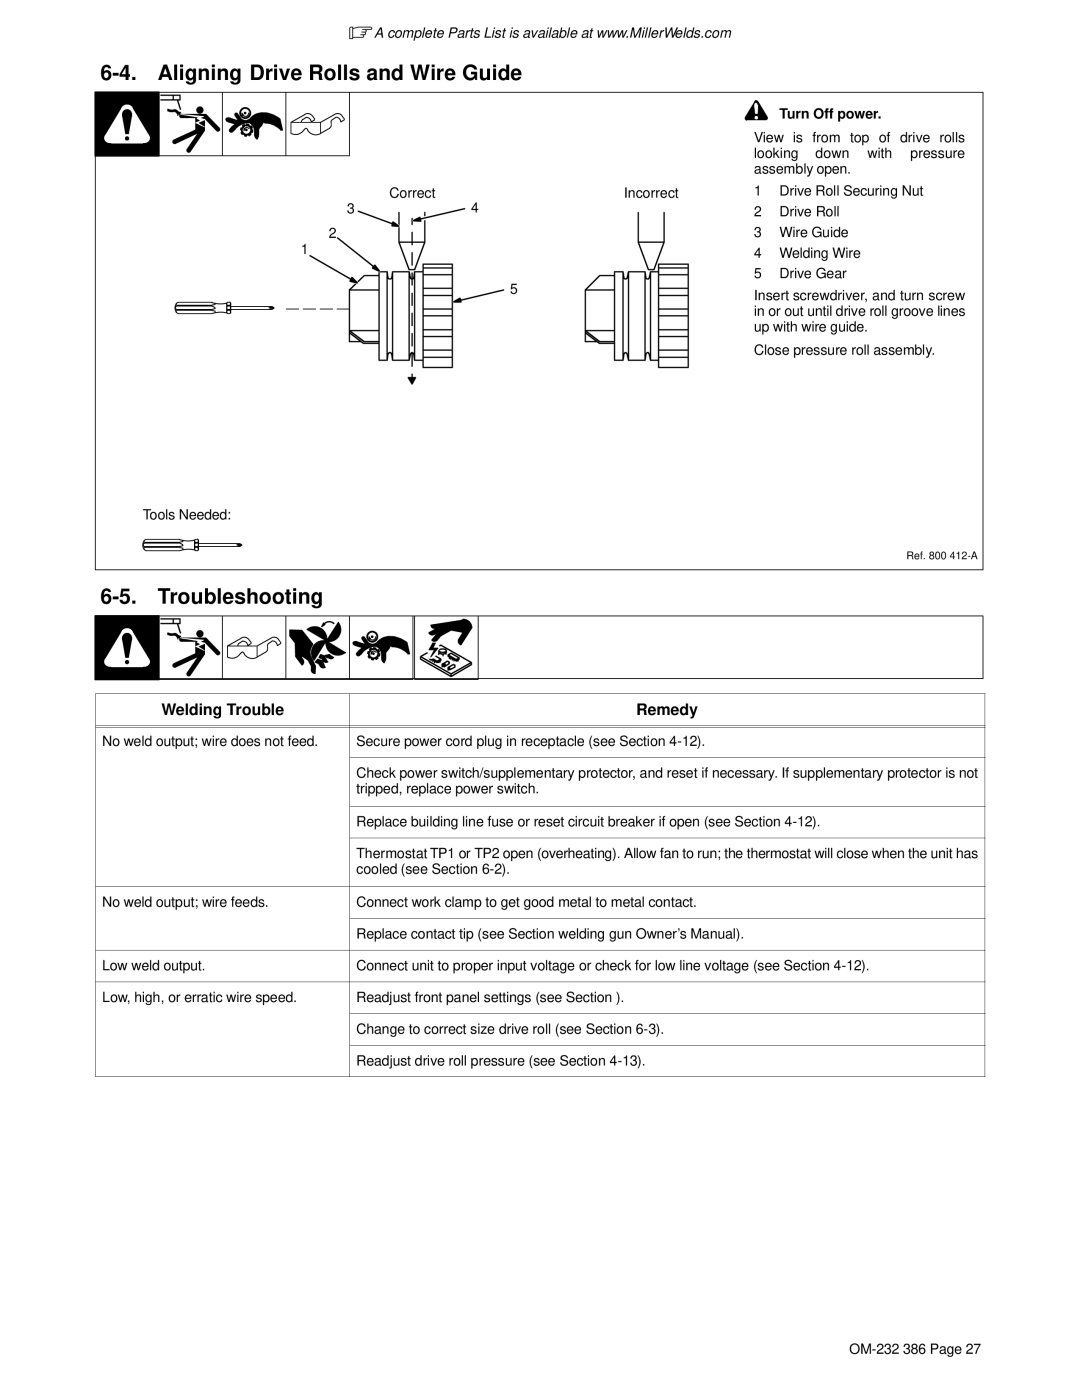
! Turn Off power.
|
|
| View is from top of drive rolls | |
|
|
| looking down with pressure | |
|
|
| assembly open. | |
| Correct | Incorrect | 1 | Drive Roll Securing Nut |
3 | 4 |
| 2 | Drive Roll |
2 |
|
| 3 | Wire Guide |
1 |
|
| 4 | Welding Wire |
|
| 5 | 5 | Drive Gear |
|
| Insert screwdriver, and turn screw | ||
|
|
| ||
in or out until drive roll groove lines up with wire guide.
Close pressure roll assembly.
Tools Needed:
Ref. 800
6-5. Troubleshooting
|
|
|
|
|
|
|
|
|
|
| Welding Trouble |
|
| Remedy |
|
| |||
|
| |||
No weld output; wire does not feed. | Secure power cord plug in receptacle (see Section | |||
|
|
| ||
|
| Check power switch/supplementary protector, and reset if necessary. If supplementary protector is not | ||
|
| tripped, replace power switch. | ||
|
|
| ||
|
| Replace building line fuse or reset circuit breaker if open (see Section | ||
|
|
| ||
|
| Thermostat TP1 or TP2 open (overheating). Allow fan to run; the thermostat will close when the unit has | ||
|
| cooled (see Section | ||
|
| |||
No weld output; wire feeds. | Connect work clamp to get good metal to metal contact. | |||
|
|
| ||
|
| Replace contact tip (see Section welding gun Owner’s Manual). | ||
|
| |||
Low weld output. | Connect unit to proper input voltage or check for low line voltage (see Section | |||
|
| |||
Low, high, or erratic wire speed. | Readjust front panel settings (see Section ). | |||
|
|
| ||
|
| Change to correct size drive roll (see Section | ||
|
|
| ||
|
| Readjust drive roll pressure (see Section | ||
|
|
|
|
|