82Chapter 7. Using IEEE 1394 Devices
Recording to IEEE 1394 Recordable Devices
You can use the TV to control recording to IEEE 1394 devices. While recording, you can view a program on a different input or power off the TV. The following table lets you see what signals can be recorded to an IEEE 1394 digital VCR or A/V disc.
Recording | Signal Type | TV Input | |
Availability | |||
|
|
| |
Can be | Digital channels, | ANT 1, ANT 2 | |
recorded | including |
| |
| tion channels |
| |
|
|
| |
| Digital signals, includ- | IEEE 1394 devices | |
| ing |
| |
| signals |
| |
|
|
| |
Cannot be | Analog channels | ANT 1, ANT 2 | |
recorded |
|
| |
Analog signals | INPUT | ||
| |||
|
| COMPONENT 1 | |
|
| and 2 | |
|
|
| |
| Digital signals | HDMI 1 and 2, | |
|
| ||
|
|
|
Summary of signal inputs and recording to an IEEE 1394 digital VCR or A/V disc.
There are two ways to record digital content to an IEEE
1394 recordable A/V disc or DVCR:
•From the TV’s Recording Setup menu
•From the TV’s ChannelView™ channel guide
Immediate Recording from the Recording Setup Menu
Recording Now from the Menu
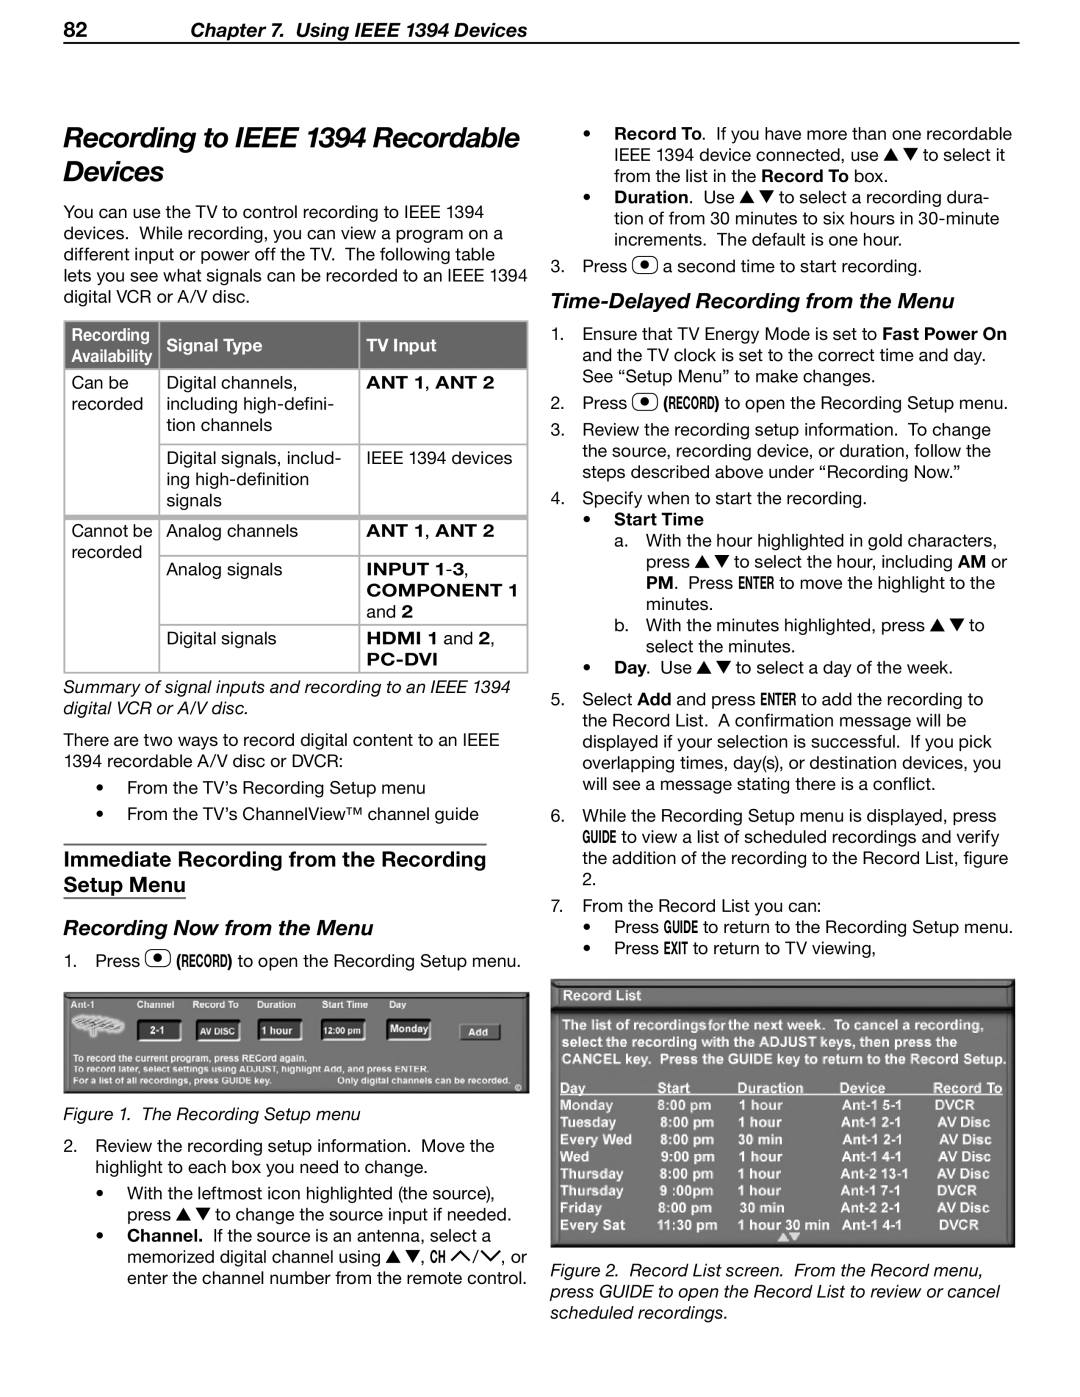
1.Press ![]() (Record) to open the Recording Setup menu.
(Record) to open the Recording Setup menu.
Figure 1. The Recording Setup menu
2.Review the recording setup information. Move the highlight to each box you need to change.
•With the leftmost icon highlighted (the source),
press ![]()
![]() to change the source input if needed.
to change the source input if needed.
•Channel. If the source is an antenna, select a
memorized digital channel using ![]()
![]() , CH
, CH ![]() /
/![]() , or enter the channel number from the remote control.
, or enter the channel number from the remote control.
•Record To. If you have more than one recordable
IEEE 1394 device connected, use ![]()
![]() to select it from the list in the Record To box.
to select it from the list in the Record To box.
•Duration. Use ![]()
![]() to select a recording dura- tion of from 30 minutes to six hours in
to select a recording dura- tion of from 30 minutes to six hours in
3.Press ![]() a second time to start recording.
a second time to start recording.
Time-Delayed Recording from the Menu
1.Ensure that TV Energy Mode is set to Fast Power On and the TV clock is set to the correct time and day. See “Setup Menu” to make changes.
2.Press ![]() (Record) to open the Recording Setup menu.
(Record) to open the Recording Setup menu.
3.Review the recording setup information. To change the source, recording device, or duration, follow the steps described above under “Recording Now.”
4.Specify when to start the recording.
•Start Time
a.With the hour highlighted in gold characters,
press ![]()
![]() to select the hour, including AM or PM. Press ENTER to move the highlight to the minutes.
to select the hour, including AM or PM. Press ENTER to move the highlight to the minutes.
b.With the minutes highlighted, press ![]()
![]() to select the minutes.
to select the minutes.
•Day. Use ![]()
![]() to select a day of the week.
to select a day of the week.
5.Select Add and press ENTER to add the recording to the Record List. A confirmation message will be displayed if your selection is successful. If you pick overlapping times, day(s), or destination devices, you will see a message stating there is a conflict.
6.While the Recording Setup menu is displayed, press GUIDE to view a list of scheduled recordings and verify the addition of the recording to the Record List, figure
2.
7.From the Record List you can:
•Press GUIDE to return to the Recording Setup menu.
•Press EXIT to return to TV viewing,