Basic manual recording

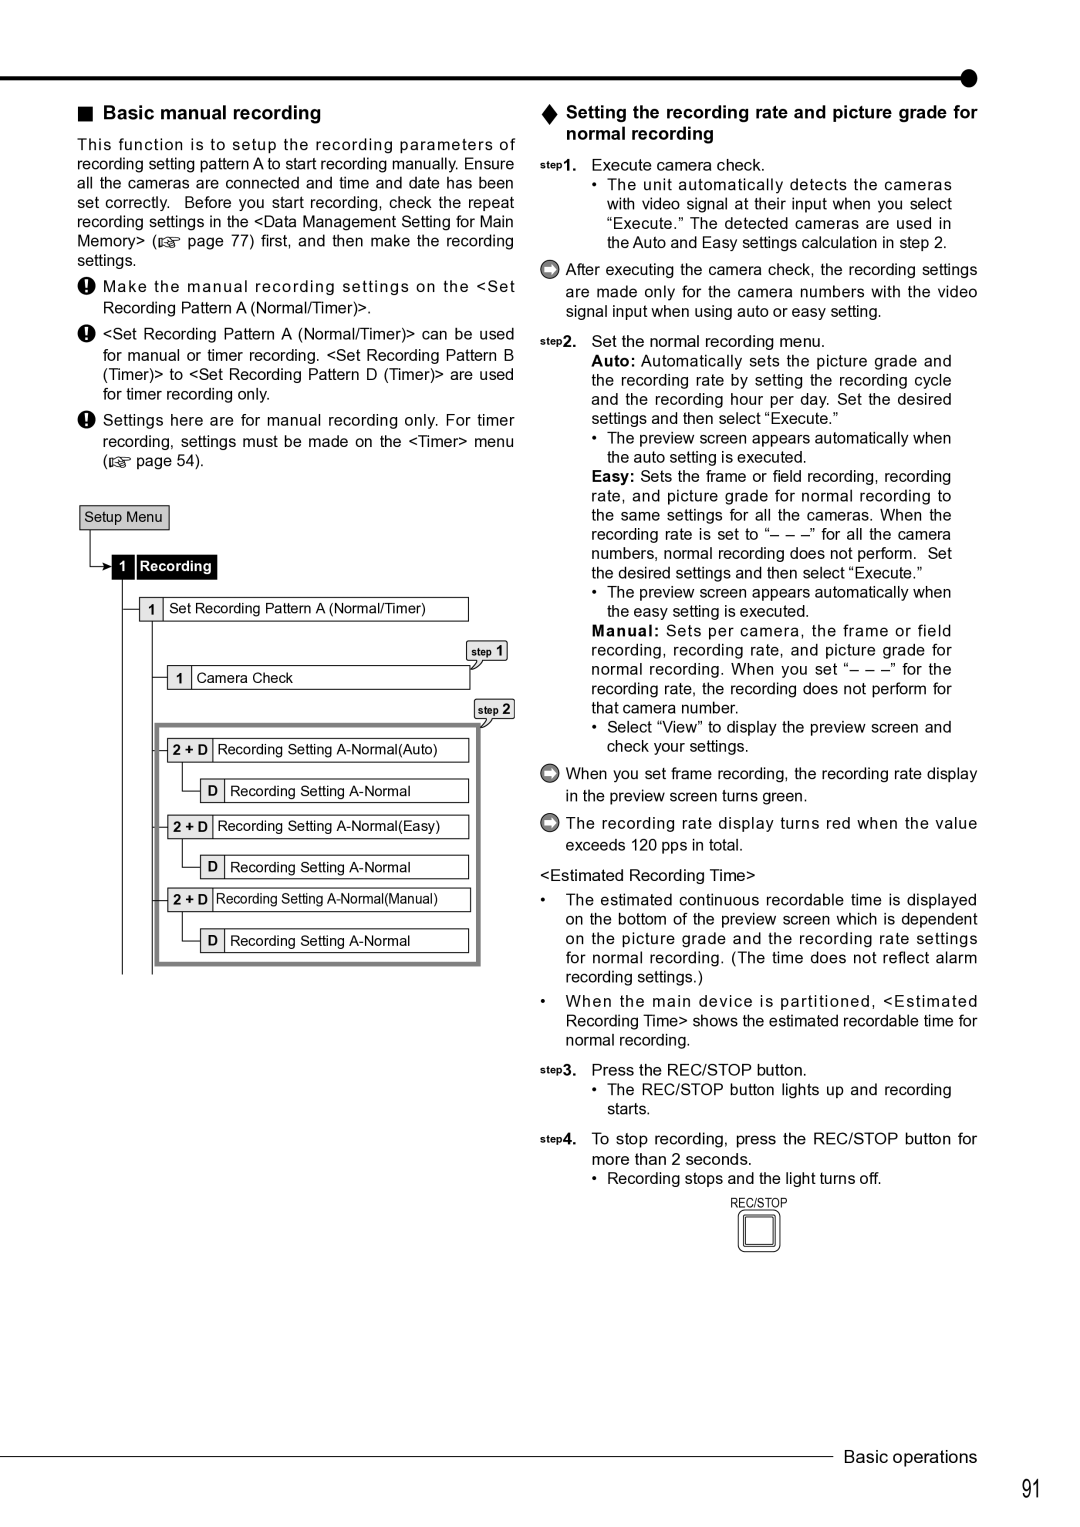
This function is to setup the recording parameters of recording setting pattern A to start recording manually. Ensure all the cameras are connected and time and date has been set correctly. Before you start recording, check the repeat recording settings in the <Data Management Setting for Main Memory> ( page 77) first, and then make the recording settings.

Make the manual recording settings on the <Set Recording Pattern A (Normal/Timer)>.

<Set Recording Pattern A (Normal/Timer)> can be used for manual or timer recording. <Set Recording Pattern B (Timer)> to <Set Recording Pattern D (Timer)> are used for timer recording only.

Settings here are for manual recording only. For timer recording, settings must be made on the <Timer> menu ( page 54).

Setup Menu

1 Recording

1Set Recording Pattern A (Normal/Timer)

step 1

1Camera Check

step 2

2 + D Recording Setting A-Normal(Auto)

D Recording Setting A-Normal

2 + D Recording Setting A-Normal(Easy)

D Recording Setting A-Normal

2 + D Recording Setting A-Normal(Manual)

D Recording Setting A-Normal

Setting the recording rate and picture grade for normal recording

step1. Execute camera check.

The unit automatically detects the cameras with video signal at their input when you select “Execute.” The detected cameras are used in the Auto and Easy settings calculation in step 2.

After executing the camera check, the recording settings

are made only for the camera numbers with the video signal input when using auto or easy setting.

step2. Set the normal recording menu.

Auto: Automatically sets the picture grade and the recording rate by setting the recording cycle and the recording hour per day. Set the desired settings and then select “Execute.”

The preview screen appears automatically when the auto setting is executed.

Easy: Sets the frame or field recording, recording rate, and picture grade for normal recording to the same settings for all the cameras. When the recording rate is set to “– – –” for all the camera numbers, normal recording does not perform. Set the desired settings and then select “Execute.”

• The preview screen appears automatically when the easy setting is executed.

Manual: Sets per camera, the frame or field recording, recording rate, and picture grade for normal recording. When you set “– – –” for the recording rate, the recording does not perform for that camera number.

Select “View” to display the preview screen and check your settings.

When you set frame recording, the recording rate display in the preview screen turns green.

The recording rate display turns red when the value exceeds 120 pps in total.

<Estimated Recording Time>

The estimated continuous recordable time is displayed on the bottom of the preview screen which is dependent on the picture grade and the recording rate settings for normal recording. (The time does not reflect alarm recording settings.)

When the main device is partitioned, <Estimated Recording Time> shows the estimated recordable time for normal recording.

step3. Press the REC/STOP button.

The REC/STOP button lights up and recording starts.

step4. To stop recording, press the REC/STOP button for more than 2 seconds.

• Recording stops and the light turns off.

REC/STOP

Basic operations

91

Page 94
Image 94
Mitsubishi Electronics DX-TL4516U instruction manual Basic manual recording, Execute camera check

DX-TL4516U specifications

The Mitsubishi Electronics DX-TL4516U is a cutting-edge digital video recorder (DVR) designed for security and surveillance applications. This advanced DVR excels in providing reliable video management along with comprehensive features suitable for various environments, from small businesses to larger enterprise settings.

At the heart of the DX-TL4516U is its ability to support 16-channel recording, which allows users to monitor multiple points simultaneously. The device accommodates both analog and IP cameras, making it a versatile choice for users looking to upgrade their existing systems or implement a new setup. The hybrid functionality ensures that users can maximize their investment in existing camera infrastructure while seamlessly integrating new technology.

One of the standout features of the DX-TL4516U is its high-resolution recording capability. The DVR supports video recordings at 4CIF resolution, providing clear and detailed images for critical monitoring. This clarity ensures that surveillance footage can be used effectively for identification and analysis, which is crucial in security applications.

Another key technology included in the DX-TL4516U is its built-in storage management system. With a capacity of up to 8TB through an internal hard drive, users benefit from extended recording times without needing frequent data management. The DVR's intelligent overwrite functionality automatically recycles older footage, ensuring that critical newer recordings remain accessible.

The user interface of the DX-TL4516U is designed for ease of use, featuring an intuitive menu system that simplifies navigation through settings and playback options. Remote access capabilities are also integrated, allowing users to view live feeds or recorded footage from virtually anywhere using a compatible device connected to the internet.

Multiple backup options, including USB and network protocols, provide robust data protection measures. The DX-TL4516U efficiently supports remote backup and data transfer, which is essential for businesses that require stringent data security protocols.

In terms of networking features, the device includes support for dynamic IP addresses and can be integrated into various network environments, enhancing its adaptability to different user needs and settings.

Overall, the Mitsubishi Electronics DX-TL4516U emerges as a formidable player in the DVR market, offering an exceptional blend of performance, reliability, and user-friendly features. Its robust architecture and cutting-edge technologies make it an ideal solution for effective surveillance management across diverse applications.